
Today, we have many IDEs that convert the routine task of writing thousands of lines of code into a meaningful process. IDEs are a smart productive tool to increase the efficiency of the developer. Moreover, they are a combination of editor, compiler and debugger, intelligent enough to identify and auto-complete syntax and typical keywords. Hence, Code::Block also leverages software development with a smart IDE. It is an open source, free programing environment especially designed for C, C++, and FORTRAN. The first stable version of of Code::Blocks was version 8.02 in 2008. It supports a variety compilers, including Microsoft C++, Borland, Intel C++, and GCC. However, Code::Block is also available on Linux and the MAC platform, but this article especially deals with Code::Block for the Windows platform.
Installation
As said earlier, Code::Block is an open source programming environment. Hence, it has binaries for Windows, Linux and Mac platforms that can be downloaded freely from its official website www.code::block.org without paying a single penny. Identifying the correct package is the first essential task because there are distinct packages available, leveraging dispersed features for both Windows and Linux platforms.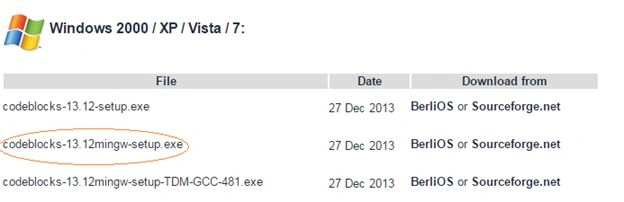
Figure 1: Choosing installation package
Once we have downloaded the correct package, its installation is quite easy on Windows as is typical for other software. Finally, the Code::Block development environment window will look such as: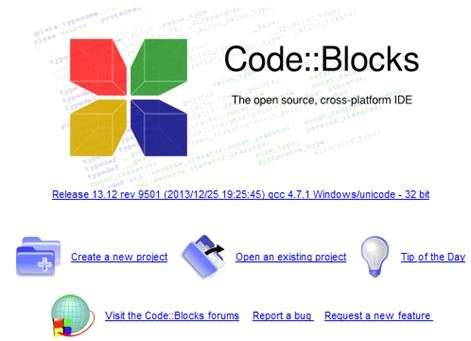
Figure 2: Code::Block IDE's First view
Code::Block in Action
After doing the installation and subsidiary configuration, it's time to proceed with the coding. You will observe that a screen appears right after imitating this software like in Figure 1 that enables the developer to create a new project and other things.
To start a new project click "Create New Project" on the screen. Here, you will get a huge list of predefined project templates as in Figure 3. For this article, we will proceed with the “Console Application” that allows you to write a console program. 
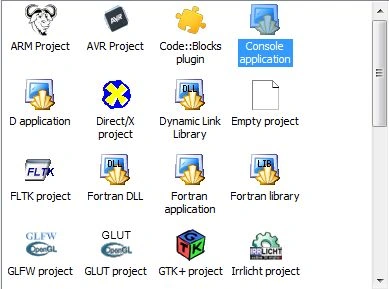
Figure 3: Step-1
The other applications are for developing more advanced types of applications. After selecting Console application, click on the Go button to begin using the Console Application Wizard. Henceforth, the wizard will ask to choose the programming language between C and C++ for coding such as shown in the following Figure 4.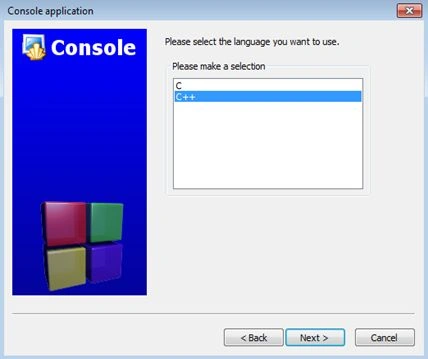
Figure 4: Step-2
Later, it prompts to specify the project name along with its directory location to store and select the default compiler as GNU that the IDE detects automatically as in screenshot 5 and 6 respectively. 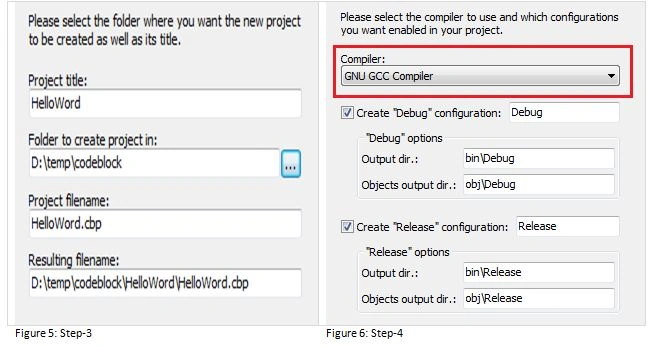
Since we have choose C++ as the programming code language, there is a file called main.cpp with default “Hello Word!” code automatically generated in the solution as shown in Figure 7. Here after we can debug and compile this code with the F9 key. After compilation, if there is any error in the arbitrary code, the IDE will reflect a visual indication like in other IDEs.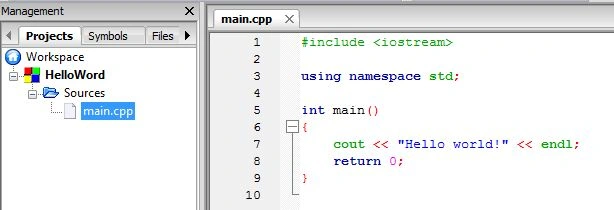
Figure 7: main.cpp file default code
Since that is generated automatically, the following code sample is therefore providing a real experience in C++ coding with the Code Block IDE in which we are calculating a Fahrenheit value from Centigrade as in the following.

CODE : : BLOCK, An Open Source IDE For C/C++ Programming
Join the conversation! Your thoughts help the community grow.
Sign in to leave a comment
It is the same account you read, post and publish with — and you will come straight back to this page.

Guest UserPosted Jan 6, 2015, 9:01 AM
Ajay Yadav you post stuff which is unique & interesting . I like all of your posts!!