ASP.NET is an exciting server side technology used for developing web based applications. It uses the namespaces, classes and methods provided by the .NET Framework. ASP.NET 2.0 is the popular framework and latest among developers. Nowadays, developers are working to convert existing ASP.NET 1.1 applications to 2.0 to take advantage of its rich features. ASP.NET 2.0 has simplified the work of developers by providing many new controls. You can perform all tasks using Wizards. There is no need to write long lines of code even for database access.
In this article, you will learn how to develop ASP.NET 2.0 applications with C# programming language.
Basic Requirements
You need a computer with a minimum of 512 MB of RAM to properly develop and execute ASP.NET applications. Firstly, you should install .NET Framework SDK 2.0. The SDK can be downloaded from the website of Microsoft.
Visual Studio 2005 is not compulsorily required for developing ASP.NET applications. You can make use of Notepad as an editor for entering source codes. Visual Studio 2005 will greatly simplify the development task as you can drag and drop controls from the Toolbox. It also comes with Intellisense which will help you to complete the code. I will show you how to make use of both these editors for developing ASP.NET applications.
You can also use Visual Web Developer Express which is available for download free of cost. Microsoft had recently announced that Express versions will be always free. It is a light weight editor and its interface looks like Visual Studio 2005.
I assume that you have installed .NET Framework 2.0 on your system. Notepad comes with the Windows operating system so there is no need to install it separately. Let us examine how to write a simple ASP.NET program with Notepad as the editor.
Fire up Notepad, enter the following code and save the file as Welcome.aspx. This file is called as a WebForm. Each and every ASP.NET page is termed as a WebForm.
<%
@ Page Language="C#" %>
<script runat="server">
void Button1_Click(object sender, EventArgs e) {
TextBox1.Text = "Welcome to ASP.NET";
}
</script>
<html>
<head>
</head>
<body>
<form id="Form1" runat="server">
<p>
<asp:TextBox id="TextBox1" runat="server"></asp:TextBox>
</p>
<p>
<asp:Button id="Button1" onclick="Button1_Click" runat="server" Text="OK"></asp:Button>
</p>
</form>
</body>
</html>
Enter the URL http://localhost/Welcome.aspx to execute the above program.
A server with the specific port will be started if you use Visual C # 2005 Express for executing the above program. You can locate the server on the TaskBar.
In the above code, we have placed a textbox control and a button control. When the user clicks the button the text "Welcome to ASP.NET" will be displayed on the Textbox.
Let us now examine the code in a much deeper way
<
asp:Button id="Button2" onclick="Button1_Click" runat="server" Text="OK"></asp:Button>
All .NET Server controls should be coded in the format of <asp:CONTROLNAME></asp:CONTROLNAME>. The runat attribute is important as it signifies that the control is a server side one. The onclick attribute is an event handler. Its value is given as Button1_Click. This is because the event is fired when the button is clicked.
All server side tags are enclosed within <form></form> tag. The code for handling the event is to be given inside <script></script> tag as shown in the above example.
You can comment the code using the following format
// code goes here
/* code here
Code here
*/
Let us now examine the usage of some of the other WebForm controls.
Label
It is the simplest of all controls and is required for almost all applications you develop. It will show what you should enter inside the text box or what to pick from the drop down box. Its usage is given below
<
asp:label id = "lblAge" runat = "server"></asp:label>
The attribute id denotes the name for a specific control. This is of not much importance for the Label control but it is required for other controls such as Buttons, DropDownList as you will make use of the relevant controls during the coding phase.
TextBox
This control is mainly used to accept text from the end user. You have the option to set three different modes such as SingleLine, MultiLine and Password. Let us examine each of these modes with sample code
SingleLine mode
<
asp:TextBox id="TextBox2" runat="server">This is TextBox</asp:TextBox>
MultiLine mode
<
asp:TextBox id="TextBox2" runat="server" TextMode="MultiLine">This is the multiline textbox</asp:TextBox>
Password mode
<
asp:TextBox id="TextBox3" runat="server" TextMode="Password"></asp:TextBox>
CheckBox
This control is used to select one or more options by putting a checkmark near the word.
<asp:CheckBox id="CheckBox1" runat="server" Text="Visual C# .NET" Checked="True"></asp:CheckBox>
<asp:CheckBox id="CheckBox2" runat="server" Text="Visual Basic .NET"></asp:CheckBox>
If you set Checked property to True as shown in the above code then that checkbox will be automatically selected when you run the ASP.NET page.
RadioButton
This control is used to select only one choice from a list of various entries.
<
asp:RadioButton id="RadioButton1" runat="server" Text="USA" GroupName="Countries"></asp:RadioButton>
<
asp:RadioButton id="RadioButton2" runat="server" Text="UK" GroupName="Countries"></asp:RadioButton>
You should note that GroupName property is important for the proper functioning of RadioButton control. If you fail to set this property then you will be able to select both the options.
DropDownList
DropDownList is one of the popular controls used in each ASP.NET application. Users can pick an option by clicking on the drop down arrow.
<
asp:DropDownList id="DropDownList1" runat="server">
<asp:listitem id= "lstaspdotnet" runat= "server">ASP.NET</asp:listitem>
<asp:listitem id= "lstvbnet" runat= "server">Visual Basic .NET</asp:listitem>
<asp:listitem id= "lstjava" runat= "server">Java</asp:listitem>
<asp:listitem id= "lstperl" runat= "server">PERL</asp:listitem>
</asp:DropDownList>
In the above code, we have given the various options inside the <asp:listitem></asp:listitem> tag. You can add any number of this tag for each item that you wish to include inside the DropDownList. You should note that users can pick only one option using this control.
ListBox
ListBox is an extension to the above mentioned WebForm control. With the help of this control, you can select one or more options by holding the Control key.
<
asp:ListBox id="ListBox1" runat="server" SelectionMode="Multiple">
<asp:ListItem Value="ASP.NET">ASP.NET</asp:ListItem>
<asp:ListItem Value="Visual Basic .NET">Visual Basic.NET</asp:ListItem>
<asp:ListItem Value="Java">Java</asp:ListItem>
<asp:ListItem Value="PERL">PERL</asp:ListItem>
</asp:ListBox>
You should set the value of SelectionMode property to Multiple as shown in the code given above. By default, its value is Single and you can select only one option.
CheckBoxList
CheckBoxList is very similar to that of the ListBox control. It is a group of CheckBoxes arranged in a ListBox.
<
asp:CheckBoxList id="CheckBoxList1" runat="server">
<asp:ListItem Value="ASP.NET">ASP.NET</asp:ListItem>
<asp:ListItem Value="Visual Basic .NET">Visual Basic .NET</asp:ListItem>
<asp:ListItem Value="Java">Java</asp:ListItem>
<asp:ListItem Value="PERL">PERL</asp:ListItem>
</asp:CheckBoxList>
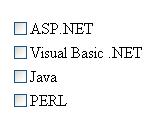
Figure 1
Link Button
This control is similar to that of Button control but it displays the text as a hyperlink.
<
asp:LinkButton id="LinkButton1" onclick="LinkButton1_Click" runat="server">Click here</asp:LinkButton>
In the code above, there is an event handler called onclick. When a user clicks the link button control, necessary action will take place depending upon the code you have given by double clicking the control.
Table
You can create tables using the Table control. This control uses the TableRow and TableCell controls available within the .NET Framework.
<
asp:Table id="Table1" runat="server" GridLines="Both">
<asp:TableRow>
<asp:TableCell Text="Sl No"></asp:TableCell>
<asp:TableCell Text="Name"></asp:TableCell>
</asp:TableRow>
<
asp:TableRow>
<asp:TableCell Text="1"></asp:TableCell>
<asp:TableCell Text="Rob"></asp:TableCell>
</asp:TableRow>
<
asp:TableRow>
<asp:TableCell Text="2"></asp:TableCell>
<asp:TableCell Text="Mark"></asp:TableCell>
</asp:TableRow>
</
asp:Table>
The above code may look complicated but you will find it easier to use it after a little practice. The GridLines property takes four different values such as None, Horizontal, Vertical and Both. The value Both denotes a combination of Horizontal and Vertical lines.

Figure 2
Calendar
With the help of the Calendar control, you can navigate through months and dates and select them. The selected entry can then be displayed on a Label control as shown in the code given below
<
asp:Calendar id="Calendar1" runat="server" ShowGridLines="True"></asp:Calendar><br>
<asp:Label id="lblShow" runat="server" ForeColor="Red">Label</asp:Label
lblShow.Text = Calendar1.SelectedDate.ToString();
The final output of the above code will be as shown in the Figure 3.
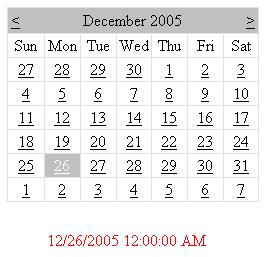
Figure 3
Calendar control comes with lot of properties which you can use to display the control in various formats. For instance, in the above example, I have applied GridLines property and set its value to True to display horizontal and vertical lines across the control.
The .NET Framework 2.0 ships with lot of WebForm controls which can be used for various purposes. We will discuss about some of them in the next part of this series.
I would suggest you to refer to the MSDN documentation for more information regarding various WebForm controls. If you have installed the documentation along with Visual Studio 2005 then you can directly access the help system from the Integrate Development Environment (IDE).
GridView
This is one of the most popular controls used by majority of developers for database operations. You can edit, delete records using GridView.
DetailsView
This control is used to display one record from a database at a time. You can also insert records using DetailsView.
FormView
With GridView, you can display all the records from a database. But with the help of FormView control, you can show only one record at a time but you have the ability to insert new records.
The main difference between DetailsView and FormView controls is that FormView has more options. You can have control over how to display data, modify headers and footers and much more. I will examine the working of each one of these controls in a later part of this article.
Summary
In this article, you have learned about the fundamentals of ASP.NET including some of its controls with the help of examples. In the next part, I will examine about the naming conventions which has to be followed and Validation controls.