

Introduction
A Drawable Resource is a general concept of drawing to the screen for a graphic, you can use Android predefined graphics and retrieve them with APIs or create custom XML drawable. There are several different types of drawable:
- Bitmap File: For bitmap graphic file.
- Nine-Patch File: For PNG file with stretchable regions.
- Layer List: For drawn in array order, creates a LayerDrawable.
- State List: Use XML file for various bitmap graphics.
- Level List: An XML file that defines a drawable that manages a number of alternate Drawables.
- Transition Drawable: Use to cross-fade between two drawable resources.
- Inset Drawable: Drawable that insets another drawable by a specified distance.
- Clip Drawable: This creates a ClipDrawable.
- Scale Drawable: This creates a ScaleDrawable
- Shape Drawable: This creates a ShapeDrawable.
Here I am explain the first two types of Drawable resources, Bitmap File and Nine-Patch File.
Bitmap File
This drawable resource simply wraps a bitmap file. Further in this, you can reference a bitmap file directly, using the filename as the resource ID that can support three types of bitmap files: PNG (.png), JPEG (.jpg) and GIF (.gif) files, or create an alias resource ID in XML where an XML bitmap is defined that points to a bitmap file.
Pass the reference of the resources:
- In Java: R.drawable.filename
- In XML: @[package:]drawable/filename
While creating an alias resource ID in XML you can set any of the following attributes:
- xmlns:android: String. Defines the XML namespace, which must be "http://schemas.android.com/apk/res/android". It is not needed when the is nested inside an <item>.
- android:src: Drawable resource. Required. Reference to a drawable resource.
- android:antialias: Boolean. Enables or disables antialiasing.
- android:dither: Boolean. Enables or disables dithering of the bitmap if the bitmap does not have the same pixel configuration as the screen
- android:filter: Boolean. Enables or disables bitmap filtering.
- android:gravity: Keyword. Defines the gravity for the bitmap.
Let's take an example of both types of Bitmap Files.
Example1: To reference a bitmap file directly.
Step 1: Create a simple Android application and run it to see the default output of an Android application.
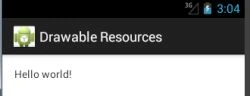
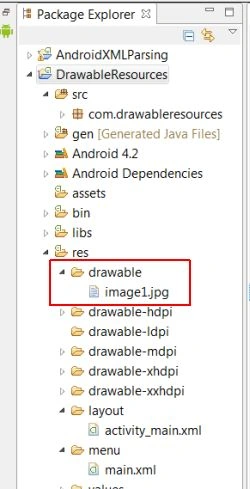
Step 2: Create a new folder in the resources folder and import one image (more if you want to) in it.
Step 3: Create a new ImageView in activity_main.xml file and give the resource a reference in the android:src Attribute
- <ImageView
- android:id="@+id/ImageView1"
- android:layout_height="50dp"
- android:layout_width="50dp"
- android:scaleType="fitXY"
- android:src="@drawable/image1"
- />
Step 4: Now run the application and see the output
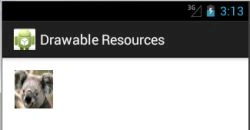
Example2: Creates an alias resource ID in XML.
Step 1: Create a new XML file in the drawable folder then create and define a bitmap and its required attributes.
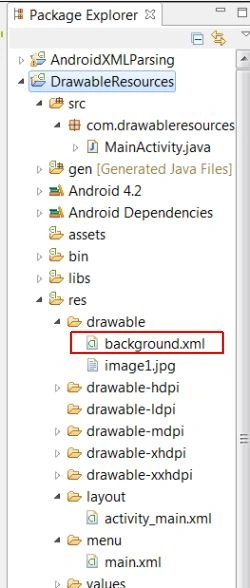
- <?xml version="1.0" encoding="utf-8"?>
- <bitmap xmlns:android="http://schemas.android.com/apk/res/android"
- android:src="@drawable/image1"/>
Step 2: Now go to the activity_main.xml file and chnage the android:src Attribute value to the XML file name
- <ImageView
- android:id="@+id/ImageView1"
- android:layout_height="50dp"
- android:layout_width="50dp"
- android:scaleType="fitXY"
- android:src="@drawable/backround"
- />
Step 3: Now run the application and see the output. The output is the same as above but the way of using the Bitmap Drawable Resources is different.
Nine-Patch File
NinePatch resources are simply another kind of Drawable subclass called NinePatchDrawable. Most of the time, you'll need only the resource ID of the image, to be set as an attribute of the view or layout. Here you can define stretchable regions that Android scales when content within the view exceeds the normal image bounds. Generally, the center patch is transparent or solid, with parts of the edges set to remain fixed, other edge parts set to stretch, and the corners set to remain fixed.
In the same way, as with a bitmap, you can reference a Nine-Patch file directly or from a resource defined by XML.
Example
Step 1: Import a .png image in the drawable folder
Step 2: Create a new button in the activity_main.xml file and provide the resource reference in the android:background Attribute
- <Button android:id="@+id/Button02"
- android:layout_width="wrap_content"
- android:layout_height="wrap_content"
- android:background="@drawable/buttonimage"
- android:textColor="#ffcc00" android:padding="30dp"
- android:text="CLICK HERE"
- android:layout_gravity="center"></Button>
Step 3: Now run the application and see the output
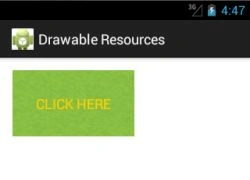
If you need to act on the resource programmatically, first you need to import the following namespace:
- import android.graphics.drawable.NinePatchDrawable;
Then call it by the following code:
- NinePatchDrawable myNinePatchDrawable = (NinePatchDrawable) getResources().getDrawable(R.drawable.[xml resource file]);
Thank you, that's all. I hope you get some idea of Bitmap and Nine-Patch Drawable Resources through this brief article.
Join the conversation! Your thoughts help the community grow.