

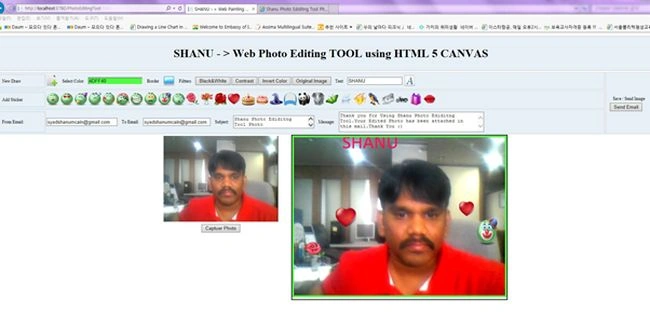
In my previous article “Web Painting Tool Using HTML 5 CANVAS in ASP.NET" I explained how to create a simple Web Painting tool using HTML5 and jQuery. This article explains how to create a simple web-based photo editing tool using HTML5, jQuery and ASP.NET.
This article shows the details of how to do the following.
- Capture an image from a web camera (I used Webcam JS, you can download the script file from this link).
Webcam JS is a JavaScript library for capturing images from a web camera and saving them as JPEG/PNG or any data URI format.
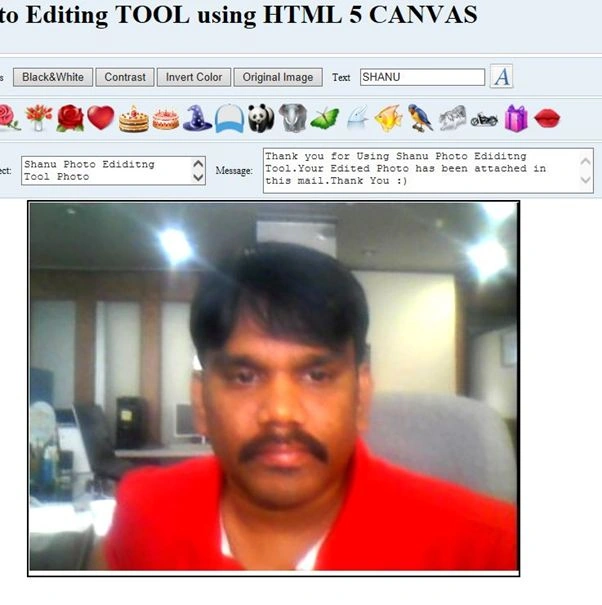
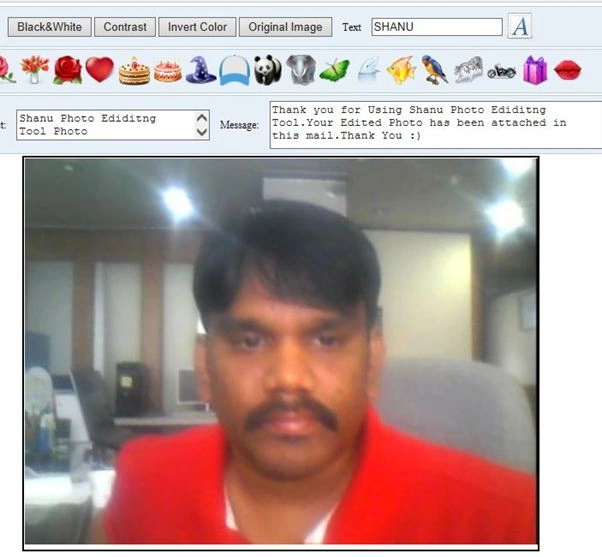
I used this library to capture images from the web camera and display the captured image in the HTML 5 canvas for editing the photo, adding a smiley, text and send the final edited image by email.
- Add Sticker: Add stickers, for example lSmiley's, flowers, and so on to our captured photo.
- Add Border: Add a border to the captured photo.
- Add Text: Add text to the captured photo.
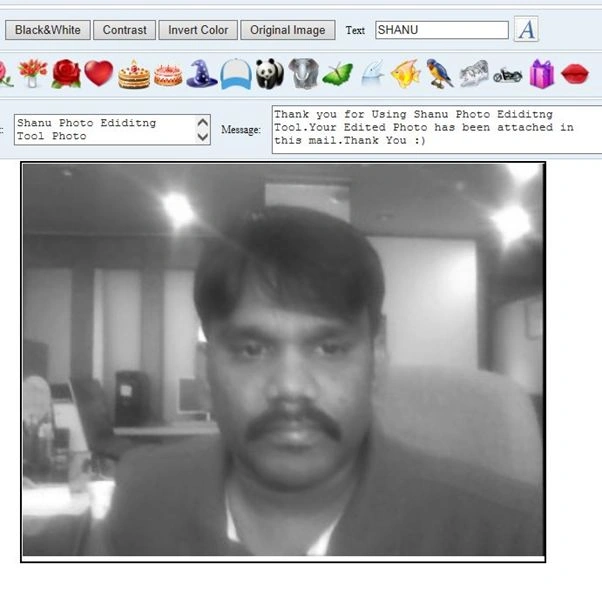
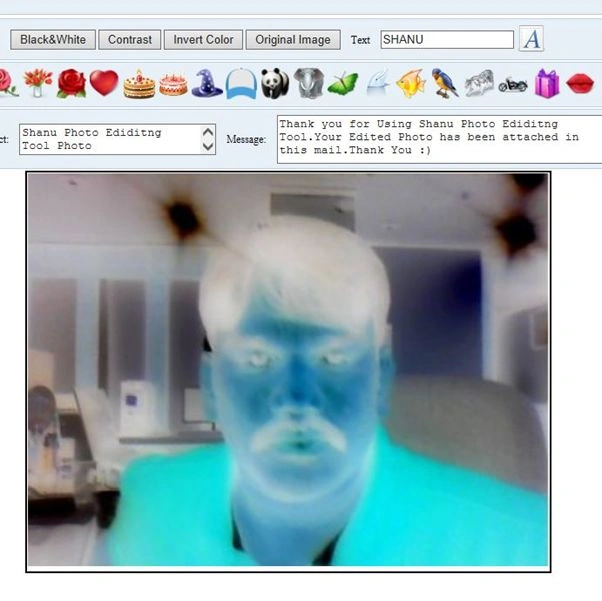
- Add Filters: Add filters to the captured photo, such as adding contrast, changing it to a Black & White photo, invert the color of the photo or convert to an original captured photo.
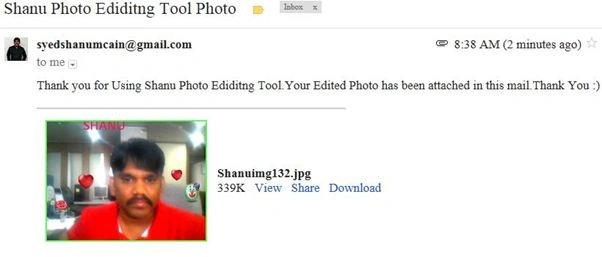
- Save and Send to Email: The final edited photo can be saved to the application root folder and you can send the edited photo to an Email address.
7. Post Canvas Photo to Facebook. The Final Edited photo can be posted to Facebook.
Prerequisites
Visual Studio 2013 or Visual Studio 2010.
In the source code Zip file you can find both Visual Studio 2010 and Visual Studio 2013 Solutions. You can use any solution depending on your Visual Studio version.
WEB Camera (to capture your photo to edit and send to email).
Using the code
The main purpose is to make the program very simple and easy to use. All the functions have been well commented in the project. I have attached my sample program to this article for more details. Here we will see the procedure to create a photo editing tool using a HTML5 canvas.
HTML5: HTML5 is the new version of HTML. HTML5 has cross-platform support. That means that HTML5 can work in a PC, Tablet and a Smartphone. HTML5 should be started with a DOCTYPE, for example:
- <!DOCTYPE html> <html> <body></body> </html>
Som of the new features in HTML5 are CANVAS, AUDIO, VIDEO and so on.
CANVAS
CANVAS is the element for 2D drawings using JavaScript. The Canvas has methods such as drawing paths, rectangles, arcs, text and so on.
The Canvas element looks as in the following.
- <canvas id="canvas" width="400" height="400"></canvas>
Reference for HTML5 canvas.
The Canvas is nothing but a container for creating graphics. To create 2D graphics we need to use JavaScript. We will see the details here in the code.
Step 1
Add References: Add an entire JavaScript library to your project to use the webcam capture. For webcam capture we need webcam.js, webcam.min.js and webcam.swf. You can download these files from here. 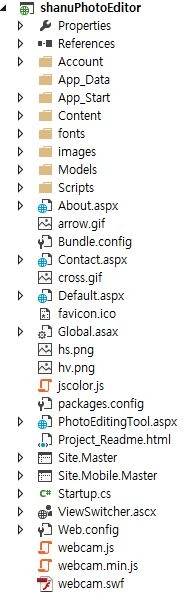
Step 2
To add the Webcam: Add the following code to initialize the web camera in your browser and display the web camera image.
- <table >
- <tr>
- <td align="center">
- <div id="my_camera"></div>
- <!-- Configure a few settings and attach camera -->
- <script language="JavaScript">
- Webcam.set({
- width: 320,
- height: 240,
- image_format: 'jpeg',
- jpeg_quality: 90
- });
- Webcam.attach('#my_camera');
- </script>
- </td>
- </tr>
- <tr>
- <td align="center">
- <input type=button value="Capture Photo" onClick="takePhoto()">
- </td>
- </tr>
- </table>
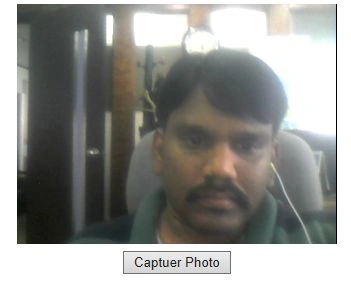
To capture the image: In the Capture button client click event, call the method takePhoto(). In this method using the webcam.js snap method we will receive the image from the live webcam. I stored the obtained image to the global variable and called the init method to add this photo to the HTML5 Canvas tag.
- function takePhoto() {
- // take your photo and add the photo as canvas Background Image
- Webcam.snap(function (data_uri) {
- imageObj_BG.src = data_uri;
- init('BG', '');
- });
- }
Step 3
To add Webcam, create a Canvas ELEMENT and declare the global variables and initialize the Canvas in JavaScript. In the code I used comments to easily understand the declarations.
HTML Canvas Part
- SECTION style="border-style: solid; border-width: 2px; width: 600px;">
- <CANVAS HEIGHT="452" WIDTH="600px" ID="canvas">
Your browser is not supporting HTML5 Canvas. Upgrade the browser to view this program or check it with Chrome or Firefox.
- </CANVAS>
- </SECTION>
JavaScript Declaration Part
First add all the JavaScript references and styles to your ASP.NET page as in the following:
- <meta http-equiv="x-ua-compatible" content="IE=9" />
- <meta http-equiv="Content-Type" content="text/html; charset=utf-8"/>
- <script type="text/javascript" src="Scripts/jquery-1.10.2.min.js"></script>
- <script type="text/javascript" src="webcam.js"></script>
- <link href="Content/myStyle.css" rel="stylesheet" type="text/css" />
Declare all the variables necessary for photo editing. In each declaration I have added comments to explain its usage.
- <SCRIPT>
- //public Canvas object to use in all the functions.
- //Main canvas declaration
- var canvas;
- var ctx;
- // canvas declaration photo filter add
- var canvasEffect;
- var ctxEffect;
- //Width and Height of the canvas
- var WIDTH = 600;
- var HEIGHT = 452;
- // var dragok = false;
- //Global color variable which will be used to store the selected color name.
- var Colors = "";
- var newPaint = false;
- var DrawingTypes = "";
- //Circle default radius size
- var radius = 30;
- var radius_New = 30;
- var stickerWidth = 40, stickerHeight = 40;
- // Rectangle array
- rect = {},
- //drag= false defult to test for the draging
- drag = false;
- // Array to store all the old Shapes drawing details
- var rectStartXArray = new Array();
- var rectStartYArray = new Array();
- var rectWArray = new Array();
- var rectHArray = new Array();
- var rectColor = new Array();
- var DrawType_ARR = new Array();
- var radius_ARR = new Array();
- var Text_ARR = new Array();
- //to add the Image this will be used to add all the stickers like Smiley,Animels,Flowers and etc
- var ImageNames = new Array();
- var imageCount = 0;
- var imageObj = new Image();
- var imageObj_BG = new Image();
- var newImagename = '';
- // For the Filters effects adde to photo like Contrast,Black&White and etc.
- var isEffectadded = 'NO';
- var EffectType = 'black';
- var DrawBorder = "No";
- //Clear the Canvas
- function clear() {
- ctx.clearRect(0, 0, WIDTH, HEIGHT);
- }
init() Method: init is important since for each button click this function will be called and pass the parameter for each function type. In this method I will create an object for the canvas and this canvas object will be used in all other functions. Here for example the DrawType will be DrawImage, DrawText, DrawBorder, Place Photo as BG and Filter Effects and the Imagename parameter will be used to pass each sticker image name and so on. In this init method I will create Mouse events such as Mousedown, Mousemove and MouseUp to add a sticker, move a sticker, resize a sticker and so on.
- //Initialize the Canvas and Mouse events for Canvas
- function init(DrawType, ImageName) {
- newPaint = true;
- canvas = document.getElementById("canvas");
- ctx = canvas.getContext("2d");
- canvasEffect = document.getElementById("canvas");
- ctxEffect = canvasEffect.getContext("2d");
- x = 5;
- y = 5;
- if (ImageName) {
- ImageNames[imageCount] = ImageName;
- imageCount = imageCount + 1;
- }
- DrawingTypes = DrawType;
- if (DrawType = 'BG') {
- ctx.drawImage(imageObj_BG, 1, 1, canvas.width - 1, canvas.height - 1);
- }
- if (DrawingTypes == 'Effects') {
- isEffectadded = 'YES';
- EffectType = ImageName;
- Effects();
- }
- radius = 30;
- radius_New = radius;
- canvas.addEventListener('mousedown', mouseDown, false);
- canvas.addEventListener('mouseup', mouseUp, false);
- canvas.addEventListener('mousemove', mouseMove, false);
- return setInterval(draw, 10);
- }
Add Captured Photo to canvas
For example, to add the captured photo to the canvas we call the takePhoto method.
- <input type=button value="Capture Photo" onClick="takePhoto()">
We have already seen that in takePhoto we store the captured photo to a global image variable.
- function takePhoto() {
- // take your photo and add the photo as canvas Background Image
- Webcam.snap(function (data_uri) {
- imageObj_BG.src = data_uri;
- init('BG', '');
- });
- }
In this method I called init('BG', '') and in the init method I will check the DrawType = 'BG'. If it's true then I will draw the captured image to the canvas as in the following.
- if (DrawType = 'BG') {
- ctx.drawImage(imageObj_BG, 1, 1, canvas.width - 1, canvas.height - 1);
- }
Add border/text/Sticker to Captured Photo: In the Border Image click event I passed the DrawType as "Border" and in the mouse move event I will call the draw() method. This method depends on the DrawingTypes selected. I will add the features to the canvas tag, for example if Border is selected then I will draw the border for the canvas tag. If Images is selected then I will add the selected sticker image to the canvas tag.
*Sticker to Captured Photo



Upendra Pratap ShahiPosted Dec 24, 2015, 8:11 AM
nice sir
Khargesh RajputPosted Jun 24, 2015, 12:48 AM
nice sir
Debendra DashPosted Jun 23, 2015, 6:31 AM
Great Post..............
Jaipal ReddyPosted Jun 22, 2015, 1:54 AM
Great work
Pankaj Kumar ChoudharyPosted Jun 16, 2015, 1:45 AM
Really Good Work Sir..........
Harpreet SinghPosted Jun 15, 2015, 3:55 PM
Very useful article
Rahul Kumar SaxenaPosted Jun 12, 2015, 2:41 AM
Great Work...
Sibeesh VenuPosted Jun 12, 2015, 1:42 AM
Good One.
Debasis SahaPosted Jun 12, 2015, 1:12 AM
nice article
Nanhe SiddiquePosted Jun 12, 2015, 12:22 AM
nice article
Hëàrt BëàtPosted Jun 11, 2015, 12:12 PM
very nice
NitinPosted Jun 11, 2015, 7:35 AM
good one
Khan Abrar AhmedPosted Jun 10, 2015, 4:56 AM
A very use full artical sir, thanks for sharing.
Afzaal Ahmad ZeeshanPosted Jun 9, 2015, 4:33 PM
A great article Shanu, as always! :) Amazing one.
Santhakumar MunuswamyPosted Jun 9, 2015, 2:43 PM
Thanks for good work
Former memberPosted Jun 9, 2015, 10:37 AM
Very nice article sir
Pankaj Kumar ChoudharyPosted Jun 9, 2015, 10:02 AM
Nice Article Sir.............