

Welcome to an article about an action State Machine in Nintex Workflows through SharePoint 2013 and Office 365. This article will display the action “State Machine” and how to configure it.
When we develop our requirements, in few cases we need to set to another stage when some condition is not met or some criteria is not met. This will involve sets of stages which we can add to the workflow where we can diver the flow to another state according to the requirement, hence easing our task of not doing it manually.
Let’s see how we’ll do it
- Create a list, Dev Testing.
- Click on the List tab on the Top ribbon and click on Nintex Workflows.
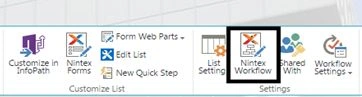
- You will see the following screen, to create a new workflow.
- Click on “Create new workflow”.

- You will come to the design phase of the Nintex workflows.
- Add the action, “State Machine” either by right clicks on the workflow or by dragging and dropping from the left toolbox.
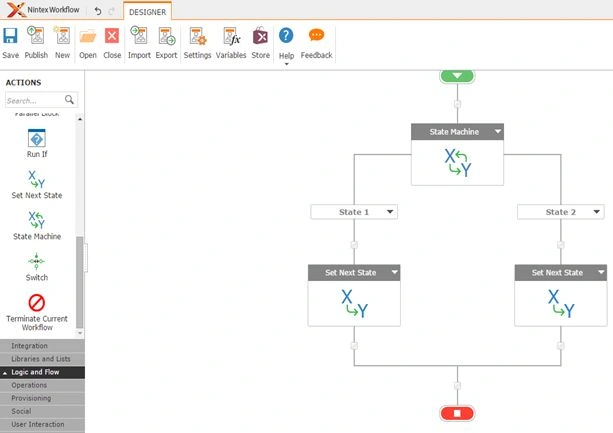
- Let’s see it closely.

- When you double click on the action, you will see the following.
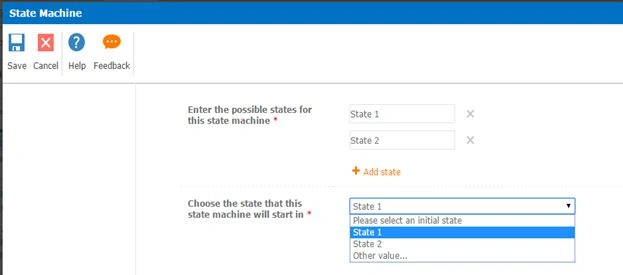
Configuration:
- Enter the possible states for this state machine: Here you can define the number of states you would like to have on this state machine.
- Choose the state that this state machine will start in: You can select the state which shuld be intitated first when the workflow runs.
- Then you have Set Next State option in each of the defined State. Lets see what are they doing.
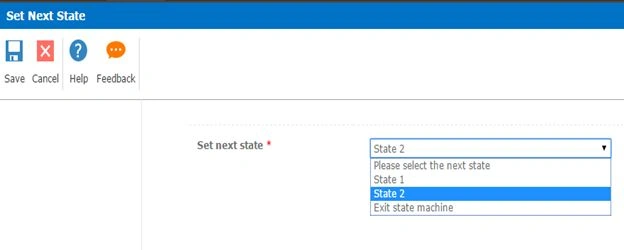
- Set Next State will help you to diver the flow of the workflow to the next state.
Set next state:
Here you can configure where the flow of the workflow should go when it reaches this set. It can be either to another set or exit from the state machine.
This State Machine is very helpful for long work flows which runs smoothly without disrupting the other actions.
So in this article we saw about the Action: State Machine in Nintex Workflows. We’ll see more in my other articles. Until then, Keep learning!
Harshad PansuriyaPosted Oct 30, 2015, 1:50 AM
Nice one
Mohammed IbrahimPosted Oct 28, 2015, 9:24 AM
nice
Nilesh JadavPosted Oct 28, 2015, 8:31 AM
Good one
Sibeesh VenuPosted Oct 28, 2015, 7:27 AM
Nice Share
Mukesh KumarPosted Oct 28, 2015, 5:12 AM
Thanks for sharing
Pramod KumarPosted Oct 28, 2015, 3:31 AM
Great Job