

What is Table of Contents?
- TOC is used to display the navigation hierarchy of your site.
- This webpart is a configurable component that we can add to the SharePoint pages
- It automatically generates the SharePoint site map. Every time a page is added or removed from the site and every time a page is renamed or moved, TOC is updated automatically.
Steps
Follow the below steps to add the "Table of Contents" webpart in your SharePoint site page.
Step 1
Open your SharePoint site and go to the page where you want to add this webpart.
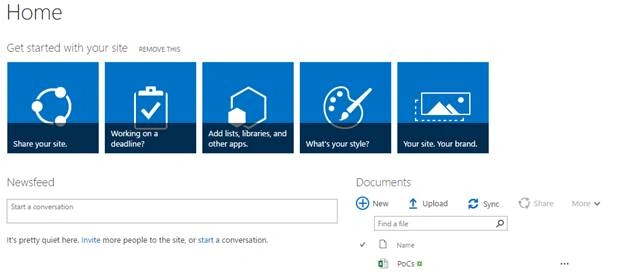
Step 2
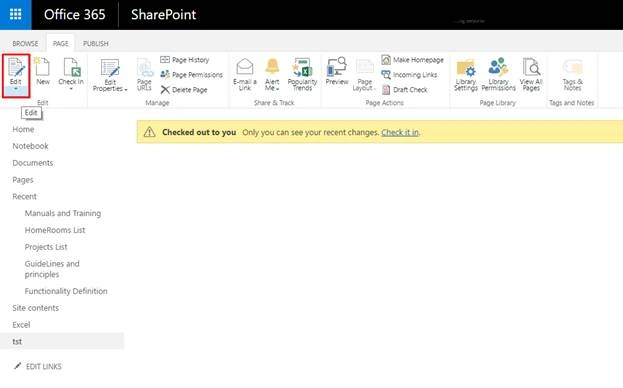
Edit the page using ribbon bar, as shown below.
Step 3
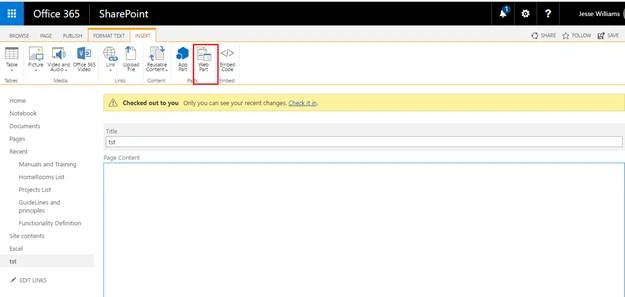
On the edited page, click on “Insert” tab from the top ribbon.
Step 4
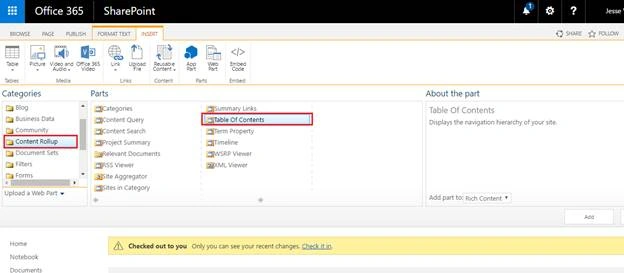
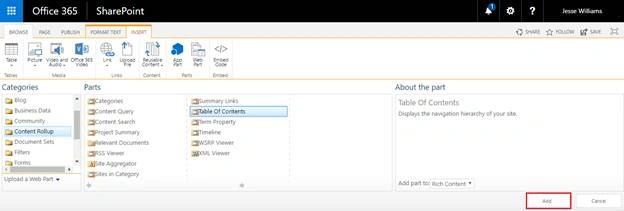
Then, click on the “Webpart” option and go to the “Content Rollup” category in webpart category section. Select “Table of Contents" here.
Step 5
Once you select “Table of Contents” webpart, click “Add” to add the webpart on your page.
Step 6
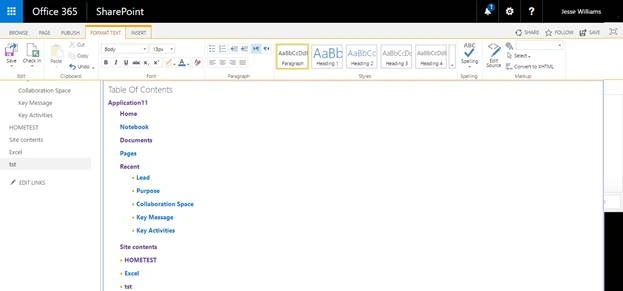
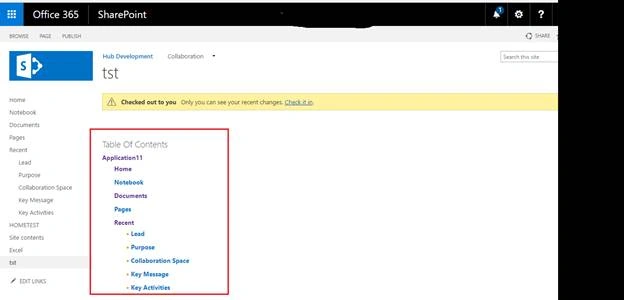
The "Table of Contents" webpart will be added on your page, as shown below.
Step 7
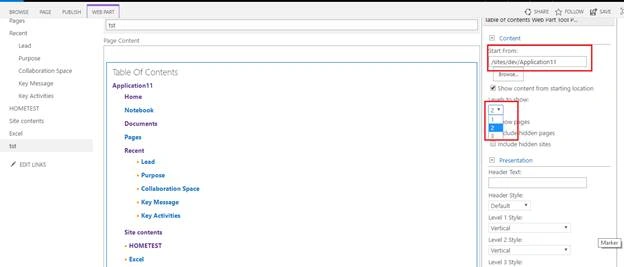
Then, edit the "Table of Contents" webpart and change the properties as you need. I’ve changed the level for this webpart. Once you complete the changes, click OK to save the properties.
Step 8
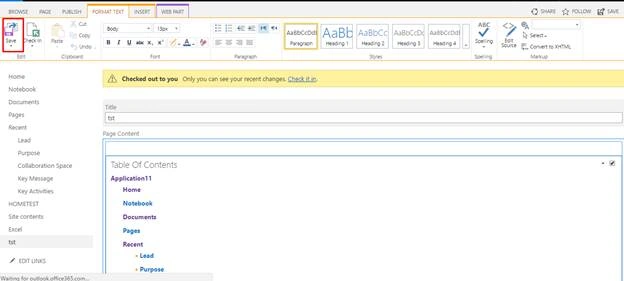
Finally, click the “Save” button to add this webpart on the page.
We can also Add, Edit, and Remove the links manually using Quick Launch “Edit Links” option.
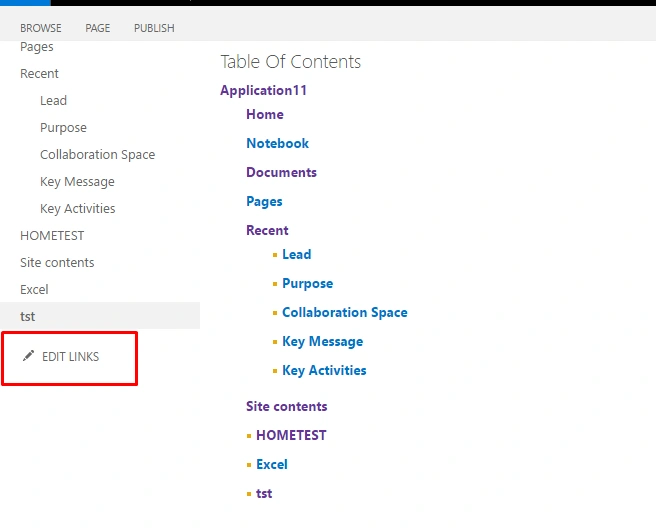
Thus, we have successfully added the “Table of Contents” webpart on SharePoint Site.
Summary
In this article, we have explored how to add the “Table of Contents” webpart. Happy learning!
omkar ranjitPosted Jun 14, 2018, 11:30 PM
Hi kaviya, is it possible to have multiple columns for sharepoint online table of content
loriPosted May 4, 2018, 5:08 AM
Is there a modern site version?