

Introduction
In this IoT article, we will use a DHT11, Raspberry Pi, and ThingSpeak to analyze the temperature and humidity.
Requirement
- DHT11 - Temperature and Humidity Sensor Module
- ThingSpeak
- Raspberry Pi
- Putty
DHT11 Sensor Actions
Refer to my previous article Stream Sensor Data In Real-Time With IoT Hub Using PowerBI
Thingspeak
ThingSpeak allows you to aggregate, visualize, and analyze live data streams in the cloud. ThingSpeak provides instant visualizations of data posted by your devices or equipment. Execute MATLAB code in ThingSpeak, and perform online analysis and processing of the data as it comes in. ThingSpeak accelerates the development of proof-of-concept IoT systems, especially those that require analytics. You can build IoT systems without setting up servers or developing web software.
Step 1
- Set up the DHT11 humidity sensor on the Raspberry Pi.
- GPIO pin is 27.
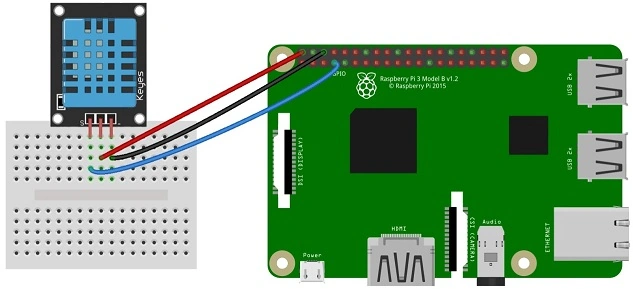
Download the Adafruit DHT11 library. In the terminal, type the following command.
- git clone https://github.com/adafruit/Adafruit_Python_DHT.git
- cd Adafruit_Python_DHT
- sudo apt-get install build-essential python-dev # python2
- sudo apt-get install build-essential python3-dev # python3
To install the library, in the terminal, type the following.
- sudo python setup.py install # python2
- sudo python3 setup.py install # python3
Navigate to the example folder.
Replace the following demo code.
- cd examples
- sudo nano dhtsimple.p
- import Adafruit_DHT # is a must
- while True:
- humidity, temperature = Adafruit_DHT.read_retry(11, 27) # GPIO27 (BCM notation)
- print ("Humidity = {} %; Temperature = {} C".format(humidity, temperature))
- sudo python dhtsimple.py
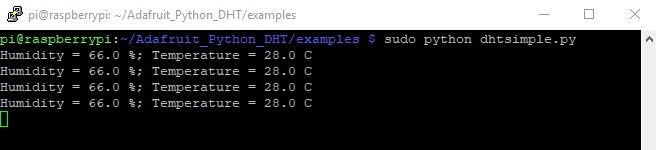
Step 2
- Open Thingspeak (https://thingspeak.com).
- Create a new channel and select fields 1 and 2.
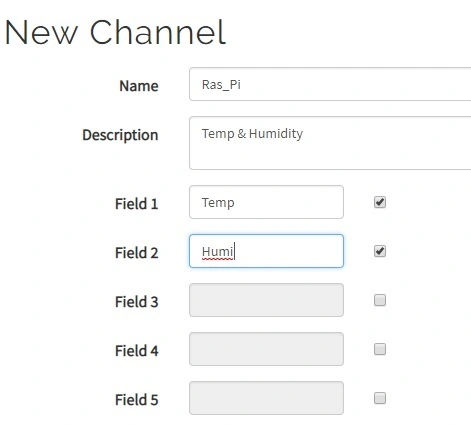
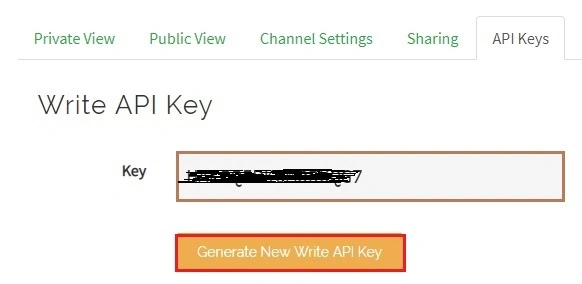
- Select Ras_Pi channel and API Keys.
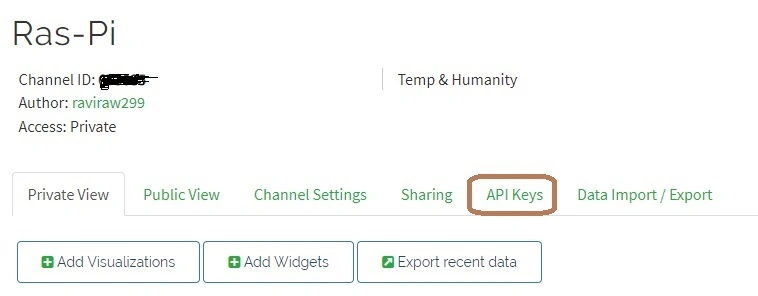
- Get the Write API Key or generate the new Write API Key.
Step 3
Open the new Python file and name it as dht1234567.py like below.
sudo nano dht1234567.py
Replace the following code.
- import httplib, urllib
- import time
- import Adafruit_DHT
- sleep = 30 # how many seconds to sleep between posts to the channel
- key = '****************' # Write API key
- humidity, temperature = Adafruit_DHT.read_retry(11, 27) # GPIO27 (BCM notation)
- #Report Raspberry Pi internal temperature to Thingspeak Channel
- def thermometer():
- while True:
- headers = {"Content-typZZe": "application/x-www-form-urlencoded","Accept": "text/plain"}
- conn = httplib.HTTPConnection("api.thingspeak.com:80")
- try:
- params = urllib.urlencode({'field1': temperature, 'key':key }) # channel name is field1 or field 2
- conn.request("POST", "/update", params, headers)
- response = conn.getresponse()
- print humidity
- print temperature
- #print response.status, response.reason
- data = response.read()
- conn.close()
- except:
- print "connection failed"
- break
- #sleep for desired amount of time
- if __name__ == "__main__":
- while True:
- thermometer()
- time.sleep(sleep)
- sudo python dht1234567.py

Graphical representation.
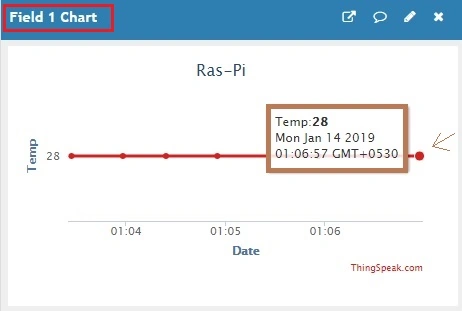
Download all of this Channel's feeds in the CSV format.
Summary
Finally, we have successfully created a graph that live-streams the data in the cloud with Raspberry Pi and ThingSpeak.
Azam AhmadPosted Jul 15, 2019, 5:01 AM
Traceback (most recent call last): File "/home/pi/Desktop/wkwk.py", line 19 print humidity , why i get this error massage when executing this programs
Ravishankar NPosted Jan 19, 2019, 9:55 PM
Nice article! bookmarked