

This article is a part of a series of articles related to one of the Azure Compute options “Cloud Services”.
- Azure Cloud Service Introduction
- Azure Cloud Services - Create Hello World Cloud Service Using Visual Studio
- Azure Cloud Service Examine Files
- Azure Cloud Service – Add existing Web Application to Cloud Service
- Azure Cloud Service – Compute Emulator
- Azure Cloud Service - Create Package using Visual Studio
- Azure Cloud Service – Create a new Cloud Service using Azure Management Portal
- Azure Cloud Service – Deploy Cloud Service using Azure Management Portal
- Azure Cloud Service – Create Staging Slot using Azure Management Portal
- Azure Cloud Service – VIP Swap using Azure Management Portal
- Azure Cloud Service – Delete Slot using Azure Management Portal.
- Azure Cloud Service – Scale up Instance Size
- Azure Cloud Service – Scale Out Instances using Visual Studio
- Azure Cloud Service – Enable Remote Desktop using Visual Studio
In our previous articles, we created Azure Cloud Service and also created the Cloud Service Package to deploy the Application to Azure.
In order to deploy the Cloud Service Application, we need to create “Cloud Service”, using Azure Management portal.
Login to your Azure Subscription and navigate to Cloud Services, as shown below-
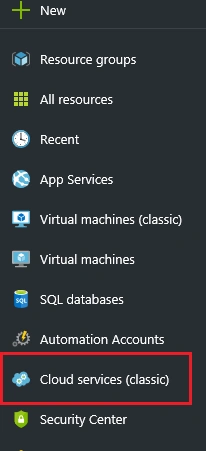
Click “Cloud Services”, which will take you to the following page, where all your existing Cloud Services are displayed-
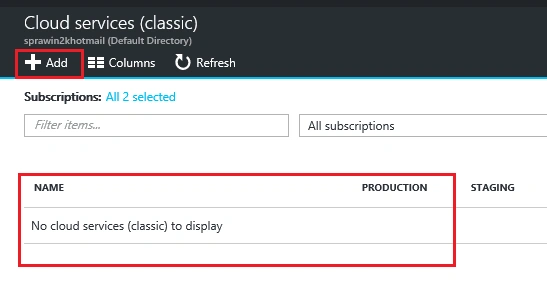
Currently, I don’t have any Cloud Services in my subscription. Thus, the list is empty, as shown in the screenshot, given above.
Let’s create one by clicking “Add” button, as shown in the image.
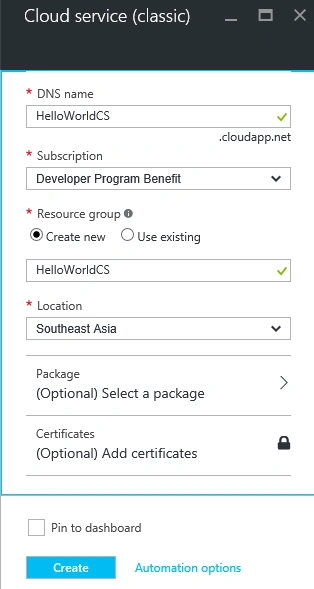
Provide the following details, while creating Azure Cloud Service.
- DNS Name - This is the name of the Cloud Service, which can be accessed later, after we created Cloud Service. In this case, it is http://helloworldcs.cloudapp.net
- Subscription - Select the subscription on which you would like to create the Cloud Service.
- Resource Group - It’s a Logical Container of all the resources. For this example, we create a new Resource Group by selecting “Create new Resource” radio button.
- Location - It is the datacenter, where Cloud Service is to be hosted. In real time, you will select the nearest location to your customers.
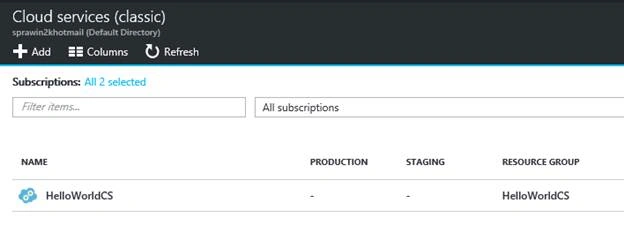
Now, click “Create” button to create Cloud Service. After a few seconds, Cloud Services gets created, as shown below-
In the next article, we will learn, how to deploy Cloud Service Package to this Cloud Service, using Azure Management portal.
Hope, you enjoyed reading the article. Your feedback is highly appreciated.
Tarun DPosted Sep 7, 2016, 12:15 AM
Thanks for sharing..
Prasanna MuraliPosted Sep 6, 2016, 9:21 PM
Nice post...