

Introduction
This article demonstrates how to send data from Raspberry Pi to Microsoft Azure. Microsoft provides a suite of IoT services, which you can use to create any kind of very large application.
About Microsoft Azure
- Microsoft Azure is a cloud computing service created by Microsoft.
- Azure cloud services to help your organization meet your business challenges.
- it supports many different programming languages, tools, and frameworks.
- Azure provides 600 different types of services.
Azure IoT Hub
- Azure IoT hub is a managed IoT service which is hosted in the cloud
- It lets you connect, monitor, and manage billions of IoT assets
- This cloud-to-device connectivity means that you can receive data from your devices.
- First, Open the Raspberry Pi terminal.
- Next, we have to install some Azure IoT Package, so run some command to the Raspberry Pi and also install the Python package.
Install the below packages:
- sudo pip3 install azure-iot-device
- sudo pip3 install azure-iot-hub
- sudo pip3 install azure-iothub-service-client
- sudo pip3 install azure-iothub-device-client
Step 2 - Create IoT Hub
- Next, go to Azure portal " https://portal.azure.com ".
- Create a resource >> IoT Hub.
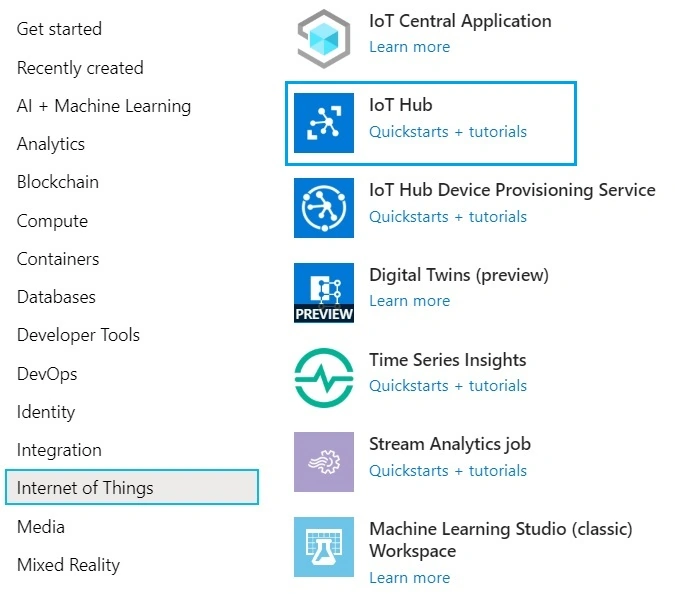
It is a dedicated service which is provided by Microsoft and it can be directly configured to your Raspberry Pi.
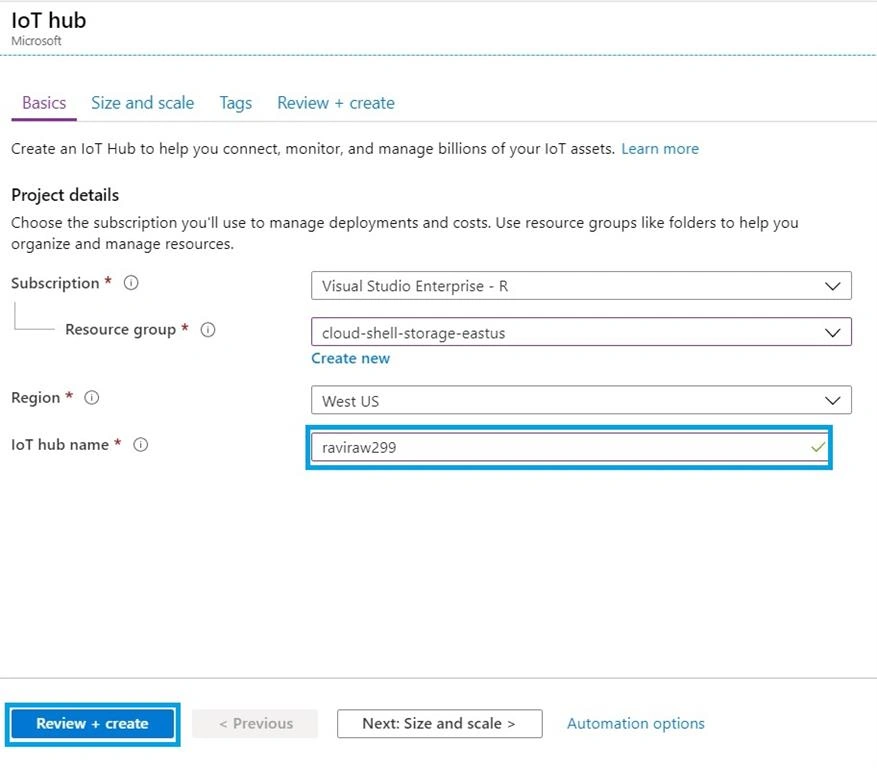
- Next, create one IoT Hub Service and fill in the necessary details, give some name at recognizable into your IoT Hub.
- Let us give the name as raviraw299. It is available and click on next-create.
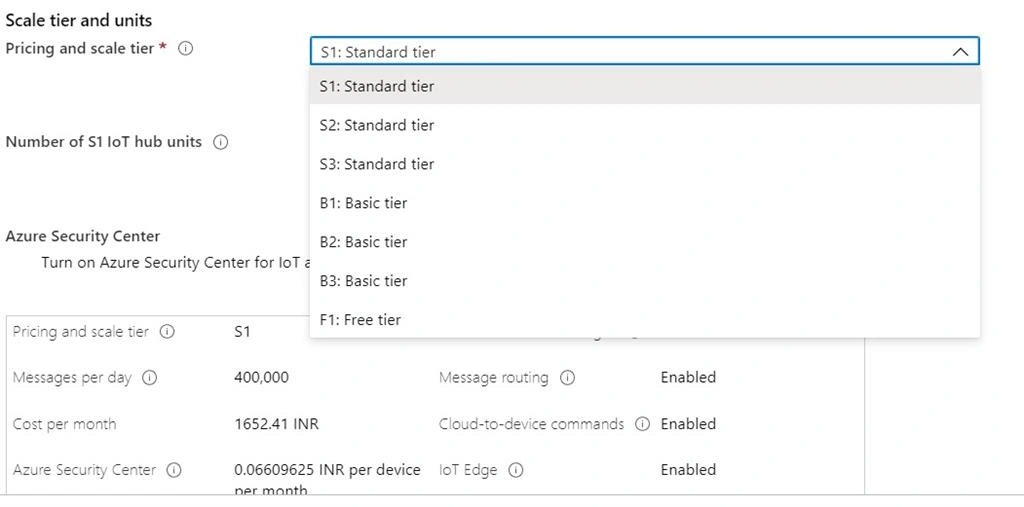
Here you can decide how you want to your IoT Hub to be, so there are three categories provided - S, B, F
- S - Standard (S1, S2 & S3)
- B - Basic (B1, B2 & B3)
- F - Free (F1).
B1, B2 & B3 are very basic and the below protocol is not available here.
- Click on Review+ Create button. Now this step to create the Azure IoT Hub. After creating Azure IoT Hub you have space where you can perform experimental Azure.
- Next, create a device where you can actually receive some data from the hardware.
Step 3 - Create an IoT Device
- Go to the IoT Device and click on new, and give the device ID (mypi).
Three types of authentication algorithms are there.
- Symmetric
- X.509 Self Signed
- X.509 CA Signed.
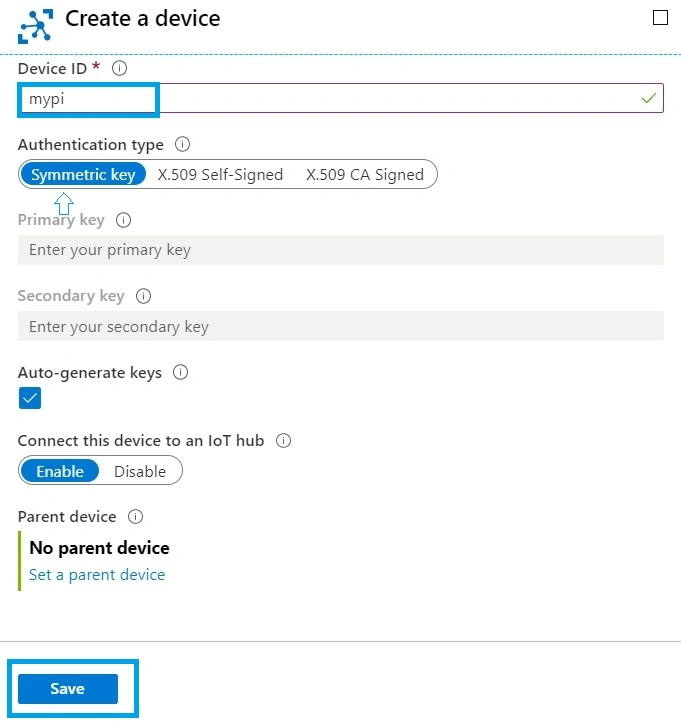
- We choose the symmetric algorithm because it uses a long text string performing the authentication, and click on save.
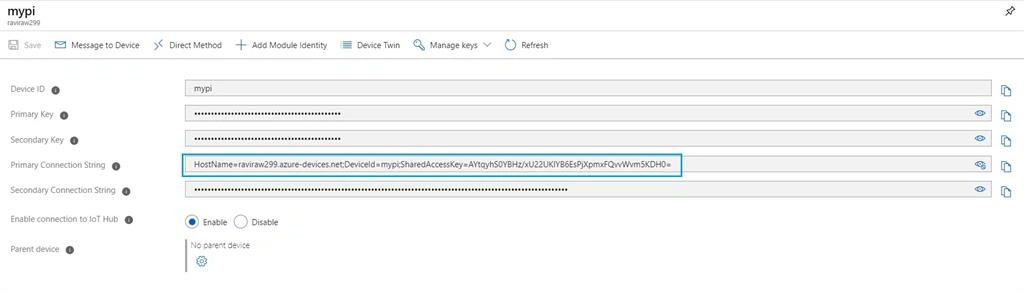
- Click on the device and then you will go to all the properties related to the device. You will see something called the primary connection string and copy the connection string.
Step 4
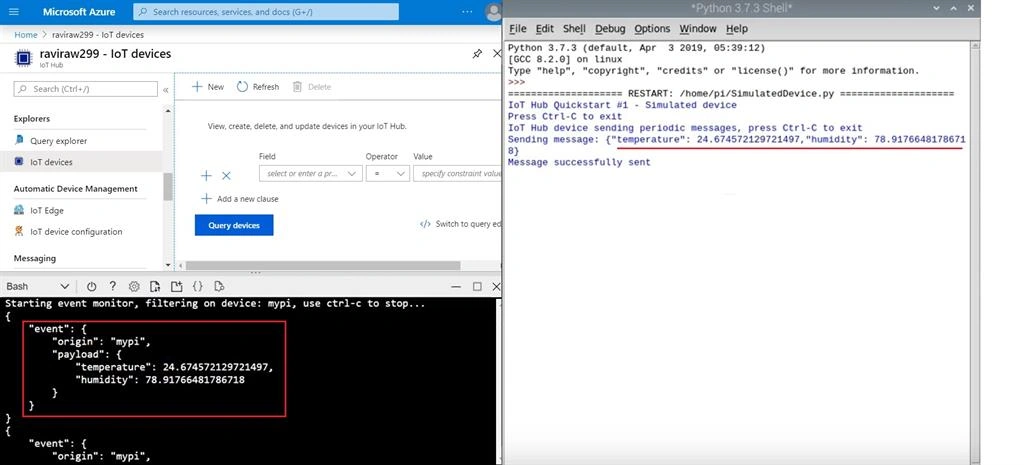
Create a new DHT 11 sensor sample program, the name of the program is simulateddeivce.py.
Source Code
SueAnn TanPosted Aug 22, 2020, 2:18 PM
Do you have the source code for sending the actual dht11 sensor data to azure?
ken zackPosted Jun 20, 2020, 8:47 PM
Please teach me .
ken zackPosted Jun 20, 2020, 8:46 PM
Raspberry pi4 has buster.
ken zackPosted Jun 20, 2020, 8:44 PM
Is it possible with type4 of Raspberry pi ?
Guest UserPosted Feb 29, 2020, 2:06 AM
Nice article, thanks for sharing
Logesh PalaniPosted Feb 27, 2020, 11:52 AM
Helpful one :)