

In my previous article, I have given a brief theory of what Azure Logic Apps are and also, I showed a step-by-step demo of connecting SaaS services with Azure Logic Apps. You can read that article by clicking on the link below.
In this article, I am going to show one more demo of Logic Apps. I will show you how you can integrate Azure Logic Apps with Azure Storage.
Step 1
First of all, log in to the Azure portal and click on create a resource. Search for Storage Account and click on Create.
 Step 2
Give some unique name, select RM as a deployment model, keep the account kind as blob storage, and keep the rest of everything default. Select the resource group that you have just created for this demo. Click on Create.

In this article, I am going to show one more demo of Logic Apps. I will show you how you can integrate Azure Logic Apps with Azure Storage.
Step 1
First of all, log in to the Azure portal and click on create a resource. Search for Storage Account and click on Create.
Give some unique name, select RM as a deployment model, keep the account kind as blob storage, and keep the rest of everything default. Select the resource group that you have just created for this demo. Click on Create.
- We are going to create a logic app that is connected to an email account and it is going to pull that email account for new messages and when messages with an attachment come in, we will build some logic to get the attachment from the email and dump it into an Azure container in Azure storage.
- And, the best part about this is that we can do all of this without writing even a single line of code.
Now, inside the Blob storage, create a new container called myattachments.

Next, create a new Logic App.

Step 5
Give a name and select an existing resource group (if you have followed the previous article) or create a new one. Click on create.

Step 6
Inside the Logic Apps Designer, select Blank Logic App from the templates below.

Step 7
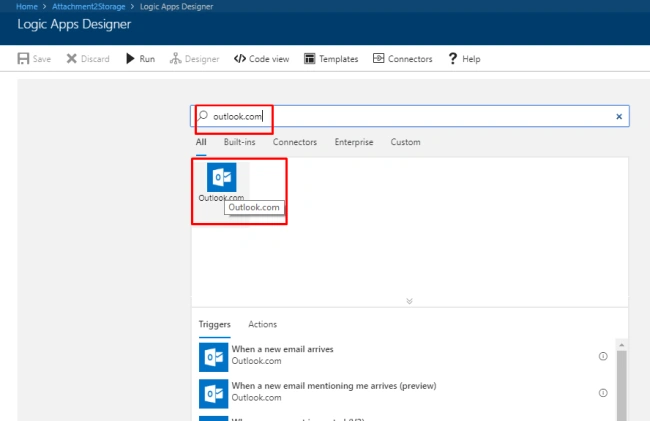
This time we will select outlook.com to see that it works with an Office 365 account as well. Search for outlook.com and select it.
Step 8
For the trigger, select 'when a new mail arrives'. After selecting that, it will prompt you for the sign in process.

Step 9
Select the inbox folder and from the advanced options, keep 'yes' to 'has attachment ' and 'include attachments'.

Step 10
Keep the interval time as 4 minutes and add a new step. In the new step, select 'Add a Condition'.

Step 11
For the condition's value, choose 'Has Attachment'.

Step 12
Define the condition as Has Attachment equal to true. And then we can define the actions related to it.

Step 13
In the 'if statement', click on more and select Add a for each. We have selected that because there can be multiple number of attachments in the email.

Step 14
So for each attachment, we are going to add an action.

Step 15
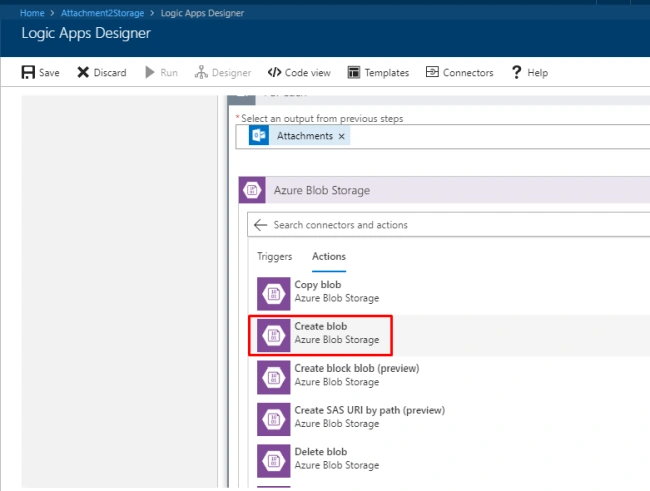
Select Azure Blob Storage Container.

Step 16
Select the Create Blob action.
Step 17
Add a connection name, select the storage account and click on create.

Select Azure Blob Storage Container.
Step 16
Select the Create Blob action.
Step 17
Add a connection name, select the storage account and click on create.
Step 18
Select the folder; i.e. the container, for the blob name, select Name for Blob Name from the Dynamic Content and Content for Blob Content.

Select the folder; i.e. the container, for the blob name, select Name for Blob Name from the Dynamic Content and Content for Blob Content.
- You can see that even in this example, we are able to enable some really greate capabilities and here we are only using just one if statement.
- We have got all the different kinds of logic that we can implement here if we need to.
Click on Save.

Step 20
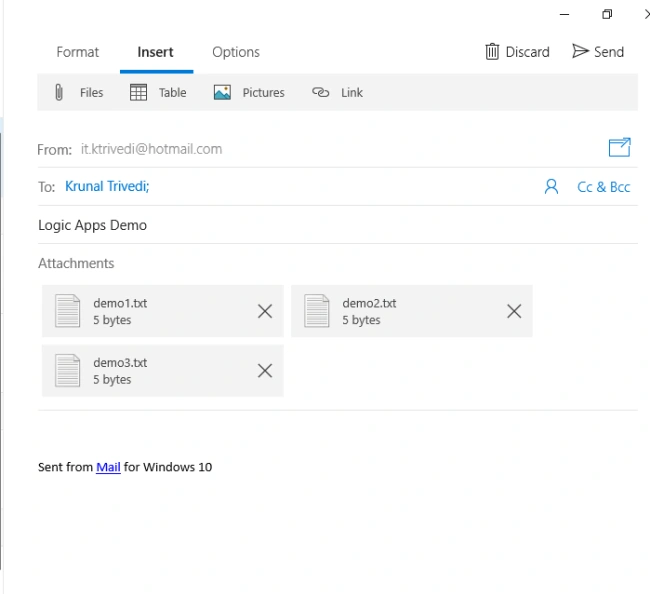
Send an email with a few attachments.
Send an email with a few attachments.
Step 21
Once you have received the email, go back to the portal and click on Run.

Once you have received the email, go back to the portal and click on Run.
Step 22
We have got green checks at every stage, so it confirms that it has worked.

Step 23
Back in the storage account inside your container, you will be able to see all the files that we attached in the mail

We have got green checks at every stage, so it confirms that it has worked.
Step 23
Back in the storage account inside your container, you will be able to see all the files that we attached in the mail
- So, you can see how powerful this is, with all the different connectors that are in there right now.
- You can start to build a lot of applications and some of the routine tasks that you might be able to automate with this service.
- In the next Logic apps demo, we are going to see how we can call Azure functions from a logic app.
Rakib AhmedPosted Jul 2, 2020, 4:01 AM
Is it possible to extract attachment for example extract txt attachment and from that txt we can get order number and some other data and execute a sql script to perform some operations