

Introduction
In this article, you will learn how to build a real-world voting smart contract with C# and Stratis. In the first article of this series, we learned about the tools and configurations required to build your first smart contract over Stratis blockchain. So, if you haven’t read that article yet, please walk through it first: Write Your First Smart Contract on Stratis
Prerequisites
Here are the prerequisites to complete this tutorial,
- Visual Studio 2019 Community or later version
- Stratis Smart Contract Template
- Sct tool
- Stratis FullNode
- Postman
- Swagger
Define Contract Behaviours
The voting system is a complex subject, and covering all aspects is quite difficult. Our goal is to showcase the feature and implementation of a smart contract. Hence, we’ll build our contract with consideration of limited scope. However, feel free to extend this contract with points given in the exercise section at the end of this article.
We will create a Smart Contract called “Ballot”. It should accept a list of proposals—Proposals could be anything like candidates or survey options—during deployment. The wallet address from the contract will be deployed, will become a chairperson. The chairperson can give a right to others' wallet addresses (users) to vote. A voter—with a voting right—can invoke the method “Vote” and register their vote. The proposal that received the highest vote should be considered as the winning proposal. Anyone can call the method to get the winning proposal and check which one is the winning proposal.
Flowchart
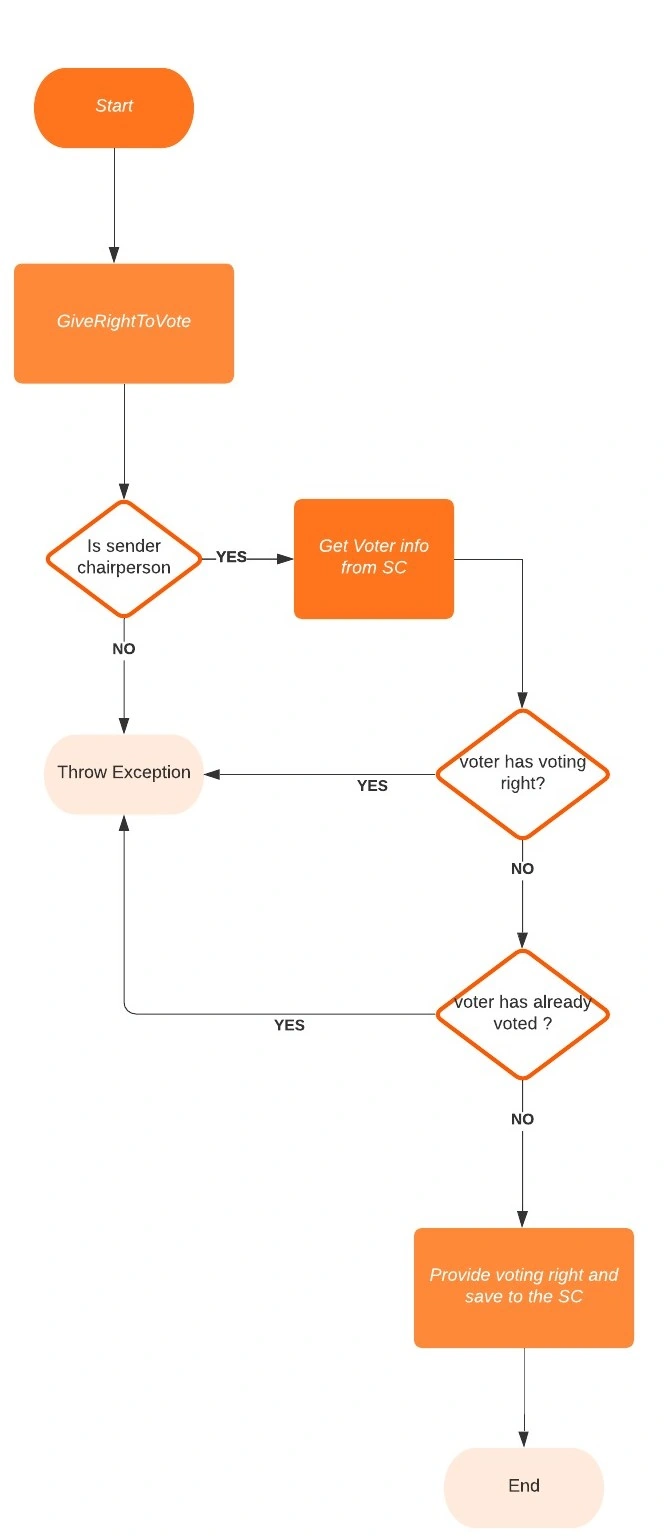
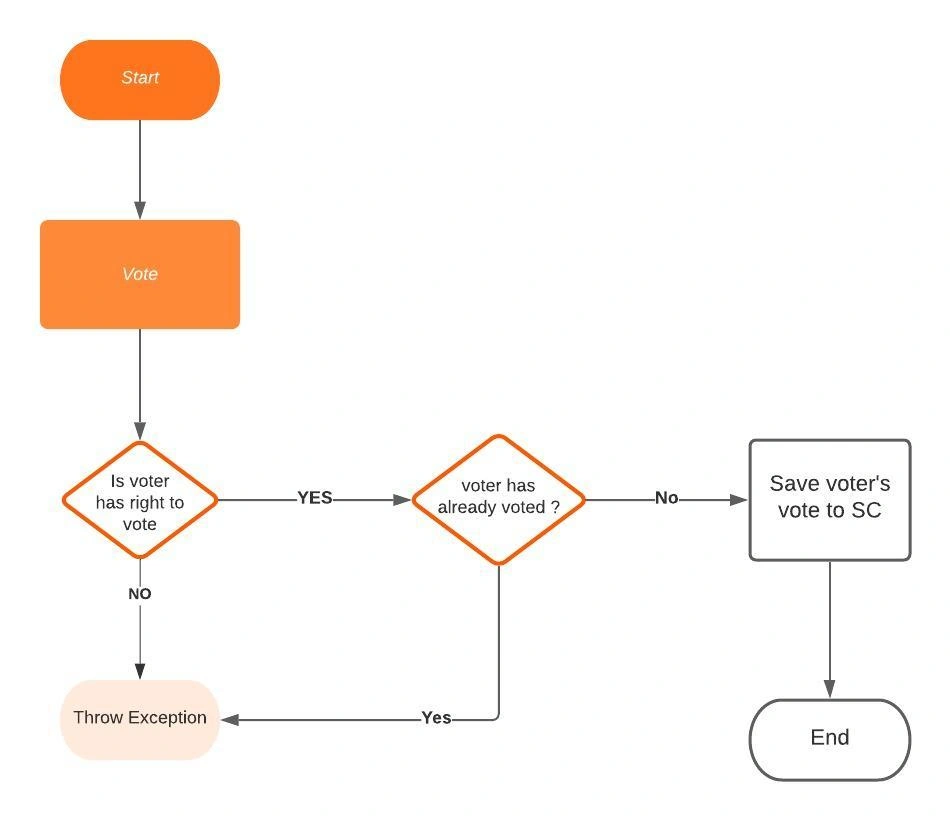
To better understand the smart contract, you can go through the following,
GiveRightToVote()
Vote()
With these considerations, let's build the smart contract.
Create Sample Contract project
Create a new project with the Stratis template. I’ve created with the name “VotingContract”. Initially, the project solution looks like the below screen.
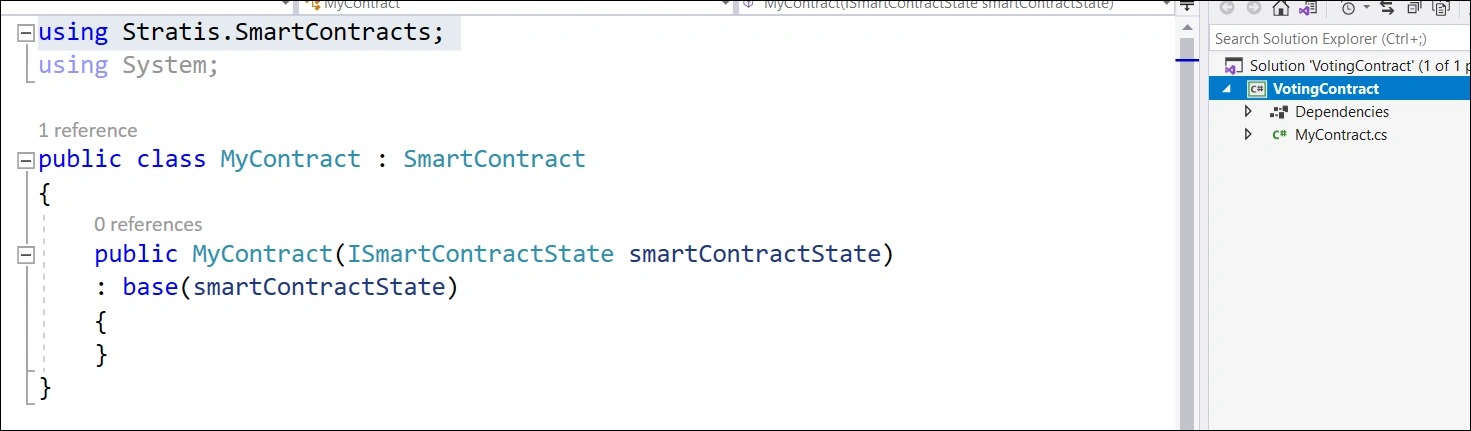
The first line in the contract is a reference to the Stratis.SmartContracts NuGet package. This package allows you to inherit from the “SmartContract” class. And thereby we can use useful functionality like sending funds, hashing, and saving data.
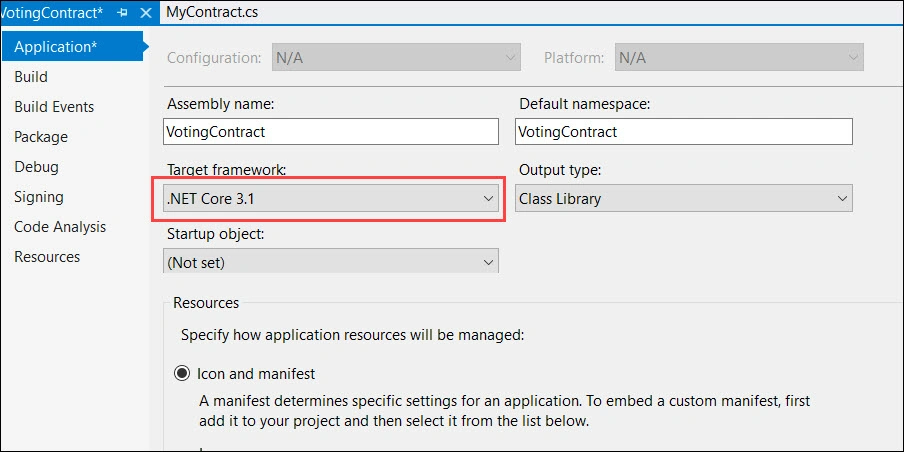
Next, change the targeted framework to 3.1. To do that, go to project properties > Applications > Find Target framework dropdown. This will help us to avoid packages version issues later while development.
Modify the contract name and give a meaningful name. I’m using the name “Ballot” for the contract.
Contract Development
Now we need a "Structure" to represent a single voter. It stores the information of a voter like voting weight, a voter is voted or not and the proposal index on voter is voted. So, let’s add one struct called “Voter”.
public struct Voter
{
    /// <summary>
    /// Voting weight of the voter.
    /// </summary>
    public uint Weight;

    /// <summary>
    /// Is the voter voted
    /// </summary>
    public bool Voted;

    /// <summary>
    /// Proposal index of the vote.
    /// </summary>
    public uint VoteProposalIndex;
}
We need a proposal structure to hold the information of proposals and voting count of each. So, take one more structure "Proposal".
public struct Proposal
{
 /// <summary>
 /// Name of the proposal.
 /// </summary>
 public string Name;

 /// <summary>
 /// Total vote received for the proposal.
 /// </summary>
 public uint VoteCount;
}
We also need to have Get and Set methods for both the structures we defined. To persist data into the smart contract, use PersistentState. The PersistentState stores data on a key, and we need to use the same key to retrieve data. To read more about PersistentState, visit.
Here, I have used the user wallet address with a string combination (voter:walletaddress) to store the voter structure information.
private Voter GetVoter(Address address) => PersistentState.GetStruct<Voter>($"voter:{address}");
private void SetVoter(Address address, Voter voter) => PersistentState.SetStruct($"voter:{address}", voter);
Note:
There are mainly two access modifiers are used in the smart contract—Public and Private. When you make anything public, that means anyone can call it from the outside world. If you make it private, only the smart contract class can access it.
The proposals should be stored only once when the contract is deployed. And we are not sure how many proposals anyone will be going to add; hence, we use a dynamic array to store proposals.
public Proposal[] Proposals
{
    get => PersistentState.GetArray < Proposal > (nameof(Proposals));
    private set => PersistentState.SetArray(nameof(Proposals), value);
}
Now let’s define the contract creator as chairperson. To store that field, we are going to add one new wallet-address property.
public Address ChairPerson
{
    get => PersistentState.GetAddress(nameof(ChairPerson));
    private set => PersistentState.SetAddress(nameof(ChairPerson), value);
}
Store the value of the chairperson's property while the deployment of the contract.
public class Ballot: SmartContract
{
    public Ballot(ISmartContractState smartContractState): base(smartContractState)
	{
		ChairPerson = Message.Sender;
    }
        .....
}
We will pass a list of proposals while deploying the contract. So, that needs to be stored as well. So, let’s take the byte array as a parameter in the constructor, and then serialize it to an array of the proposal. At the time of writing this article, it is not allowed to pass struct array as a parameter to the Smart Contract directly.
public class Ballot: SmartContract
{
    public Ballot(ISmartContractState smartContractState, byte[] proposals): base(smartContractState)
	{
		ChairPerson = Message.Sender;
		var proposalsArray = Serializer.ToArray < Proposal > (proposals);
    }
    .....
}
Whenever we take input from the user, it is better to validate that before doing any operation. We can achieve this using the helper method. So, let’s take one helper method— ValidatePropsalAndAssign—to validate the length of the proposals array. If the length of an array is correct, assign the proposal array to the “Proposal” property.
private void ValidateProposalAndAssign(Proposal[] proposals)
{
    Assert(proposals.Length > 1, "Please provide at least 2 proposals");
    this.Proposals = proposals;
}
Note:
Assert is the method of the “SmartContract” class. It is used for validation.
Syntax:
Assert(bool condition, string message = "Assert failed.");
Simply, if the condition is not met, it will throw an exception and the code execution won’t go further. In our case, if the proposal's array length is not greater than 1, it will throw an error. You can add a message to identify the issue while executing the smart contract, otherwise, sometimes a single method can have multiple validations and with a default message, it would be difficult to identify which validation is throwing an error.
Now, let’s pass chairperson values from the contractor.
public Ballot(ISmartContractState smartContractState, byte[] proposals): base(smartContractState)
{
    ChairPerson = Message.Sender;
    var proposalsArray = Serializer.ToArray < Proposal > (proposals);
    ValidateProposalAndAssign(proposalsArray);
}
We have set the proposal's value and chairperson wallet address. Now, let’s add a method to give a voting right to the user. Remember, only the chairperson can call this method.
public bool GiveRightToVote(Address voterAddress) {
    Assert(Message.Sender == ChairPerson, "Only chairperson can give right to vote.");
    var voter = this.GetVoter(voterAddress);
    Assert(voter.Weight == 0, "The voter already have voting rights.");
    Assert(!voter.Voted, "Already voted.");
    voter.Weight = 1;
    this.SetVoter(voterAddress, voter);
    return true;
}
We have set the updated voter information to the PersistentState, so whenever we will retrieve the voter information using the same key, it should give the updated state information.
Further, add one method to vote. A voter will pass the proposal index and the method captures the vote. Also, it should update the proposal array and increase the voting count.
public bool Vote(uint proposalId) {
    var voter = this.GetVoter(Message.Sender);
    Assert(voter.Weight == 1, "Has no right to vote.");
    Assert(!voter.Voted, "Already voted.");
    voter.Voted = true;
    voter.VoteProposalIndex = proposalId;
    Proposals[proposalId].VoteCount += voter.Weight;
    this.SetVoter(Message.Sender, voter);
    Log(new Voter {
        Voted = true,
            Weight = 1,
            VoteProposalIndex = proposalId
    });
    return true;
}
Every transaction has some fee associated and reading data for each record would not be the best way. Instead, the Log method of the SmartContract class enables you to log the data that can be queried using API.
Add one more method that counts the number of votes and return the winning proposal.
public uint WinningProposal()
{
    uint winningVoteCount = 0;
    uint winningProposalId = 0;

    for (uint i = 0; i < Proposals.Length; i++)
	{
        if (Proposals[i].VoteCount > winningVoteCount)
		{
            winningVoteCount = Proposals[i].VoteCount;
            winningProposalId = i;
        }
    }

    return winningProposalId;
}
Similarly, to get the winning proposal name, we add one more method, which will use the method “WinningProposal” and retrieve the name of the proposal.
public string WinnerName()
{
    var winningProposalId = WinningProposal();
    var proposals = Proposals[winningProposalId];
    return proposals.Name;
}
The contract implementation is done. Next, we will understand Parameter serialization.
Parameter Serialization
As per the Stratis docs, the contract parameters must be provided as a string. This requires that a parameter is serialized to a string in the format that the API is expecting. Additionally, when using the API or SCT, the type of each parameter must be provided in the format “{0}#{1}”, where: {0} is an integer representing the Type of the serialized data and {1} is the serialized data itself.
Refer to this table to see the mapping between a type and its integer representation, the serializer for the type, and an example of using the type as a parameter.
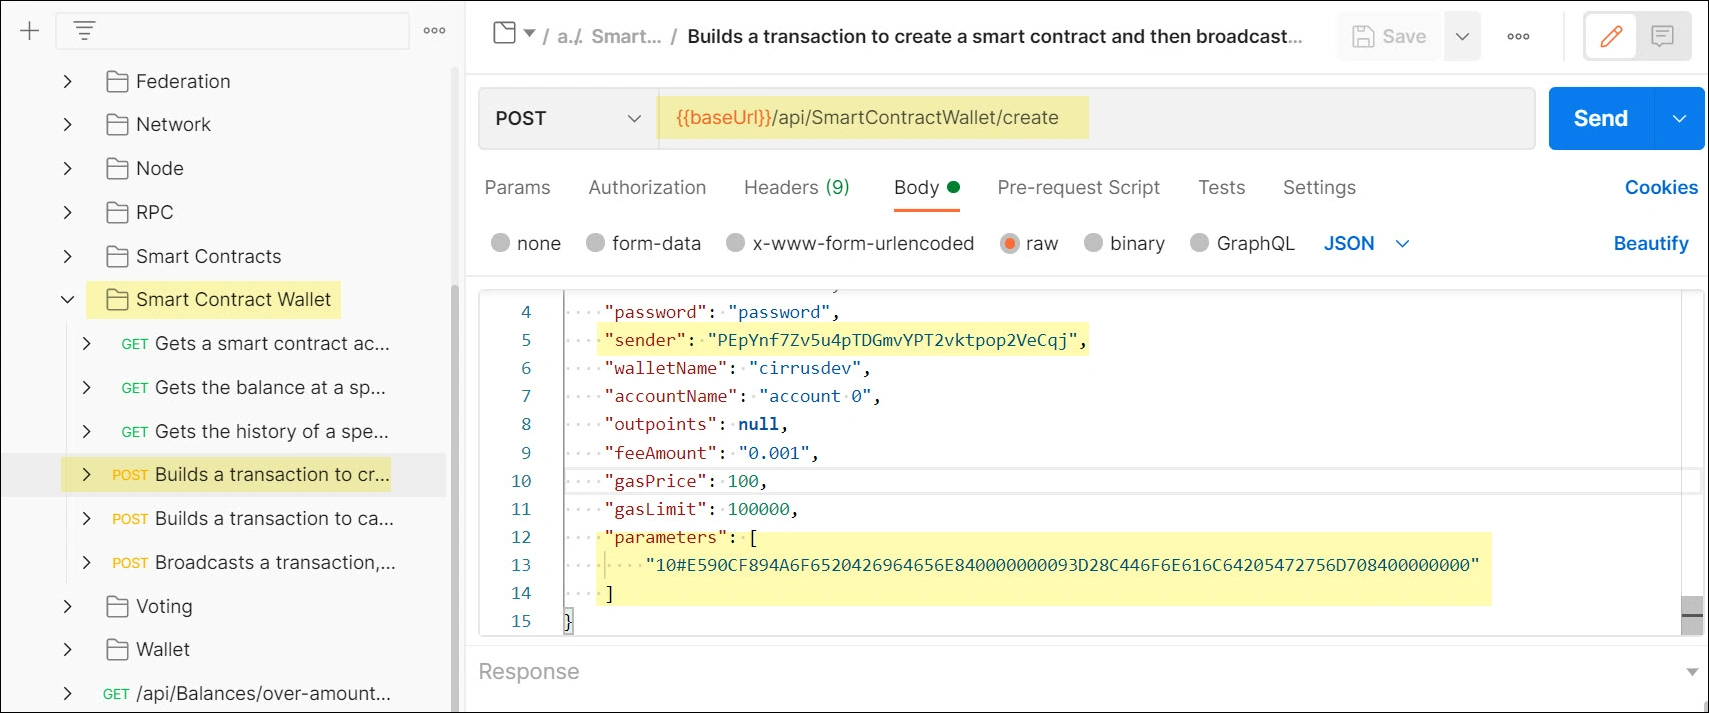
So, if you want to pass a list of proposals to the contract, we need to pass in the format like
parameters: [
 "10#Hex_String"
]
But we don't have the hex string value that the contract expects. So, let's get the hex string. The simplest way to create a hex string is to add a test case for it.
Add Tests Project
Add a new class library to the voting contract project.
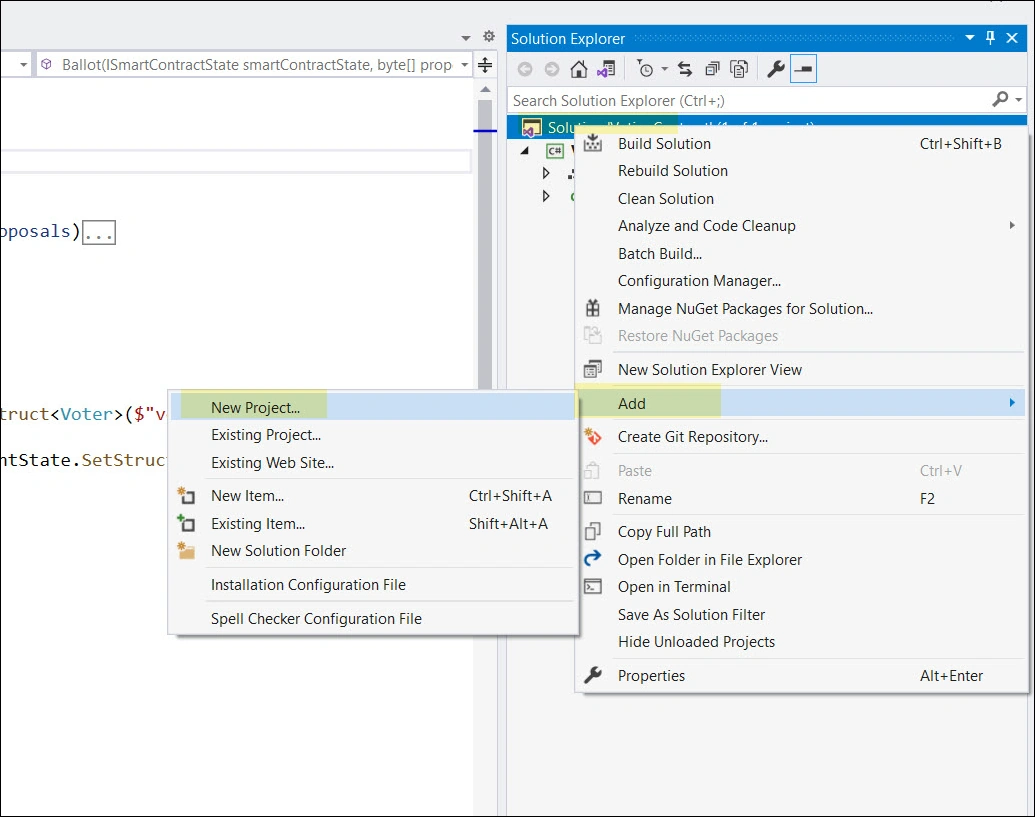
Choose xUint Test Project:
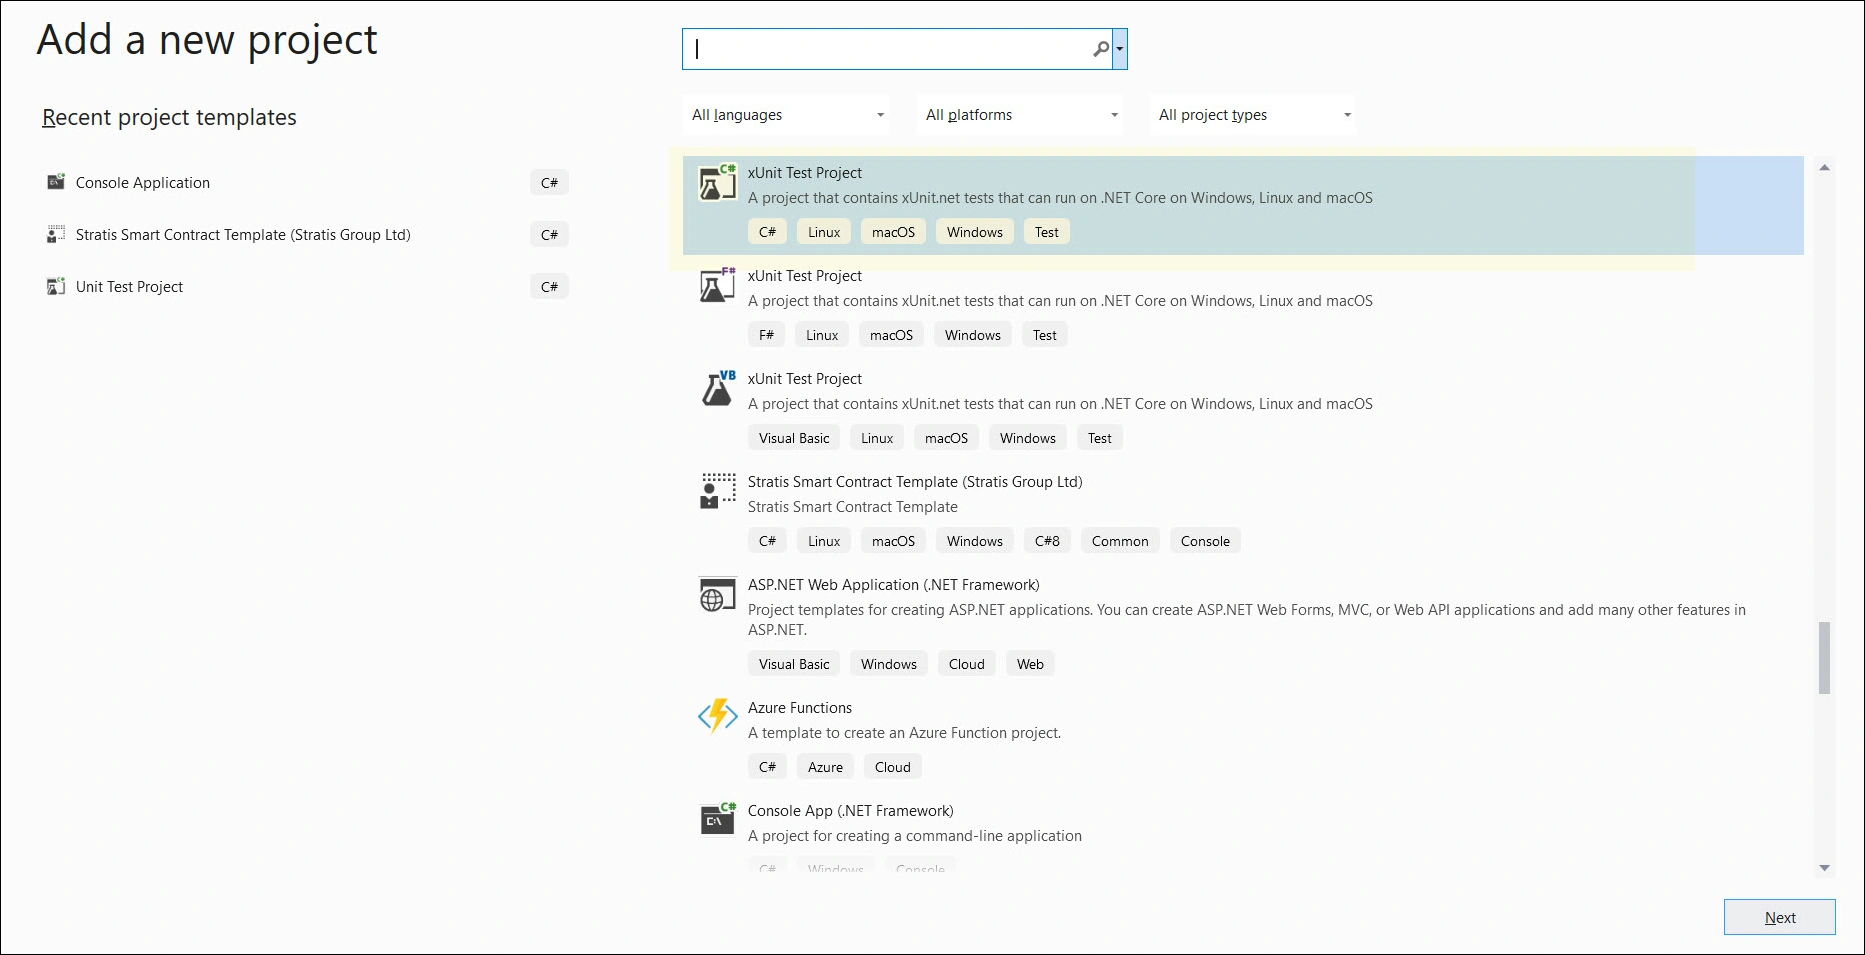
Provide Project name,
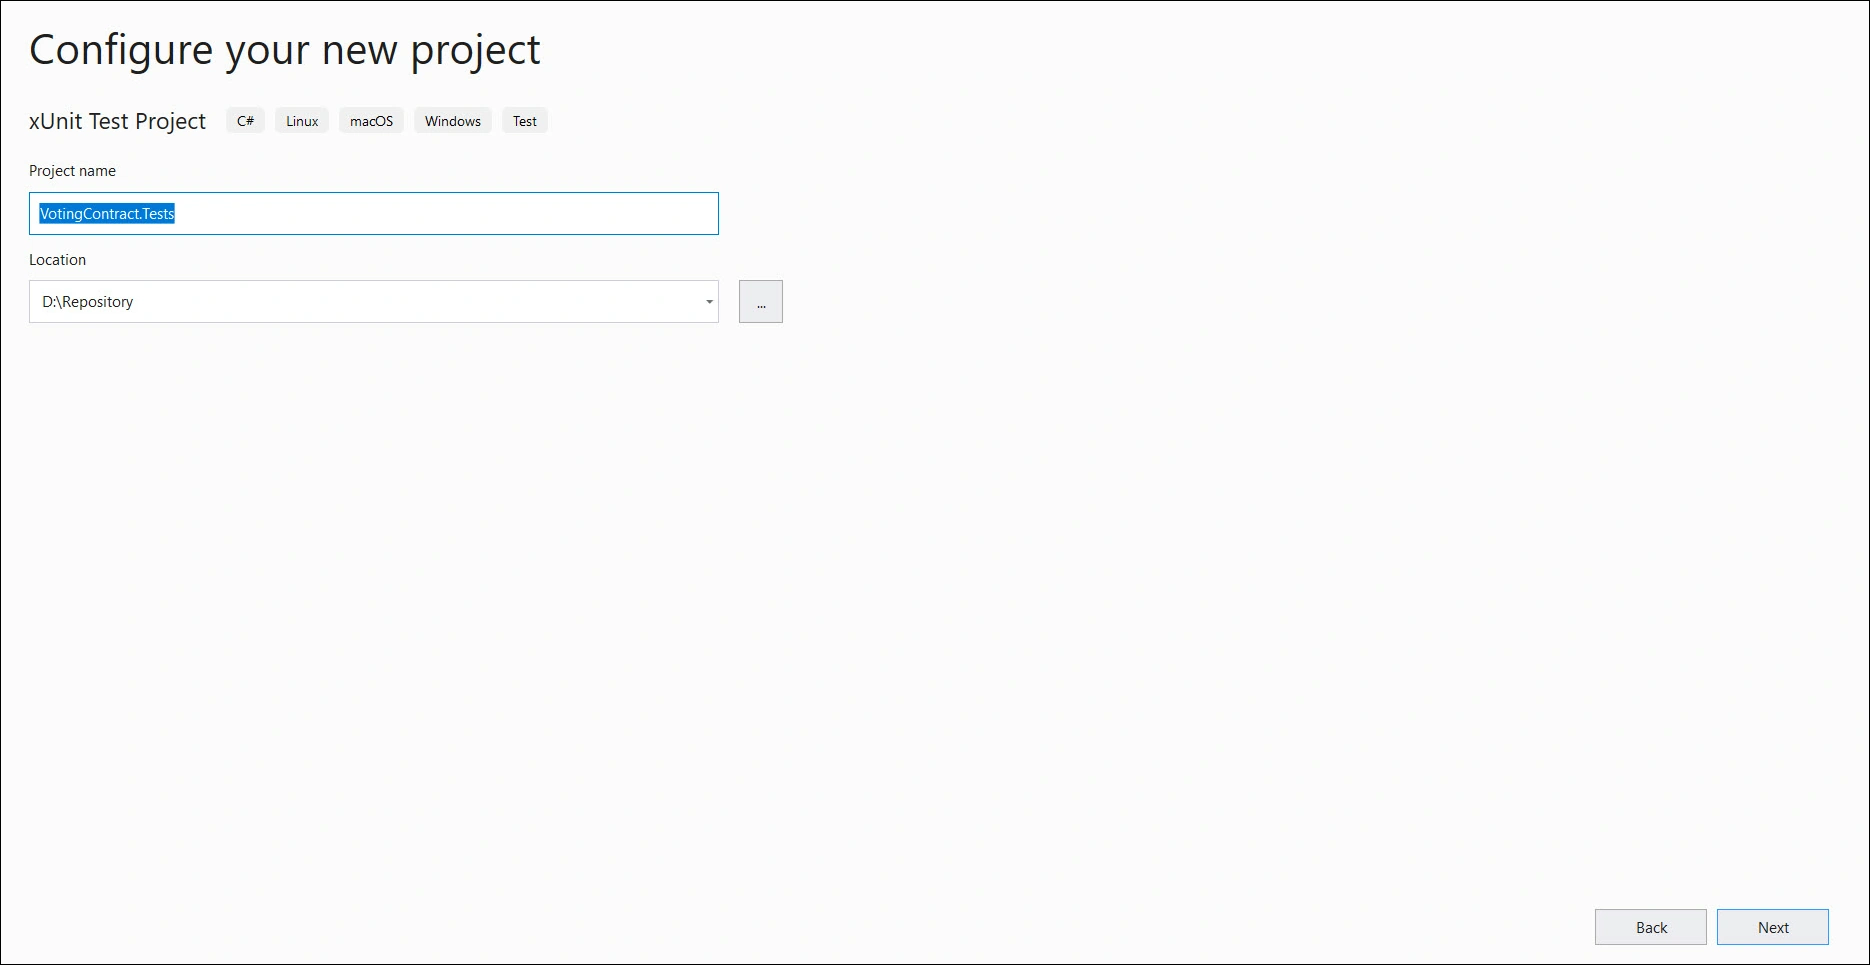
Choose targeted framework .NET Core 3.1.
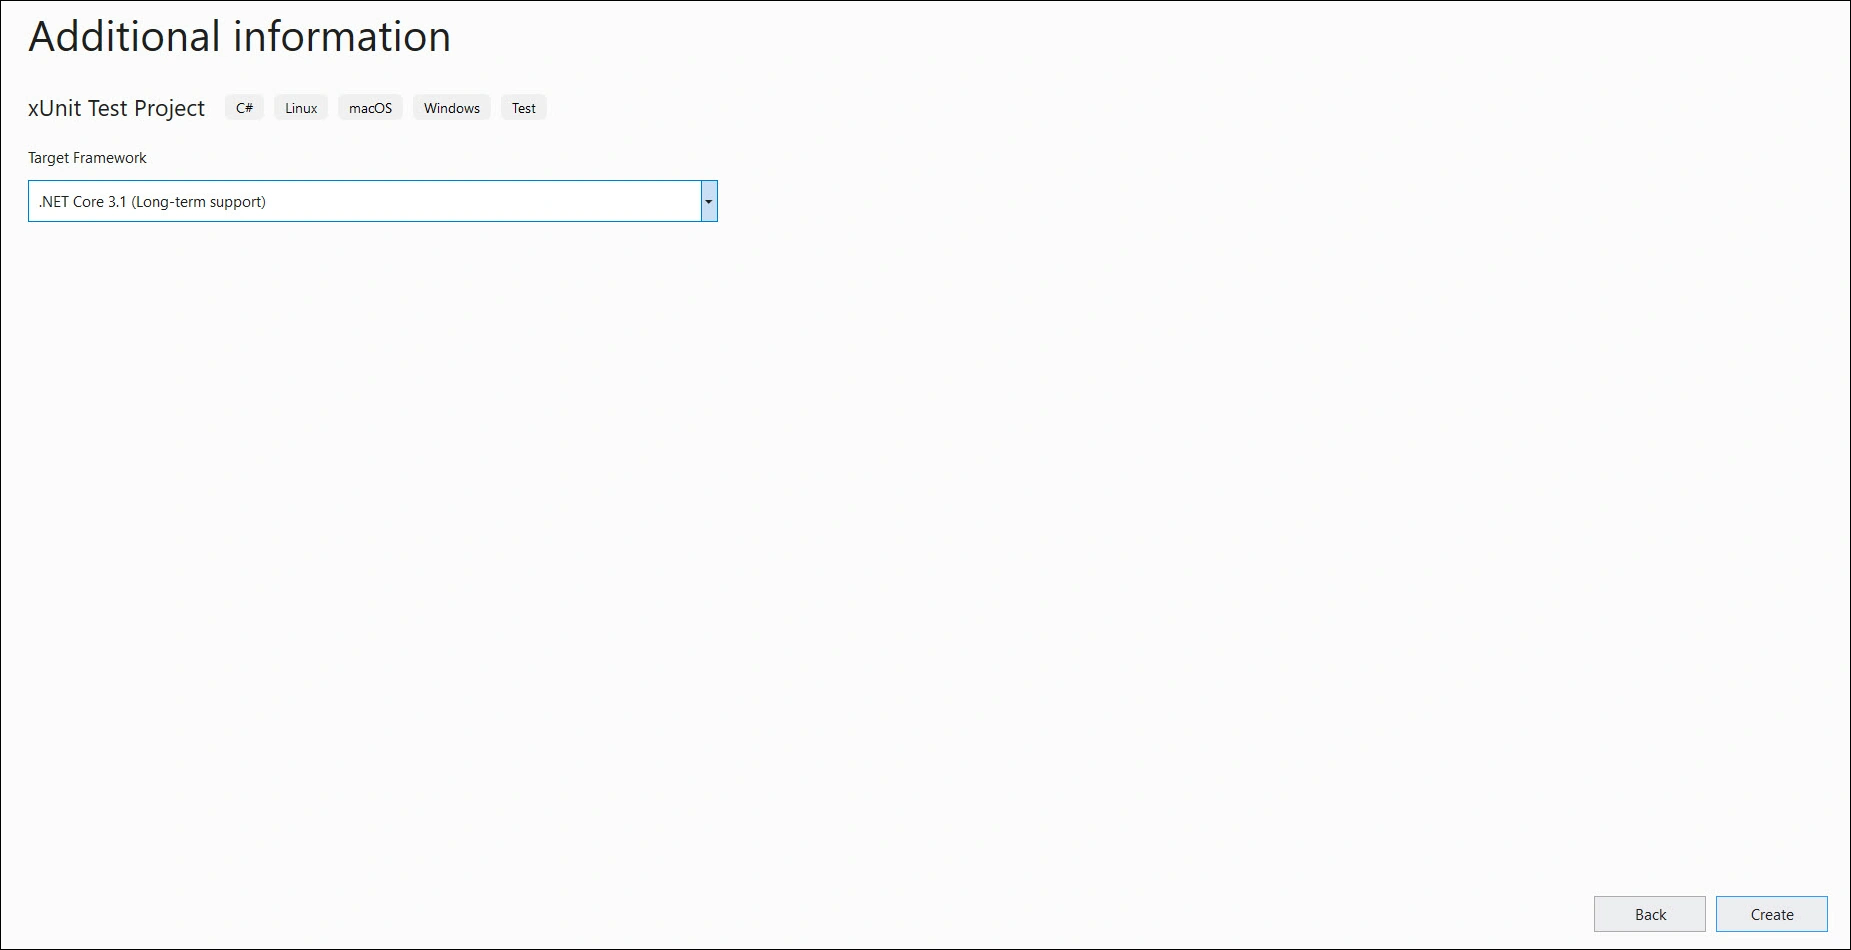
Next, Install require NuGet packages for test cases. Go to Tools > NuGet Package Manager > Package Manager console.
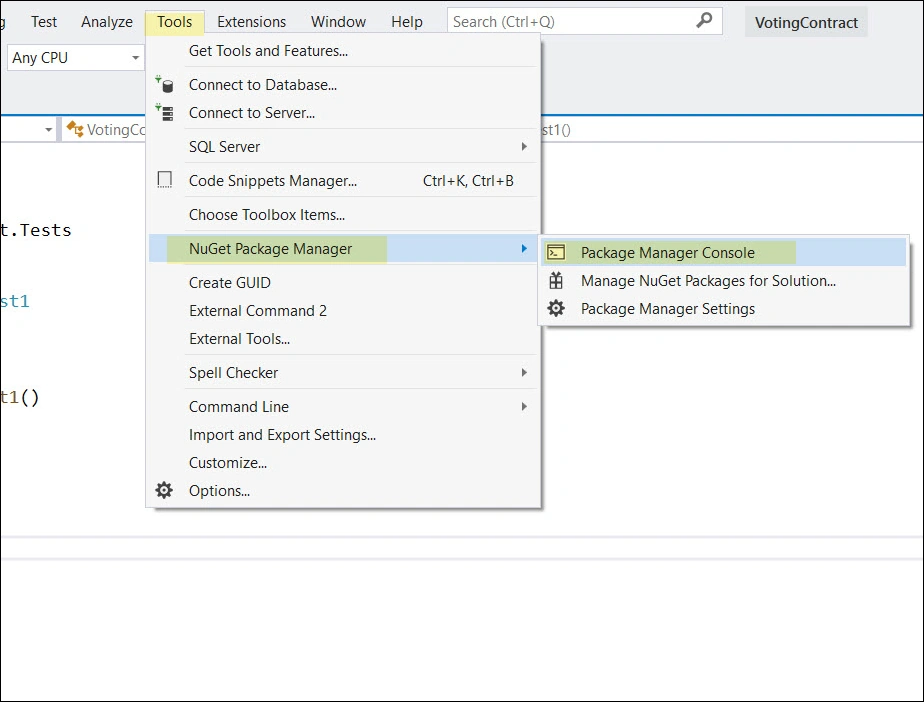
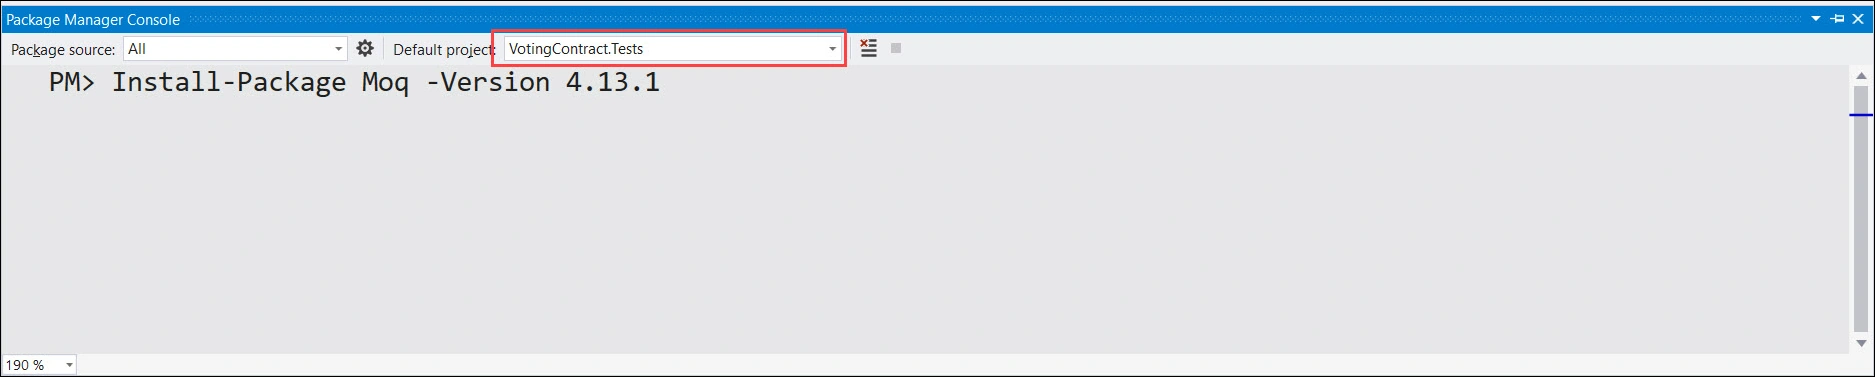
Install the following package. Make sure to select the Test project.
Install-Package Moq -Version 4.13.1
Install-Package Stratis.SmartContracts.CLR -Version 2.0.1
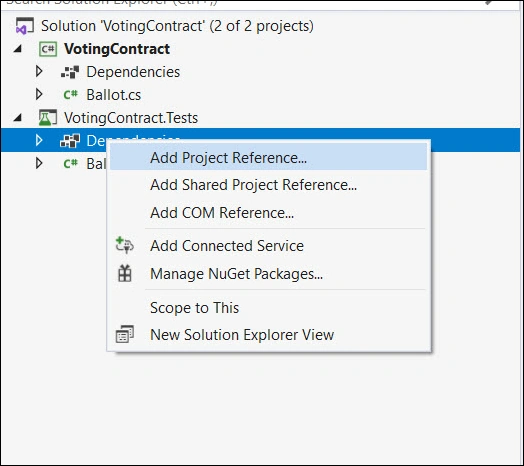
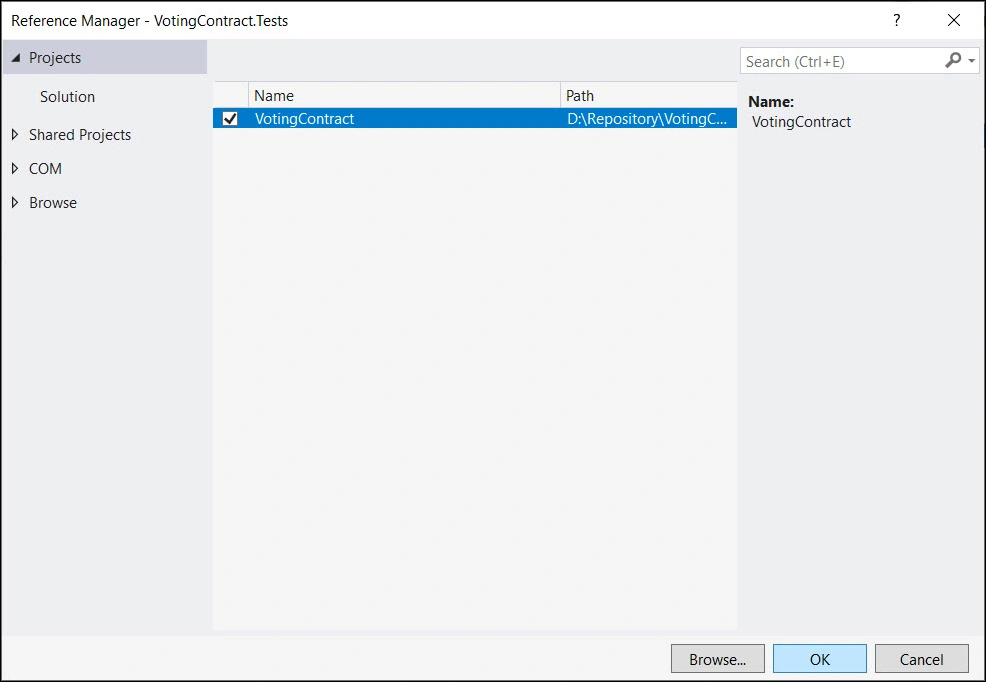
We also need to add a reference to the Smart Contract library project.
Rename the class name from UnitTest1 to BallotTests and add modify the code as below.
namespace VotingContract.Tests
{
    using Moq;
    using NBitcoin;
    using Stratis.SmartContracts.CLR.Serialization;
    using Stratis.SmartContracts.Core;
    using Xunit;
    using Xunit.Abstractions;
    using Proposal = Ballot.Proposal;

    public class BallotTests
	{
        private readonly ITestOutputHelper testOutputHelper;
        private Serializer serializer;
        private Mock < Network > network;

        public BallotTests(ITestOutputHelper testOutputHelper)
		{
            this.testOutputHelper = testOutputHelper;
            this.network = new Mock < Network > ();
            this.serializer = new Serializer(new ContractPrimitiveSerializer(this.network.Object));
        }

        [Fact]
        public void SerializePraposalAsHexString()
		{
            var proposals = new [] {
                new Proposal { Name = "Joe Biden", VoteCount = 0 },
                new Proposal { Name = "Donald Trump", VoteCount = 0 }
            };

            this.testOutputHelper.WriteLine(this.serializer.Serialize(proposals).ToHexString());
        }
    }
}
Here, we created a proposal array with two records, serialized it, and created a hex string. If you don't understand this code at this point, don't worry! we'll understand more about test cases in some other article.
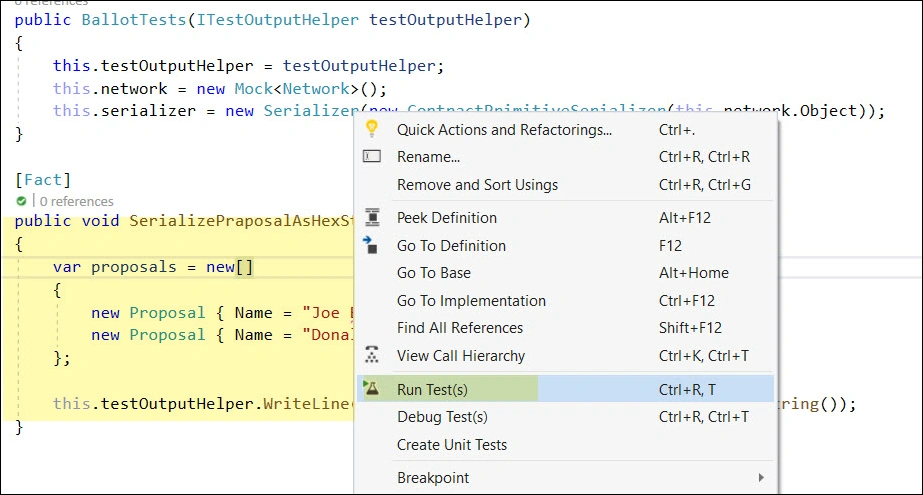
Run the test by right click and select the "Run Test(s)" options.
Then, go to text explorer and open the test summary.
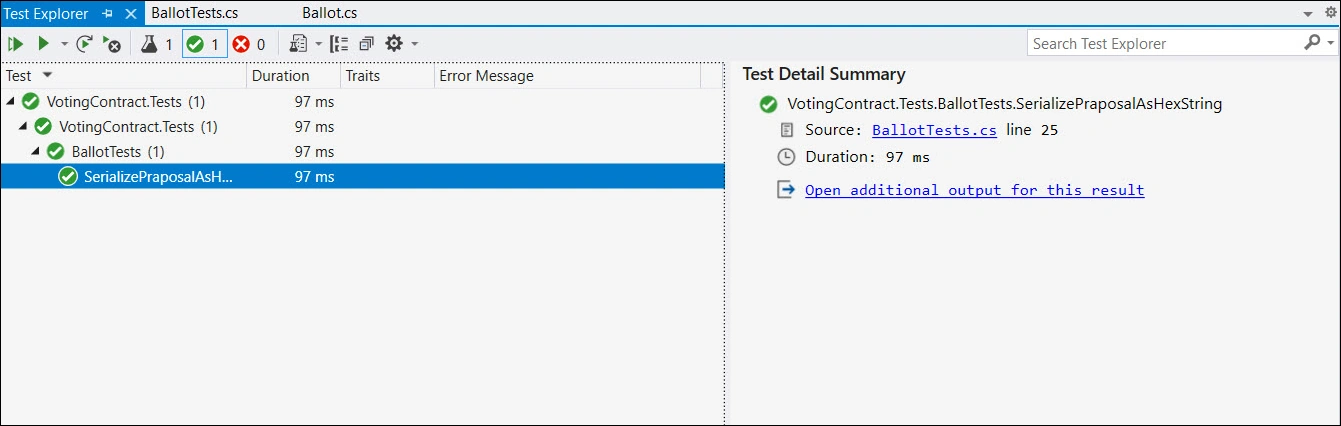
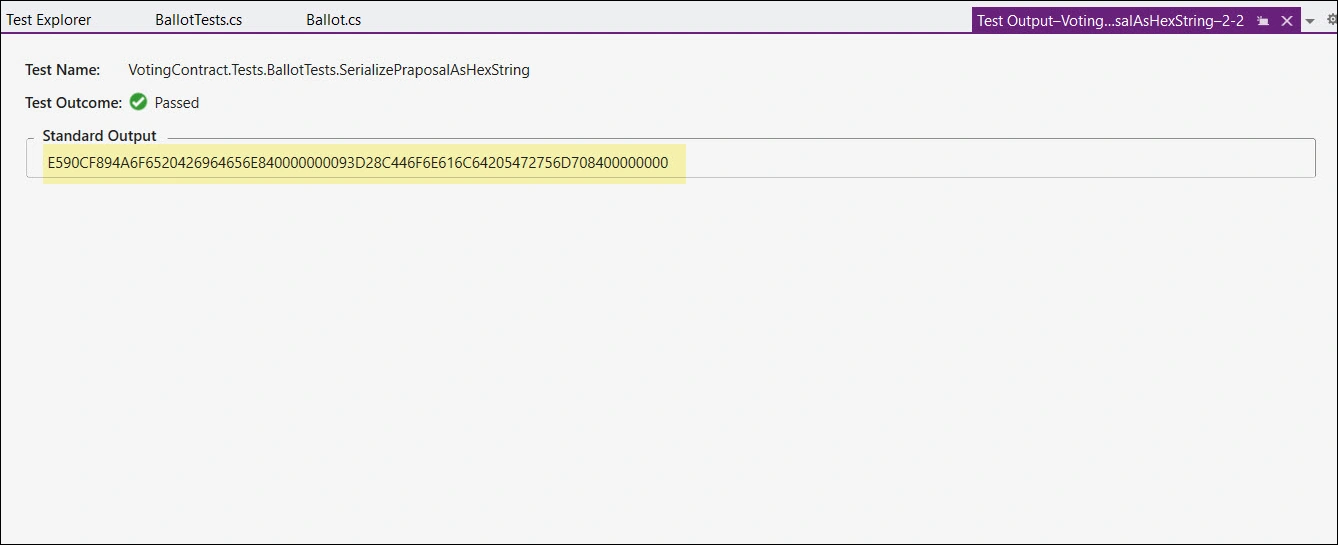
Then, click on "Open additional output for this result" You should see the output. That we need to pass in parameters while deploying the Smart Contract like:
parameters: [
 "10#E590CF894A6F6520426964656E840000000093D28C446F6E616C64205472756D708400000000"
]
Validation and Compilation
Next, we’ll validate and compile our contract using the Sct tool.
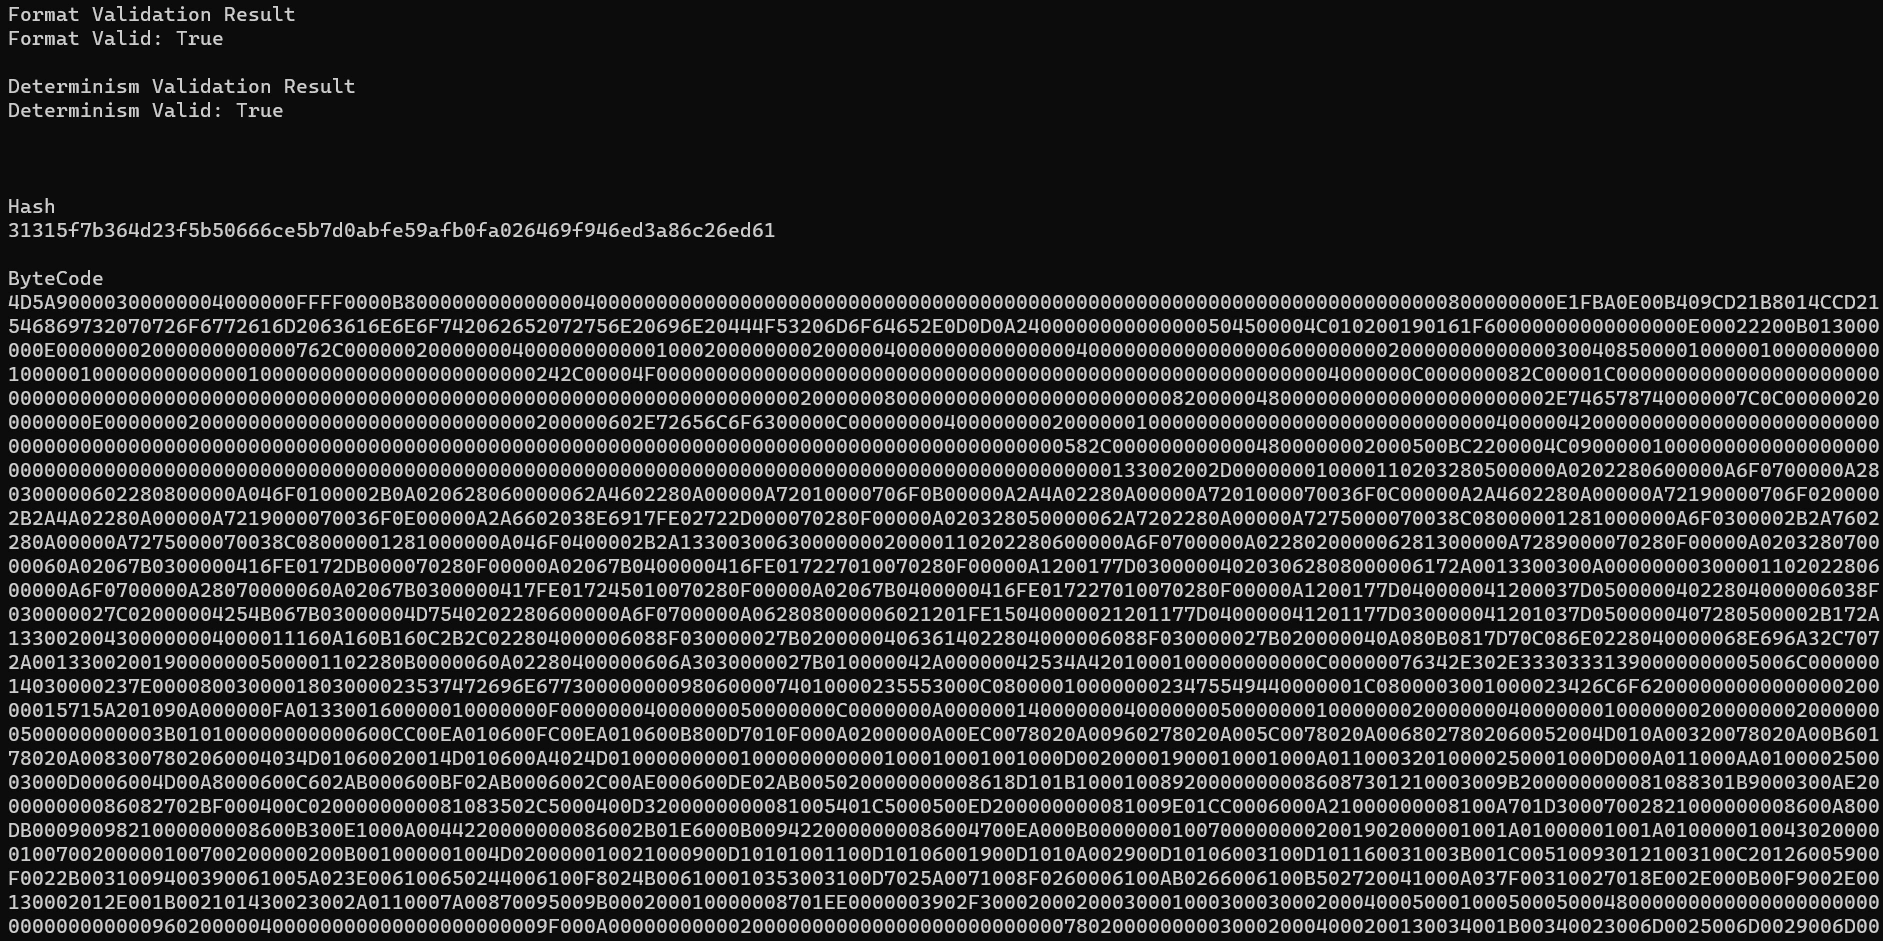
If the contract is valid, you’ll get the bytecode of the contract, that will be used while deploying the contract.
So, go to the sct project directory and run the below commands.
cd src/Stratis.SmartContracts.Tools.Sct
dotnet run -- validate [CONTRACT_PATH_HERE] -sb
Deployment
Wallet Load
Pass the credentials of the pre-defined wallet in the load wallet API /api/Wallet/load.
| Parameters | Value |
| Name | cirrusdev |
| Password | password |
This API is to make sure that the private chain is running properly, and we are ready to go to the next step.
Get Wallet Addresses to Test the Contract
The contract requires some wallet addresses for chairperson and voters, and the wallet address we use should require some balance to execute the transaction.
So, to grab those addresses, let’s hit the API endpoint: /api/Wallet/balance. it will return the wallet address along with the balance of each.
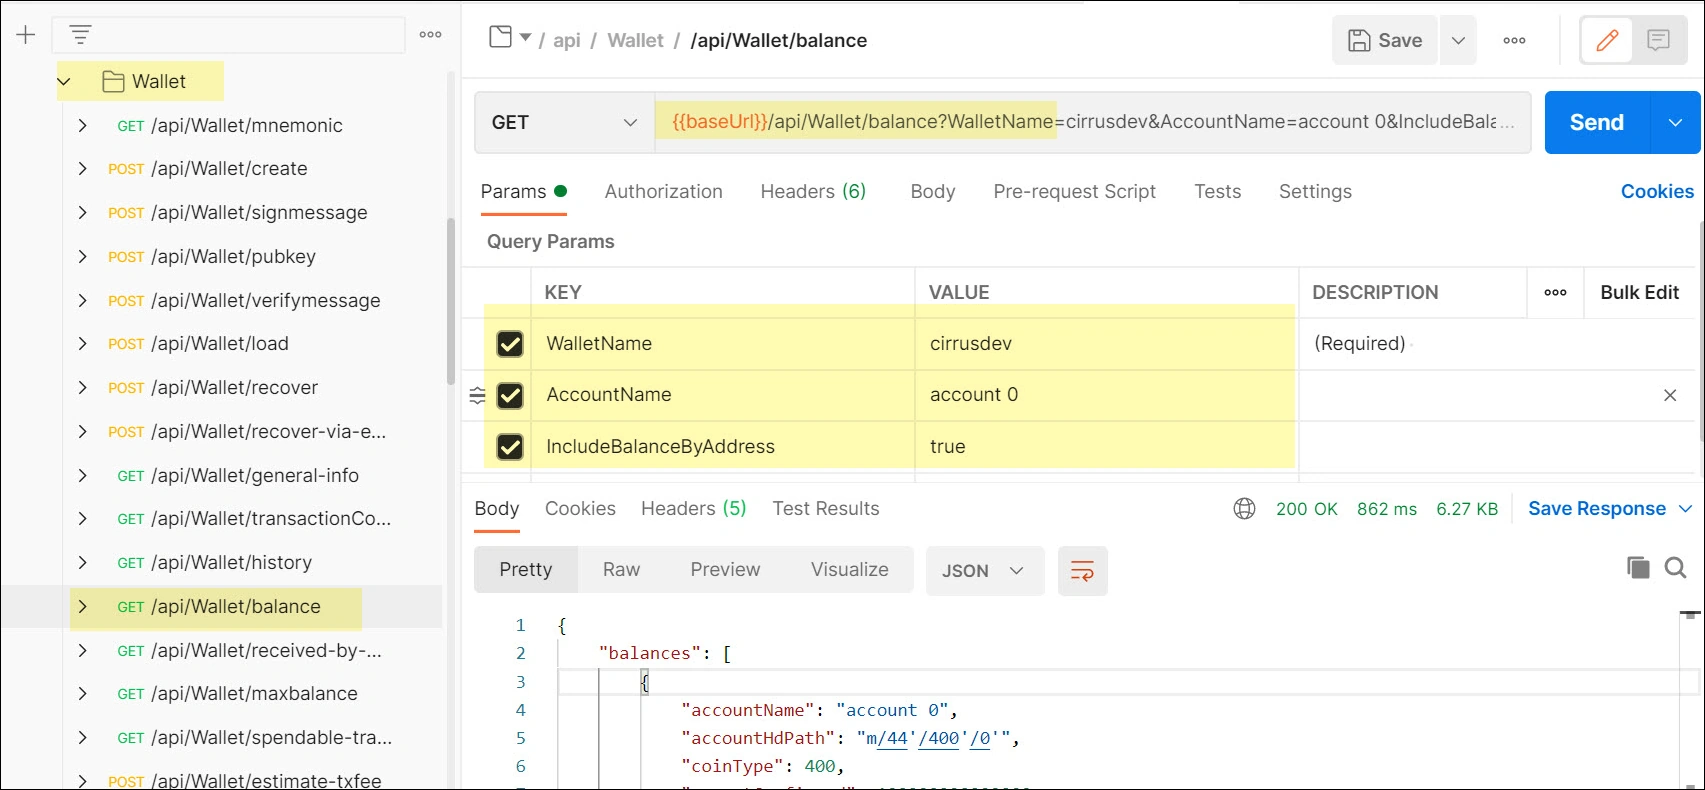
Sample response:
Manish KumarPosted Feb 4, 2022, 5:58 AM
Que 1. I have created an web api project and my proposals are not stattic, so i cant use unit testing to serialize.How to do serializtion in web api project. Que 2. I have to deploy contract everytime as proposals are changing?