Introduction
Here I will demonstrate an application to chat privately using SignalR. Before that, we need to know first what SignalR is! SignalR is an open and free library that can integrate real-time functionality into your web applications. Real-time means having your server respond as quickly as possible to the client as and when a request is made. There is a hell of a lot of areas where SignalR can come in handy to make your application handier and more integrated, and more responsive to the end user as well.
For instance, we have a requirement to show the user uploading a file and the percentage of that file that has been uploaded on the server. Or I had come across a scenario where we had to show the end user who would upload a CSV file with the 'n' number of rows and process each row for some validations. End users would wonder what would happen in the back end. So, wouldn't it be great if we could show him how many rows have been processed and how many are left out? Similar to a progress window.
Here comes the SignalR magic! Most of us think SignalR would help make chat applications, but NO! It has much more than chat! I don't think the makers of SignalR would have a thought in mind to make a chat application out of it! :P Much of a story now! Let's get into a bit of theory!
Theory
We will look into a simple image below, and from that image, we will try to gain some knowledge of the flow.
![Building A Private Chat Application Using SignalR]()
Nowadays, every application requires a load of server response in real time to sustain in the market, as user expectations have risen higher. Remote Procedure Calls (RPC) are the concept in the SignalR internally. SignalR provides an API that helps make the RPC between the server and the client. From the client side, server-side functions are called using JavaScript once the connection to the server is set. The SignalR API also helps create connections and manage them when required. In simple terms, SignalR provides a connection between server and client, letting the server call the functions on the client side and, from the client side, calling the server side.
SignalR starts with HTTP and then to a WebSocket if the connection is available. That somehow is called "Server-Push". From Wiki, "WebSocket is a protocol providing full-duplex communication channels over a single TCP connection." An advantage of using WebSocket is both client and server applications can use it. WebSocket is considered the most efficient and consistent communication medium as it can properly manage server memory and, being a full duplex communication, has low latency. These are the considerations made with SignalR, which make it more efficient. The SignalR decides the transport based on the browser. i.e., if the browsers support the kind of transport required by the SignalR, we will discuss the kinds of transport next:
HTML Transports
- WebSockets- as we have already discussed. This transport is considered persistent, creating a two-way connection between the client and server.
- Server-Sent events- also called Event Sources, are supported by all browsers.
Comet Transports
Comet is usually a web application model in which a long-held HTTP request allows the server to post data to a client (browser).
- Forever frame- This is supported by Internet Explorer only. Creates a hidden frame making a request to the endpoint on the server. The server keeps pinging the client or sending the script to the client, thus providing a one-way connection, creating a new connection on every request.
- Ajax Polling- This is long polling, which is never persistent. This polls the request and waits until and unless the server receives the response. This introduces latency, and the connection resets.
Practical
We will be creating a chat application to explain the flow of SignalR. We install the SignalR, create a hub to which the client will interact, calling the server methods, and in return, the server responds and interacts with the client. You can directly add a new project in VS for the SignalR or create an MVC project and install the SignalR package/libraries from the Nuget.
PM > Install-Package Microsoft.AspNet.SignalR
This downloads all the dependencies required for the SignalR.
![Building A Private Chat Application Using SignalR]()
After the successful installation, the above dll's or packages are installed into your project. There will be a class file that needs to be added to the root of your project, which would look like this,
using Owin;
using Microsoft.Owin;
[assembly: OwinStartup(typeof(SignalRChat.Startup))]
namespace SignalRChat
{
    public class Startup
    {
        public void Configuration(IAppBuilder app) { // Any connection or hub wire up and configuration should go here app.MapSignalR();
        }
    }
}
This is an OWIN-based application. The OWIN attribute specifies the property type, specifies the project's startup and the configuration method, and sets up the start-upmapping for the App. Every OWIN application will have a startup.cs class, where the component for the applicatstart-upeline is added. Another two script files will be added as we install the packages for SignalR.
![Building A Private Chat Application Using SignalR]()
These script files must be loaded onto the .cshtml page to activate the SignalR. Let's look into the code immediately; We must add a new hub class inside a Hub folder. Let's name that LetsChatHub.cs, which would look like this,
![Building A Private Chat Application Using SignalR]()
using System;
using System.Collections.Generic;
using System.Linq;
using System.Web;
using Microsoft.AspNet.SignalR;
namespace LetsChatApplication.Hubs
{
    public class LetsChatHub: Hub
    {
        public void Send(string name, string message, string connId)
        {
            Clients.Client(connId).appendNewMessage(name, message);
        }
    }
}
The above send method accepts the parameters, name (which you would give once you navigate onto the URL), and message (which the user would be sent from the UI). The other parameter is connId, which would help us have a private chat and not send it to every user who navigates to the site if you want every user to receive and send the messages who navigate to the URL. To allow every user access, the code you change as below,
namespace LetsChatApplication.Hubs
{
    public class LetsChatHub: Hub
    {
        public void Send(string name, string message)
        {
            Clients.All.appendNewMessage(name, message);
        }
    }
}
The Send method is requested from the client with the parameters after the connection is set on the client side, and once the server receives the request, it processes and sends back the response to the client using the appendNewMessage. This appendNewMessage method is added on the client side to receive the response and display it on the UI to the client. The client-side code would look like below: you need to add a controller; let's suppose: "LetsChat" with an action "LetsChat" and add a view to that with the below code to it.
@{
    ViewBag.Title = "LetsChat";

}


<h2>Lets Chat</h2>
<link href="~/Content/sweetalert.css" rel="stylesheet" />

<div class="form-group col-xl-12">
    <label class="control-label">Your connection Id</label><br />
    <input type="text" class="col-lg-12 text-primary" id="frndConnId" placeholder="Paste your friend's connection Id" /><br /><br />
    <label class="control-label">Your Message</label><br />
    <textarea type="text" class="col-lg-10 text-primary" id="message"></textarea>

    <input type="button" class="btn btn-primary" id="sendmessage" value="Send" /><br /><br />
    <img src="~/Content/smile.jpg" width="20" height="20" id="smile" style="cursor:pointer"/>
    <img src="~/Content/uff.jpg" width="20" height="20" id="ufff" style="cursor:pointer" />
    <div class="container chatArea">
        <input type="hidden" id="displayname" />
        <ul id="discussion"></ul>
    </div>
</div>
<br />
<input type="hidden" id="connId" />

<!--Reference the autogenerated SignalR hub script. -->
@section scripts {
    <script src="~/Scripts/jquery-1.10.2.min.js"></script>
    <script src="~/Content/sweetalert.min.js"></script>
    <script src="~/Scripts/jquery.signalR-2.2.0.min.js"></script>
    <script src="~/signalr/hubs"></script>
    <script>
        //var userName = "";
        //var sessionVal = '';
        $(function () {
            // Reference the auto-generated proxy for the hub.
            var chat = $.connection.letsChatHub;

            debugger;

            // Create a function that the hub can call back to display messages.
            chat.client.addNewMessageToPage = function (name, message) {
                // Add the message to the page.
                $('#discussion').append('<li><strong>' + htmlEncode(name)
                    + '</strong>: ' + htmlEncode(message) + '</li>');
            };
            // Get the user name and store it to prepend to messages.
            swal({
                title: "Lets Chat!",
                text: "<span style='color:#f8bb86;font-weight:700;'>Enter your name:</span>",
                type: "input",
                html: true,
                showCancelButton: true,
                closeOnConfirm: true,
                animation: "slide-from-top",
                inputPlaceholder: "Your Name"
            },
            function (inputValue) {
                userName = inputValue;
                if (inputValue === false) return false;
                if (inputValue === "") {
                    swal.showInputError("You need to type your name!");
                    return false;
                }
                $('#displayname').val(inputValue);
            });
            // Set initial focus to message input box.
            $('#message').focus();
            $('#message').keypress(function (e) {
                if (e.which == 13) {//Enter key pressed
                    $('#sendmessage').trigger('click');//Trigger search button click event
                }
            });
            $("#smile").click(function () {

            });
            // Start the connection.
            $.connection.hub.start().done(function () {

                $('#sendmessage').click(function () {
                    // Call the Send method on the hub.
                    var connId = $("#connId").val();
                    var frndConnId = $("#frndConnId").val();
                    var finalConnId = frndConnId == "" ? $.connection.hub.id : frndConnId;
                    chat.server.send($('#displayname').val(), $('#message').val(), finalConnId);
                    $("#connId").val($.connection.hub.id);
                    if (frndConnId == "") {
                        swal("You connection Id", $.connection.hub.id, "success");
                    }
                    // Clear text box and reset focus for next comment.
                    $('#discussion').append('<li><strong>' + htmlEncode($('#displayname').val())
                   + '</strong>: ' + htmlEncode($('#message').val()) + '</li>');
                    $('#message').val('').focus();
                });
            });

        });
    // This optional function html-encodes messages for display in the page.
    function htmlEncode(value) {
        var encodedValue = $('<div />').text(value).html();
        return encodedValue;
    }
    </script>
}
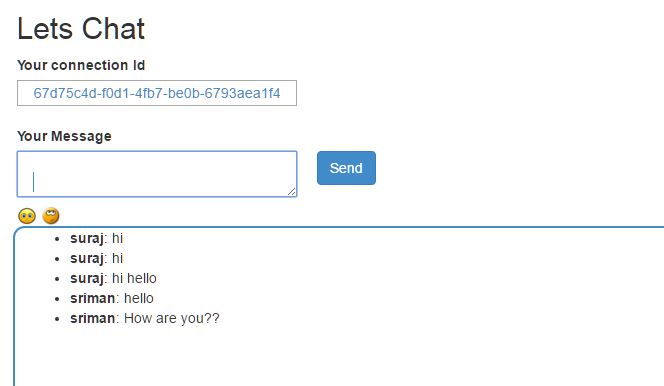
We have a normal UI to add your message and send button to call the server methods. Let's understand the code above part by part.
var chat = $.connection.letsChatHub;
Here, we set the connection to the Hub class. As you can notice, letsChatHub is the same hub class file name we added to set up the server. The convention is as follows: the methods' initial or the class name starts in lowercase. From here, we use chat to access the Send method.
$.connection.hub.start().done(function()
            {
            $('#sendmessage').click(function()
                         {
                        // Calls the Send method on the hub. chat.server.send($('#displayname').val(), $('#message').val(), finalConnId);
chat.server.send is self-explanatory; it sets the chat connection to call the server Send method once the connection is set and started.
chat.client.appendNewMessage = function (name, message) {
//
}
This is called when the Server receives the request and calls back the method on the client side.
How would the sample work?
The sample provided for download will be having few instructions to follow,
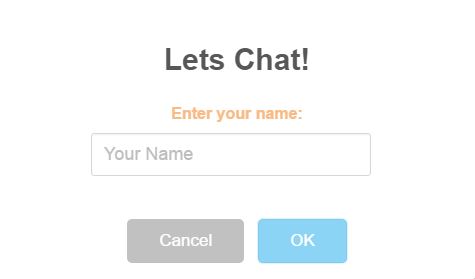
- When you navigate to the LetsChat/LetsChat route, an alert will pop up asking you for the name with which you would like to chat. Sweet Alert !!
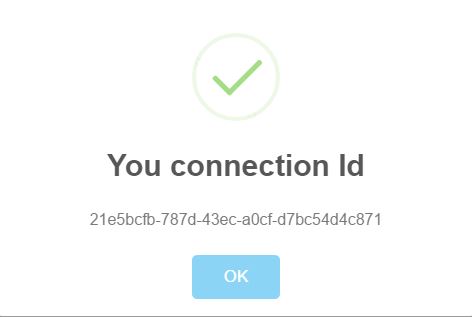
- Once you enter the name, you see a textbox that asks you for "Your friend's connection Id", but since you are starting the chat, you send a message, and another pop-up comes up with your connection ID, which you need to share with your friends to share your message. Remember, only those with your ID and who use it while chatting can see and send messages to you.
- When your friend navigates, he ought to generate his connection ID and share it to set up your connection completely. Thus, you need to have the connID to whom you will send it and vice-versa with your friend. Then chat!! :)
If you want to send messages to all and make that common, use the Clients. All code snippets to send. Another interesting thing that was figured out is the use of @section scripts{}, which lets the Signal R scripts render and active on your page, and also, using the @section scripts also provides your code a good outlook.
Share and Send files using SignalR
Ooops!! A nice question, right? Ideally, it is not advised; rather, I would not recommend sending or sharing files using Signal R. There is always a better way to accomplish that. The idea would be to use API; you can have an upload area and use SignalR to show the progress, and once the upload completes, update the user regarding the completion and generate a download link on the UI for the users to download and view the file. This is not always the best idea, but it is just another one. :)
Conclusion
This is just a simple Chat application you can use to chat with your friends if you host on Azure or any other domain. But again, SignalR is not just this much. There are a lot of other effective uses of SignalR. I will be sharing more utility of SignalR in future articles.
References
Read more articles on SignalR,