

Introduction
In this article, I will show you how to change the Android application icon using Android Studio. Icons are part of the graphical user Interface of the mobile application.
Requirements
- Android Studio version 2.3.3
- PNG Image
- Android Emulator (or) Android mobile
- Download link (Android Studio)
Step 1
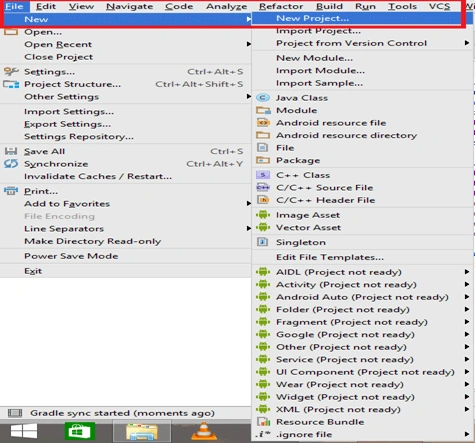
Open Android Studio and start a new Android Studio Project.
Step 2
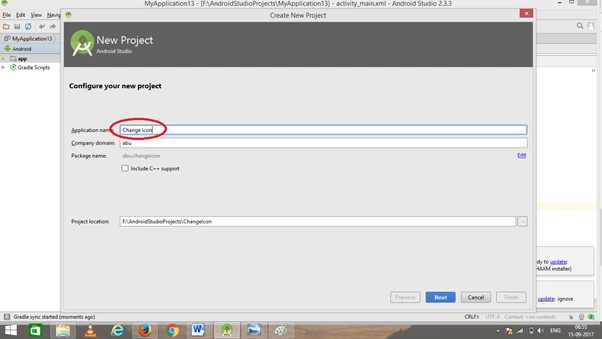
You can choose your application name and choose where your project is stored. If you wish to use C++ for coding the project, mark the "Include C++ support", and click the "Next" button.
Step 3
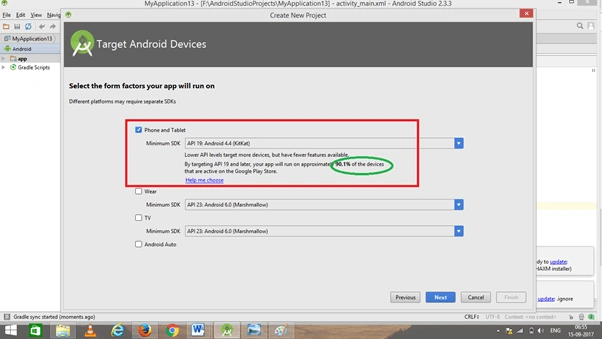
Now, select the version of Android and select the target Android devices. We need to choose the SDK level which plays an important role to run the application.
Step 4
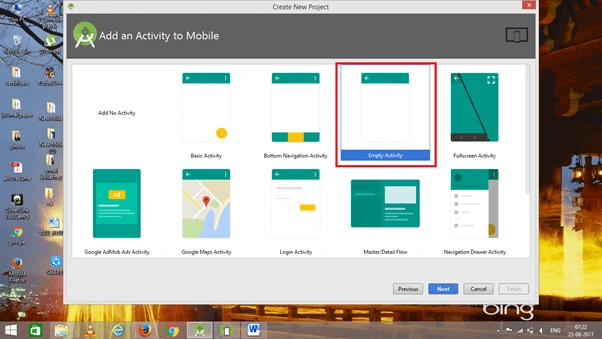
Now, add the activity and click the "Next" button.
Step 5
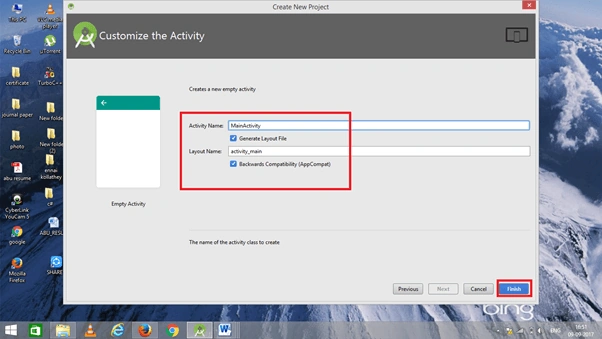
Add Activity name and click "Finish".
Step 6
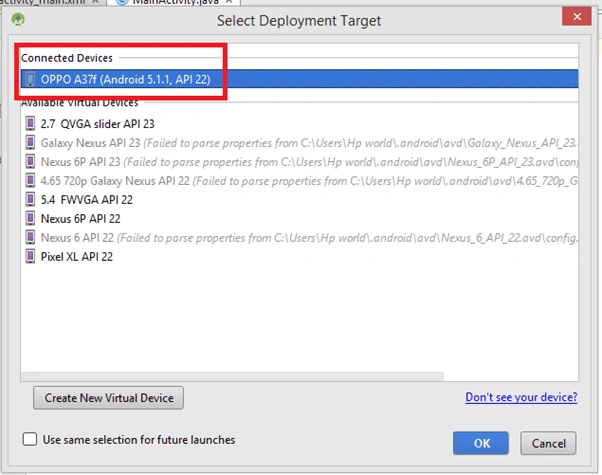
Then click the "Run" button or press shift+f10 to run the project. And choose the virtual machine or Android device and click OK.
Step 7
We have successfully created the Android application.

Step 8
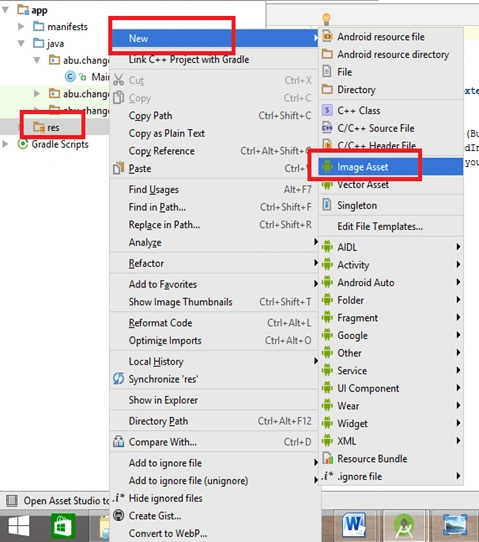
Now, go to (Res ⇒ New ⇒Image Asset).
Step 9
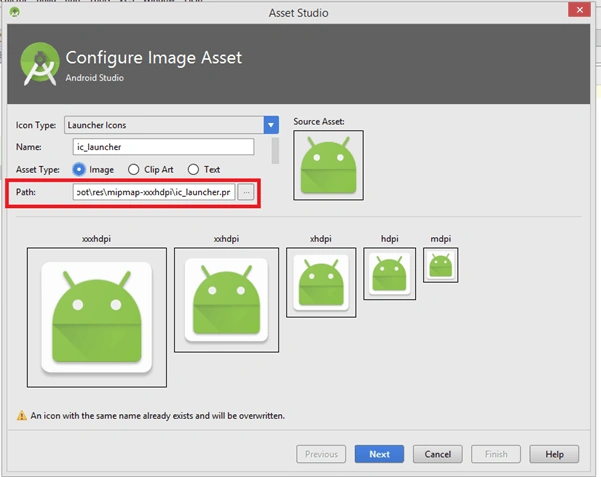
We can see the "Configure Image Asset" window and path of the icon. We need to change the path to change the application Icon.
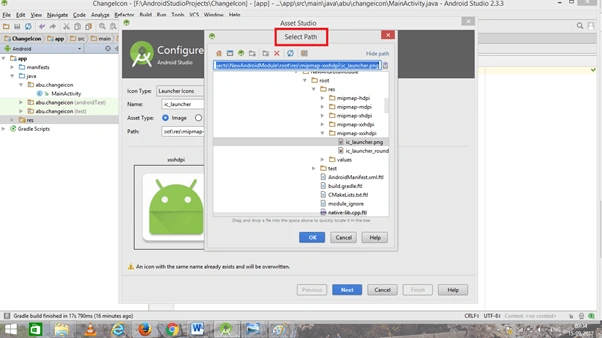
Step 11
After changing the path, the image of the icon has been changed.
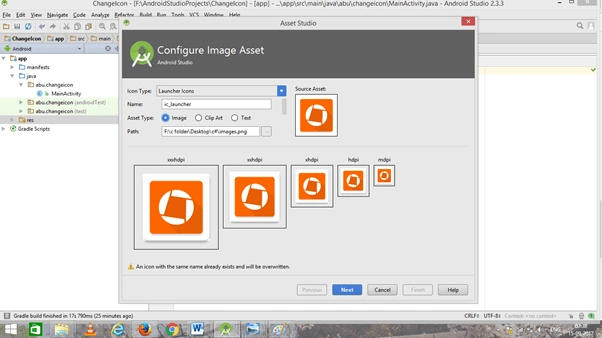
Step 12
Again, click the Run button or press shift+f10 to run the project. And choose the virtual machine or Android device and click OK to see the changes in the application icon.
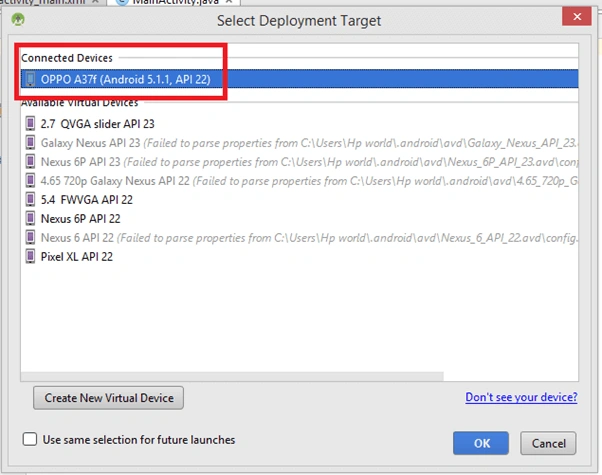
Conclusion
We have successfully changed the Android application icon.

Join the conversation! Your thoughts help the community grow.