

Introduction
As a Software Engineer, within our organization, while working on a workstation, we need to be connected to multiple resources like Web Servers, database servers, printers, active directory Servers, centralized file Servers etc. In order to be connected to all those multiple resources, our workstations need to be connected to the networks (ex: LAN, WAN). In a similar way, in our production environment, each virtual machine needs to connect to the multiple resources (like IP Address, other virtual machine etc.). In order to connect to any other resource, the virtual machine should be first connected to a virtual network. Just as we work in our Local Area Network (LAN), we can also create a network on the Cloud, which is referred to as Virtual Network (VNet). Think about VNet as a network of resources that can communicate with each other. I hope, you have now got a brief idea on why and what is a virtual network.
In this article, you will learn how to create a VNet, using Azure management portal. We will also learn about the basic attributes of a VNet, which are required, while creating the same.
Create a Virtual Network
After logging into Azure management portal, as shown in the below screenshot, select the virtual network to navigate to the blade to create a new VNet.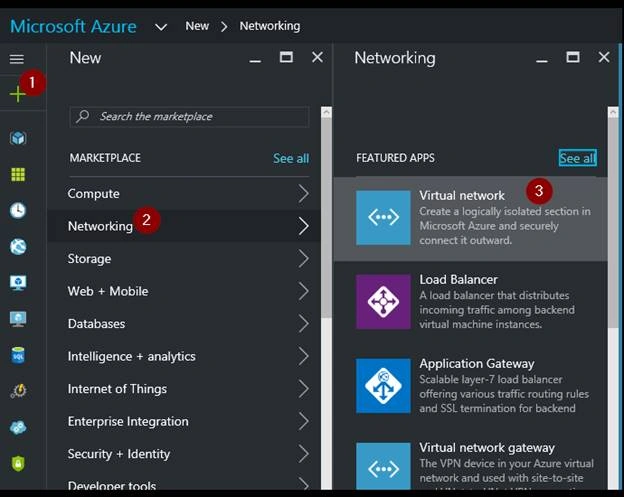
In the next step, you will need to choose the deployment model. 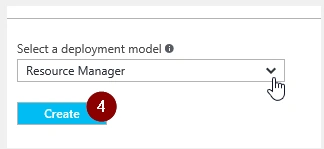
As shown in the screenshot, shown above, we have chosen “Resource Manager” as the deployment model where everything (ex: VNet, Subnet, NSG, NIC, IPAddress) is treated as a separate component or entity.
After clicking on the “Create” button, you will be taken the following blade, where you can provide all the VNet related attributes.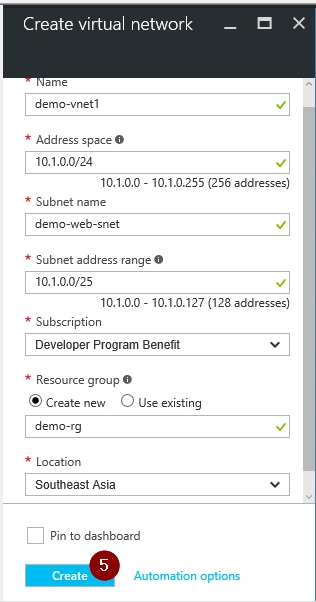
Let’s try to understand each attribute in detail.
- Address Space
Range of the IPAddress that can be assigned to the devices (it’s actually NIC’s to which an IPAddress can be assigned) within the network.
- CIDR Notation (Classless Inter Domain Routing)
The notation, using which IP Address is assigned. - In the example mentioned above, the address space (which comprises of 32 bits) of our network is 10.1.0.0/24. In this notation, “/24” denotes that the first 24 bits are used for the network address and the rest of the 8 bits are for IP address, which also means that we can have 255 addresses within our network. Read more about CIDR and the other basics of the networks by understanding IP Addresses, Subnets and CIDR notation for the networking.
- Subnet
It’s nothing but a segmentation of a virtual network. You can have multiple subnets in a given VNet. The examples are given below on the considerations, while creating your Cloud production environments. - You could create a subnet (10.1.0.0/25) to host all the Web Servers.
- You could create a subnet (10.2.0.0/25) to host all the database Servers
By default, a VNet must have a subnet to contain any devices within VNet. Once you provide all the mandatory fields, click “Create” button to create the virtual network, as shown below.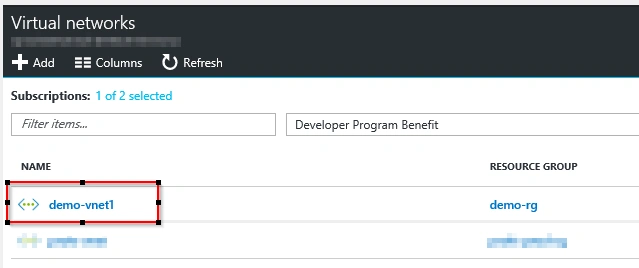
Other important points to remember
- The smallest subnet that Azure supports is a /29 and the largest is a /8 ( using CIDR notation).
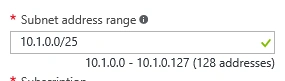
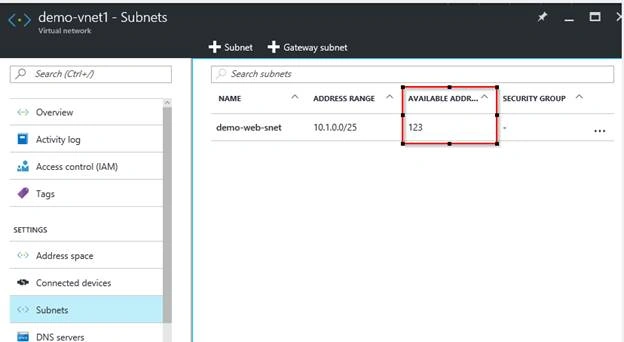
- Azure reserves some IP addresses within each subnet. The first and last IP addresses of the subnets are reserved for the protocol conformance, along with 3 more addresses (2nd, 3rd and 4th), which are used for Azure Services. As shown below, Azure management portal shows that we can create 128 addresses in a given subnet, which is based on the address range.
- However, when I navigate to the subnet’s blade of the “demo-web-snet”, I can see that we can just create 123 addresses.
Summary
In this article, we have learned what VNet and subnet are and also few of the basics of networking like CIDR notation.
I hope, you enjoyed the article. Your feedback is appreciated.
Join the conversation! Your thoughts help the community grow.