

This article will show you how to create a Local NuGet package repository and consume packages from it.
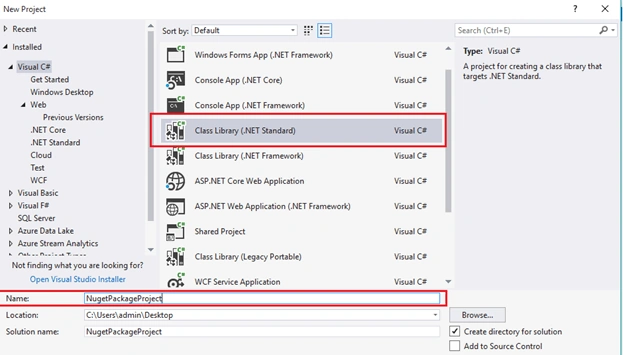
NuGet is a simple and convenient way to do this via a graphical user interface or a PowerShell-based command line named Package Management Console. I am going to create a Local NuGet package repository and consume packages from it. The steps are below, along with screenshots.
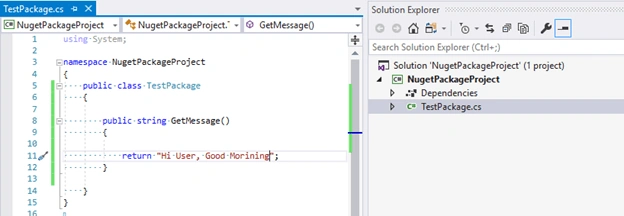
We create a new class that we will reuse in other projects,
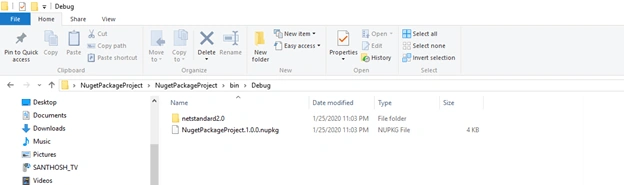
Build the project, and we can see the .nupkg file that is generated.

We can find these files that begin at the root of the project by navigating to C:\Users\admin\Desktop\NugetPackageProject\NugetPackageProject\bin\Debug
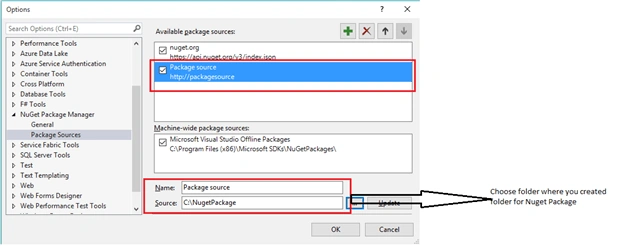
Let's configure Visual Studio to configure this new repository. Navigate to Tools | NuGet Package Manager | Package Manager Settings | Package Sources,
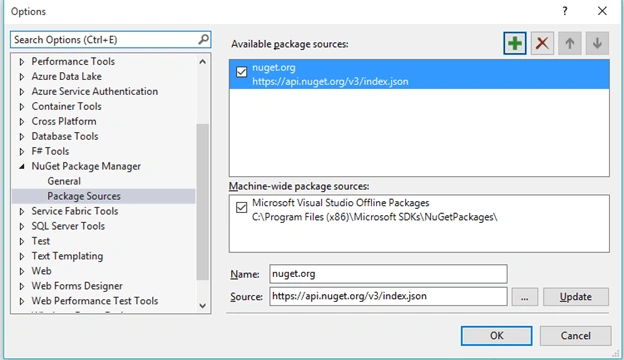
Let's add a name to this repository,
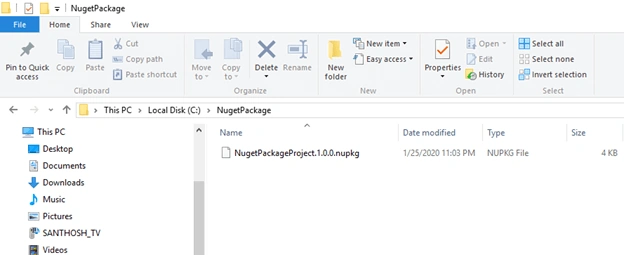
Let's place the NuGet package we just created,
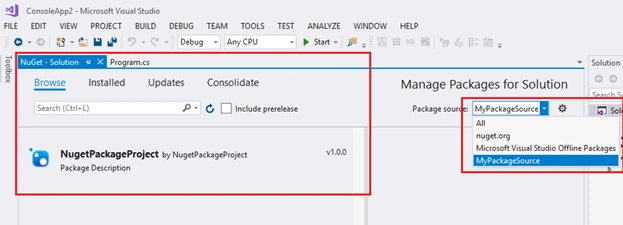
Right-click on the root project in Solution Explorer and select Manage NuGet Packages to open the NuGet Package Manager.
If we open the Package source drop-down list in the top-right corner, we can see our new package repository,
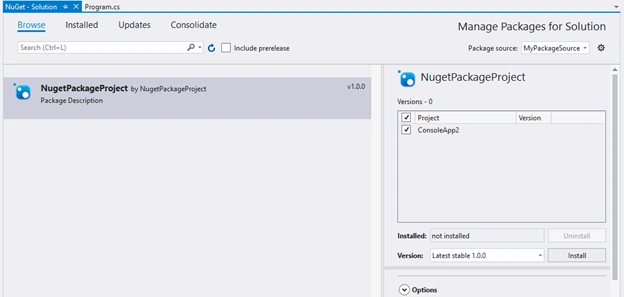
Now let's install this package in the current project by clicking on the Install button; the following dialog box will appear,
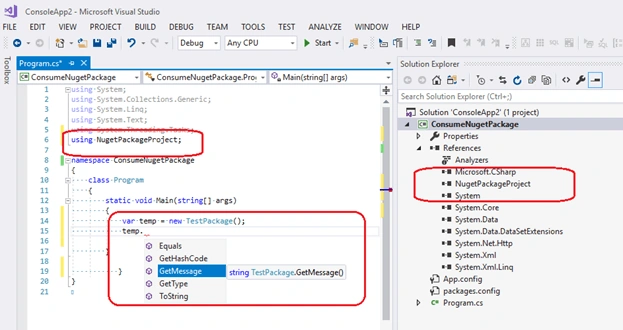
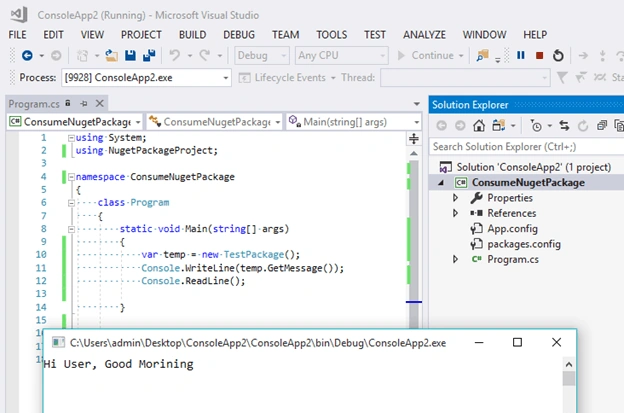
After having created our own NuGet package by following the Creating a NuGet package recipe, we will publish it in the NuGet public repository, but we have created an account on the NuGet website.
Emanuele CiriachiPosted Jan 22, 2021, 11:45 AM
The article does not explain the settings to create a NuGet package on build.
Pritesh MaturkarPosted Feb 13, 2020, 12:43 AM
Thanks you Santhosh Patil
Pritesh MaturkarPosted Feb 11, 2020, 11:06 PM
It is very nice. Thank for sharing. I have question How can publish NuGet package public repository on live. So Can anyone use this package
Raju PaladiyaPosted Feb 11, 2020, 1:38 PM
Ohhh !! Great, last week I was looking for the same. Thank you for share, this will help me in my development.