

Introduction
Xamarin is a platform for developing cross-platform and multi-platform apps (Ex. Windows phone, Android, iOS). In Xamarin platform, code sharing concept is used. The Xamarin Studio is available in Visual Studio also.
The Switch is used to change a setting between two states (ON and OFF).
Prerequisites
- Visual Studio 2015 update 3
The following steps are needed to be followed in order to create a Switch in Xamarin Android app, using Visual Studio 2015.
Step 1
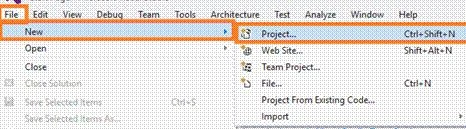
Click File--> New--> Project, or click (Ctrl+Shift+N) to open the list of different project types.
Step 2
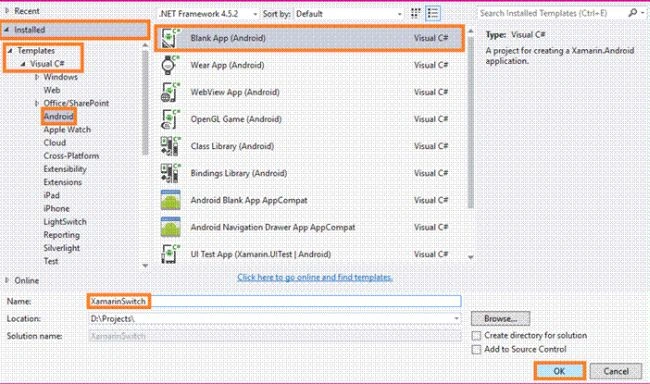
Select Installed -->Templates -->Visual C# --> Android -->choose Blank App (Android).
Next, give your Android app a name (Ex:sample) and give path of your project. Click OK.
Step 3
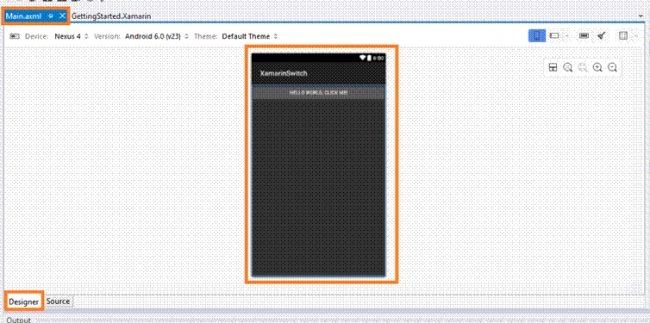
Now, go to the Solution Explorer, select Resource-->Layout--> double click to open Main.axml page. You can either select designer or source to design your application's homepage.

Step 4
In the main page designer, delete the default "Hello World" button. Go to the source panel and remove the button coding.
Now, delete the C# button action code from MainActivity.cs page.
Step 5
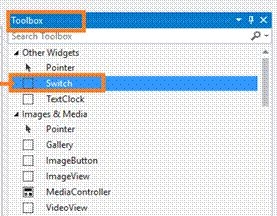
Next, go to the toolbox window and scroll down. Drag and drop the Switch on the page, wherever you want.
Step 6
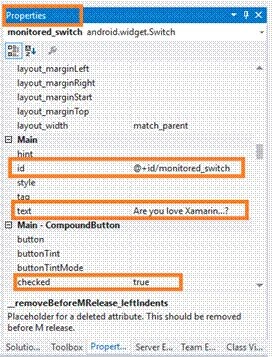
Next, go to the properties window and edit the Switch Text, Id and checked properties values.
(Ex: android:text="Are you love Xamarin...?" android:id="@+id/monitored_switch" android:checked="true").
Step 7
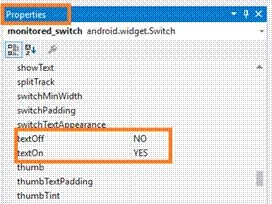
In this step, edit the Switch textOn and textOff value (Ex: android:textOn="On" android:textOff="Off" ).
Step 8
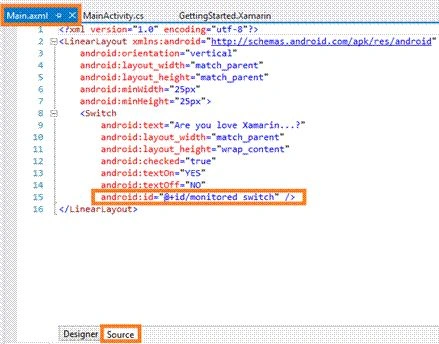
In this step, you will see the Main.axml page source panel. Note the id value.
Main.axml




Matthew WildingPosted Jul 23, 2021, 6:03 AM
Thank you so much!
Prasanna MuraliPosted Oct 22, 2016, 12:15 PM
Nice post
Bhavik PatelPosted Oct 17, 2016, 8:48 PM
Nice