

Today in this article I explain how to create a Report Server project in Business Intelligence and how to generate reports using a dataset.
In this article are also the following two topics:
- Creating a shared data source
- Creating a shared data set
To create a report in SQL Server, you must create a report server project where you will save your report (.rdl) and also save any other resources that are required for your report. After that you will create the actual report. We have to define the data source for the report and also define the data set and report layout. When the user runs this report then the actual data is shown on the screen and then you can export this report in a different format, like HTML, PDF, Excel, CSV and so on, or save this report.
Use the following procedure to create a report server project.
Step 1: Open Visual Studio
The fist and major step is to open Visual Studio then select "File" -> "New" -> "Project...".
Step 2: Select project type
The next step is to select the project type under the Business Intelligence project templates.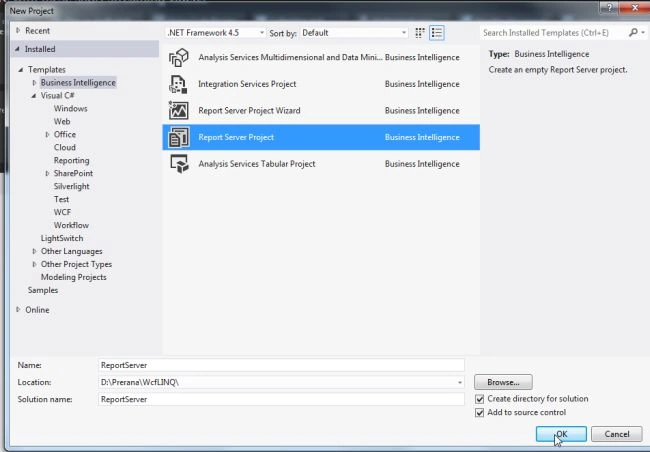
Step 3: Creating a shared data source
The next step is to create a shared data source because the data source contains the necessary data that is important for the report. When we create a shared data source then that means it can be used by any report in the same project. If a data source is not shared then that means it is not used by any other report and its definition is stored inside the report.
Step 4: Properties of data source
Then next window shows the properties of the shared data source in which the window we change the name, type and connection options of the data source.
In this window I change the name of the data source and select the type of data source as SQL Server and click on the edit button.
Step 5: Connection properties
The next window shows the connection properties of SQL Server.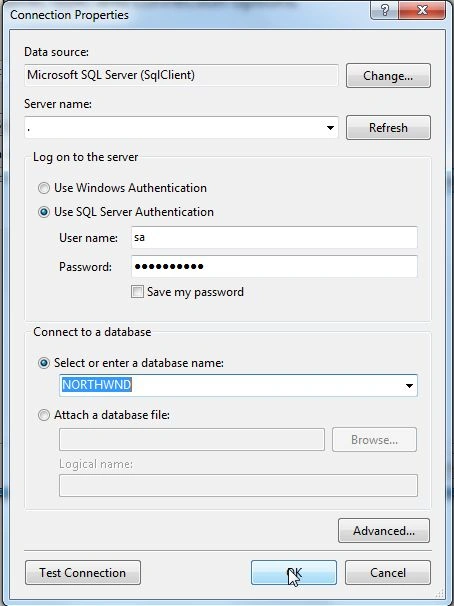
Now here you will see the connection string and click on the OK button.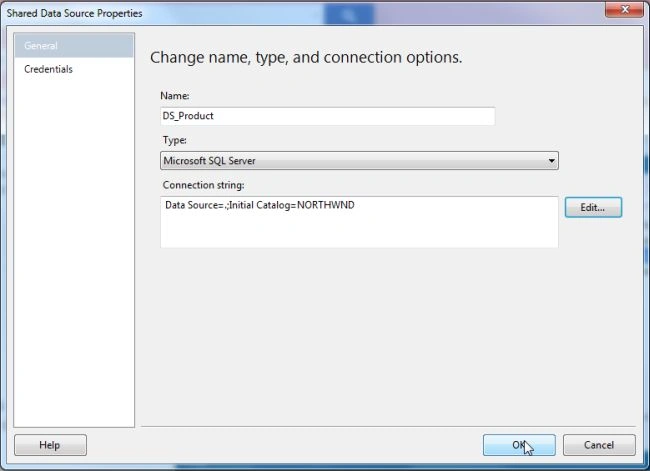
Step 6: Create shared datasets
The next step is to create a shared data set. The main advantage to creating a shared dataset is that it can be used by all reports in a given Reporting Services project.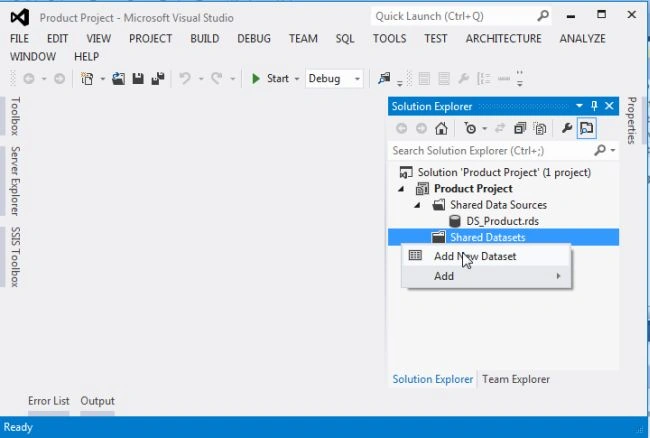
Step 7: Properties of datasets
Then next window shows the properties of shared datasets in which the window shows the data source and creates a query. Here we select the Query Designer button to create the query.
Step 8: Add table
After opening the Query Designer window the next step is to add a table from the database.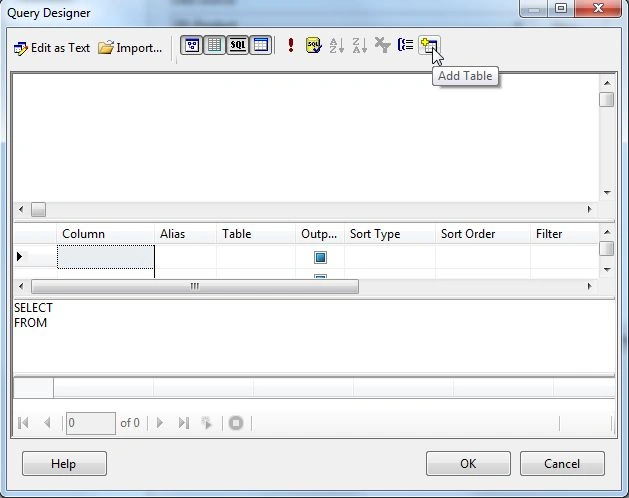
Then select the table.
Step 9: Select columns from the table
The next step is to select columns from the table.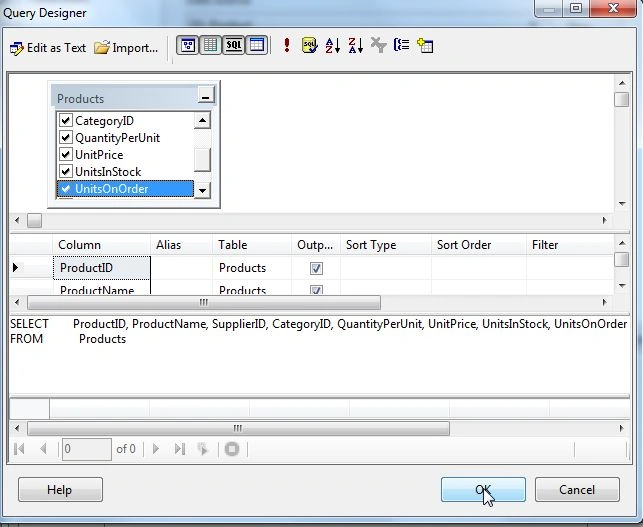
Then click on the OK button.
Step 10: Reports using shared data source
The next step is to generate a new report using the shared data source.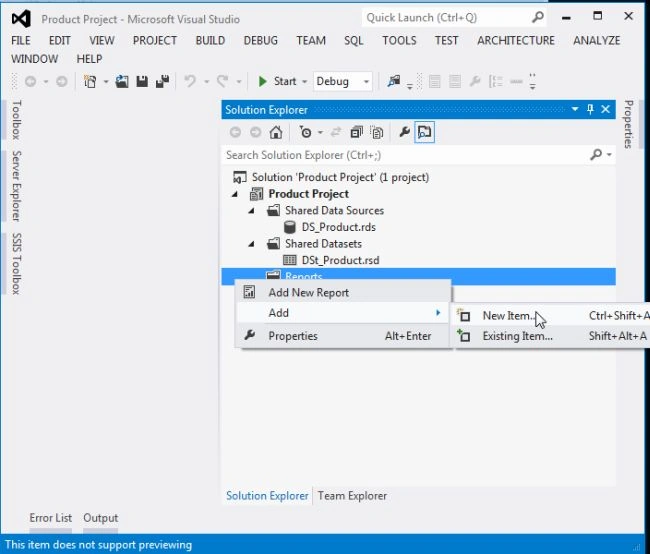
Then select the report type and click on the Add button.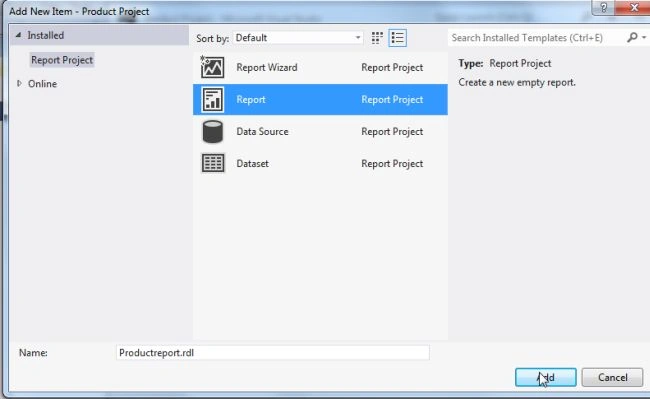
Step 11: Add data source
The next step is to add the data source.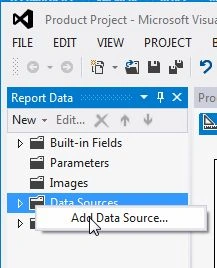
Step 12: Properties of data source
The next window shows the properties of the data source. Here we can change the name, type and connection options of the data source.
In this window you can see that I use a shared data source reference.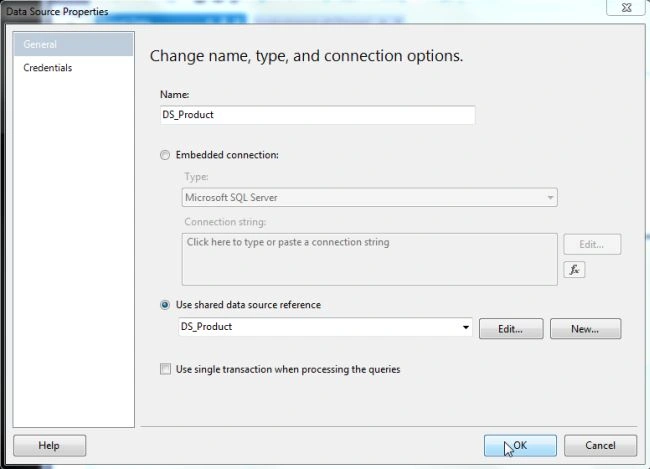
The next step is to add datasets.

Now in this window you can see I use a shared dataset.
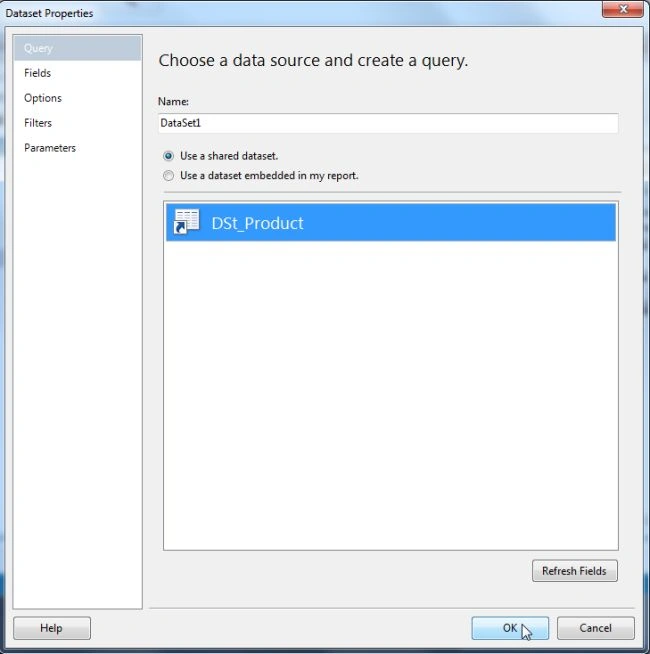
Now you can see that the shared data source has been add in the dataset.
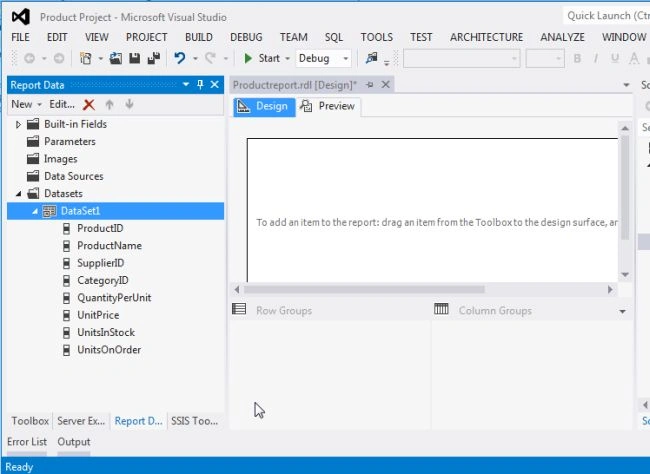
Step 14: Add table from tool box
The next step is to add a table from the toolbox to display report data from the data source.

Step 15: Select the Preview tab to see the report. Now you can see the report server project.

Summary
This article explained how to create a report server project type in a Business Intelligence project template and also describes how to create a shared data source shared data set.
Join the conversation! Your thoughts help the community grow.