
SharePoint hosted add-in (previously app) is one of the two ways to create SharePoint add-ins, the other one being Provider hosted Add-ins. SharePoint hosted add-ins can be used to deploy lists, custom pages, workflows, web parts, and other components. We can have only JavaScript code in the pages that are deployed along with SharePoint hosted add-in.
In order to ensure that we have the required templates spin up Visual Studio. From Office/SharePoint section, check if the ‘Web Add-ins’ and ‘SharePoint Solutions’ templates are available. If it is not present, we will have to install Office developer tools available here, so as to add the SharePoint 2016 templates along with Office Templates as part of Visual Studio.
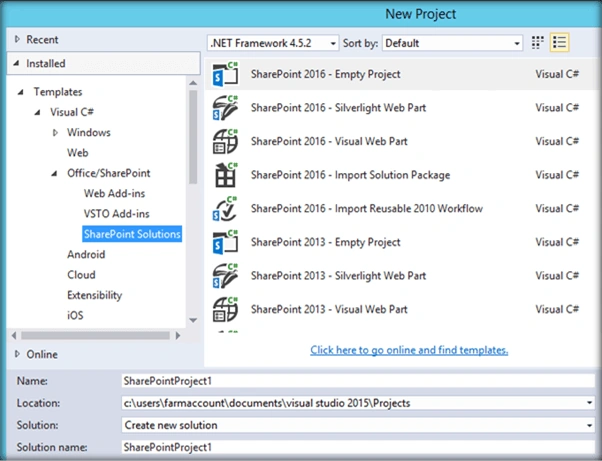
Once the Visual Studio templates for SharePoint 2016 are made available, let’s get started with SharePoint hosted add-in creation.
Create SharePoint Hosted Add-in
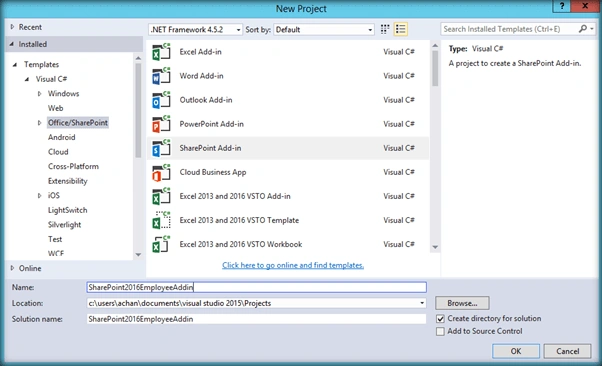
In order to create the SharePoint hosted add-in, we have to select the ‘SharePoint Add-in’ from the available templates. Specify the project name and click on OK.
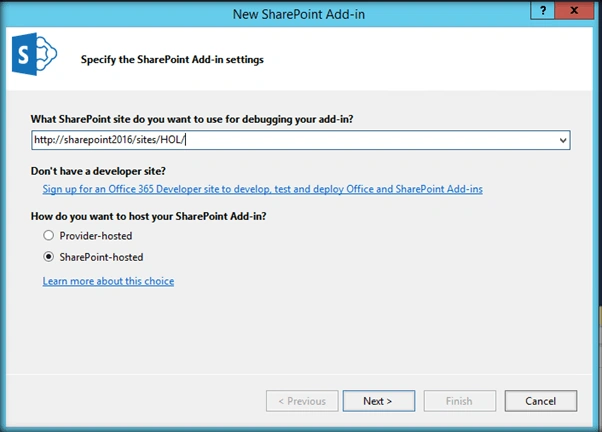
Specify the name of the site that will be used for debugging and deployment. Specify the type of SharePoint add-in that we are going to create. In this case: SharePoint hosted. Click on Next.
Specify the version of SharePoint that will be used for deployment which is SharePoint 2016 in our case.
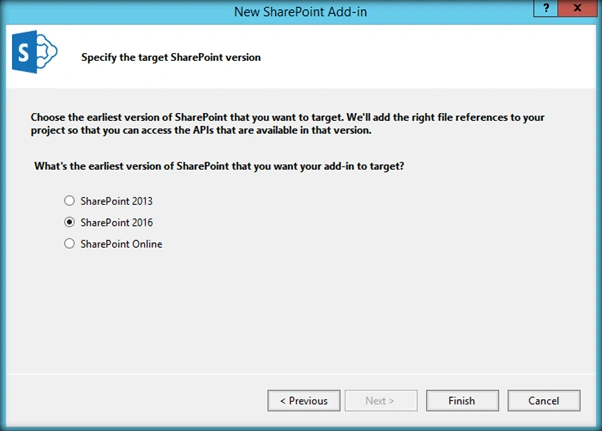
Click on Finish. This will start the creation of project structure.
Once provisioned, the project structure looks like the below.
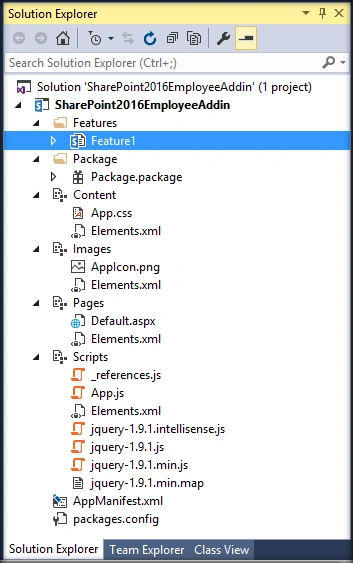
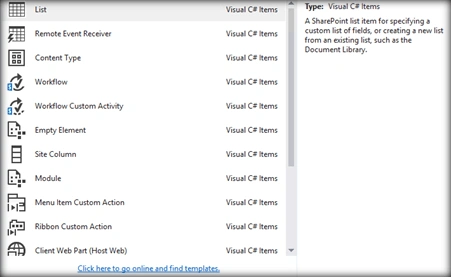
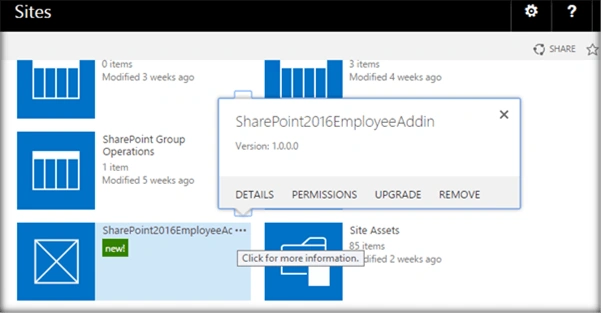
We can deploy custom project items which are listed below, using SharePoint Hosted App in to SharePoint 2016.
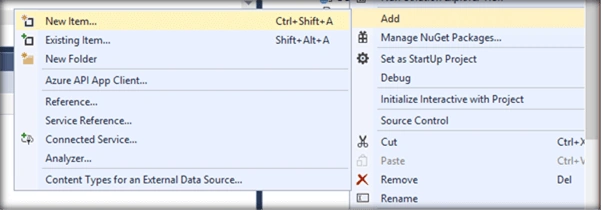
We will try to deploy a list as the SharePoint hosted add-in with some custom list items in it. Click on Add and select ‘New Item’.
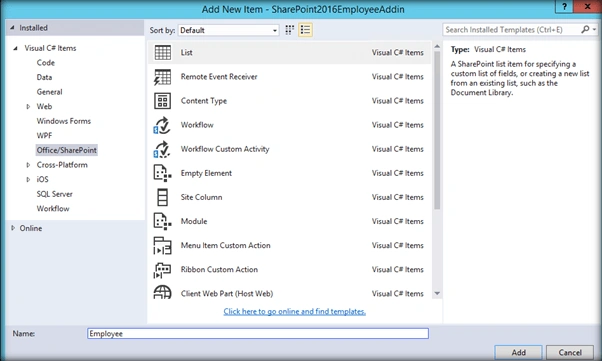
Select ‘List’ and specify the name of the list.
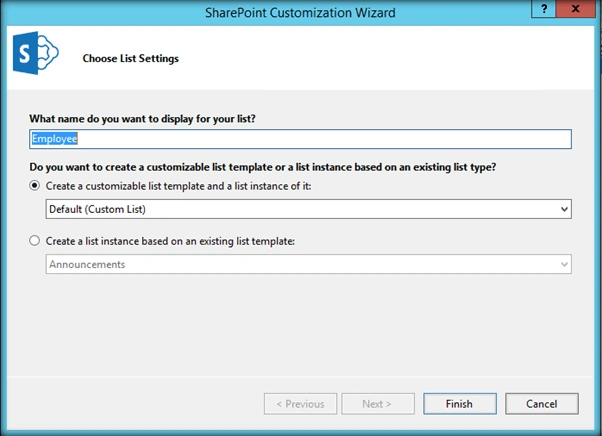
Specify the template based on which the list should be created. In my case I am going with Custom List template.
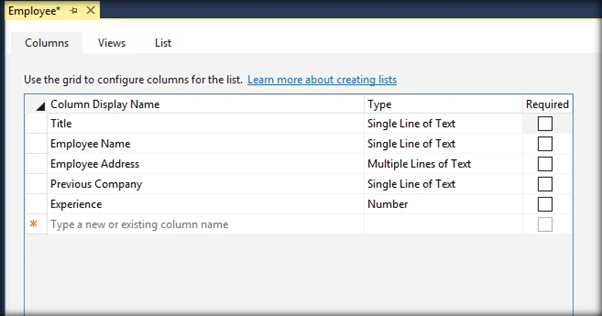
Add the columns that you want to be part of the list by specifying the list column names.
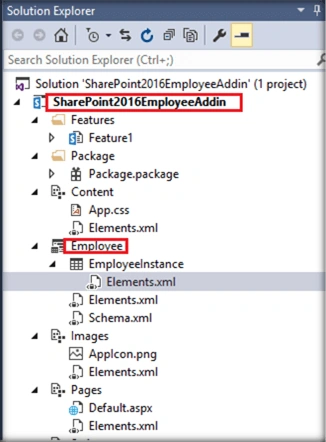
Once the list is added it will come up in the project structure as shown below.
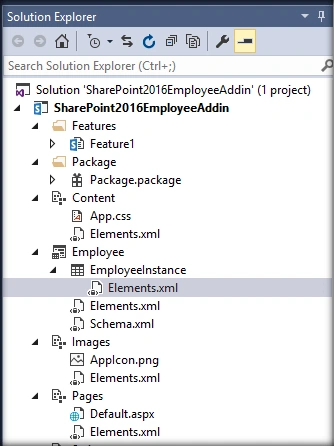
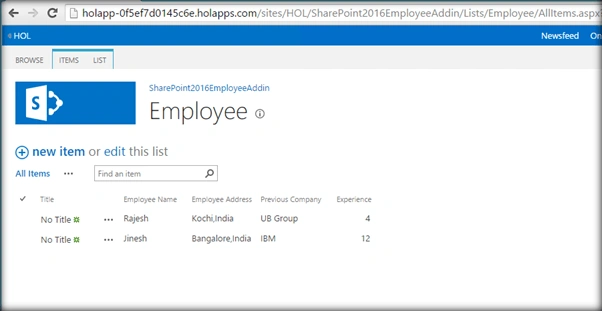
The ‘Employee’ list also has an instance object which contains the information that can be added to the list by default.
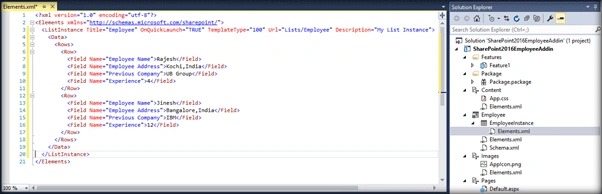
You can add the information that needs to be pre-populated as list items in the list, using CAML in the elements.xml file of the list instance.

Creating SharePoint Hosted Add-ins In SharePoint Server 2016
Join the conversation! Your thoughts help the community grow.
Sign in to leave a comment
It is the same account you read, post and publish with — and you will come straight back to this page.

Tarun DPosted Sep 26, 2016, 1:18 AM
Thanks for sharing..
Humayun Kabir MamunPosted Sep 26, 2016, 12:26 AM
Nice...