
Retrieving data from table in MySQL in JDBC
In my previous article "Creating table and accessing data from MS-Access in JDBC" we had created a
connection and retrieve the data from MS-Access, now in this article, we will learn
how to establish a connection with MySQL and perform different operation like
create,update,retrieve etc.
To establish a connection with MySQL in JDBC,
first we have to install MySQL on our system and we have to add the MySQL
connector (it is a .jar file containing the classes that are the
implementation of interfaces provided by Sun Microsystems ) to our class path
variable. After doing this the classes implementing the interfaces provided by
Sun Microsystem are available to our program.
How to add MySql connector to our class path
variable: There are two approaches for adding the MySQL connector to our
class path variable. Both are given below.
Adding MySQL connector
temporarily
In this approach, we simply set the classpath
variable = path to where our MySQL connector is stored on our system at the command
prompt or console window. This approach is applicable until we close our
console. After closing the console window, the classpath variable removes the
path of MySQL connector.
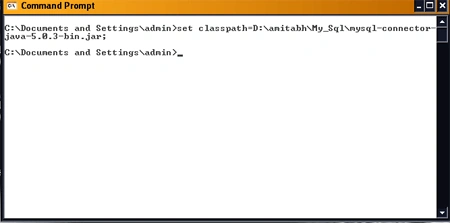
syntax : c:\> set classpath=path of connector;
For example, the given image is helpful
for understanding the syntax
Adding MySQL connector
permanently
To add MySQL connector permanently we have to
add the connector in the classpath variable of system (or in user). The following
steps with figures will help you to add a connector in the classpath variable
- Go to My Computer and after
right clicking, select the Properties option and click on that

- System Properties window will open, select Advanced option and the following window will open
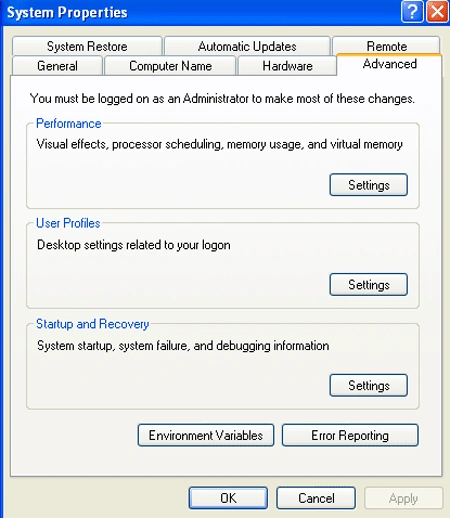
- Select Environment Variable option
and the following window will open
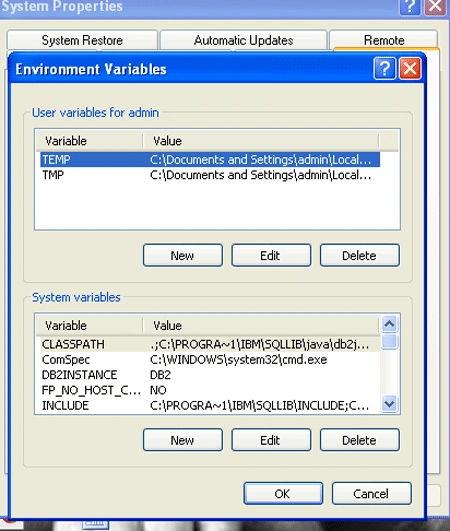
- Select the class path variable
(left click) and click on Edit button and the following window will open
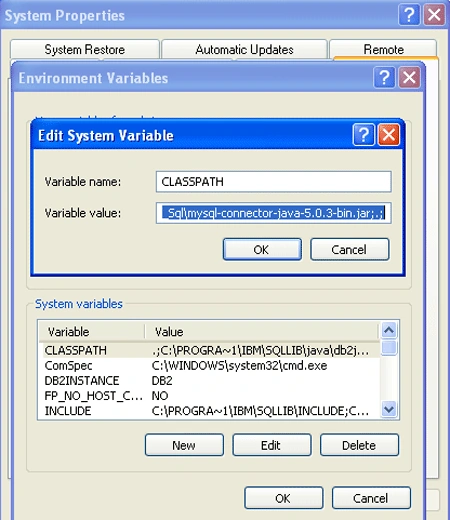
- In the System Variable window, go to the end of Variable value option and place a semicolon, after that add the path of connector followed by semicolon and click on the ok button
In this way we add the MySQL connector in the classpath variable.
Creating database in MySQL and granting it
all privileges: To perform this we follow the following steps
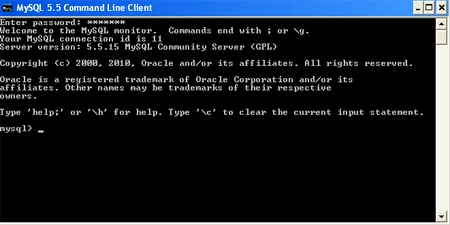
- Open MySQL and enter the password
after this my mysql> prompt will open
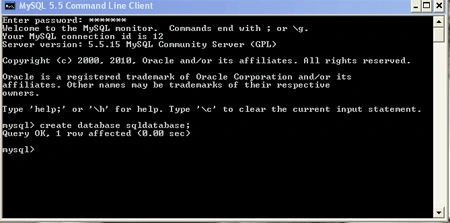
- Create a database with the following command
- Granting a user name, password and all
privileges with the following command
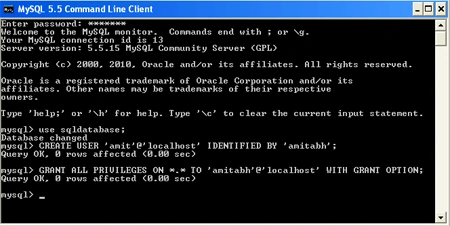
Now our MySQL database is ready for creating a connection with JDBC.
Simple JDBC code for creating a table, inserting a value, and retrieving that value from that table in MySQL database:
- import java.sql.*;
- public class MySQLdatabase {
- public static void main(String[] args) {
- try {
- Class.forName("com.mysql.jdbc.Driver");
- Connection con = DriverManager.getConnection("jdbc:mysql://localhost/sqldatabase", "amit", "amitabh");
- Statement s = con.createStatement();
- s.execute("create table student ( stud_id integer,stud_name varchar(20),stud_address varchar(30) )"); // create a table
- s.execute("insert into student values(001,'ARman','Delhi')"); // insert first row into the table
- s.execute("insert into student values(002,'Robert','Canada')"); // insert second row into the table
- s.execute("insert into student values(003,'Ahuja','Karnal')"); // insert third row into the table
- ResultSet rs = s.executeQuery("select * from student");
- if (rs != null) // if rs == null, then there is no record in ResultSet to show
- while (rs.next()) // By this line we will step through our data row-by-row
- {
- System.out.println("________________________________________");
- System.out.println("Id of the student: " + rs.getString(1));
- System.out.println("Name of student: " + rs.getString(2));
- System.out.println("Address of student: " + rs.getString(3));
- System.out.println("________________________________________");
- }
- s.close(); // close the Statement to let the database know we're done with it
- con.close(); // close the Connection to let the database know we're done with it
- } catch (SQLException err) {
- System.out.println("ERROR: " + err);
- } catch (Exception err) {
- System.out.println("ERROR: " + err);
- }
- }
- }
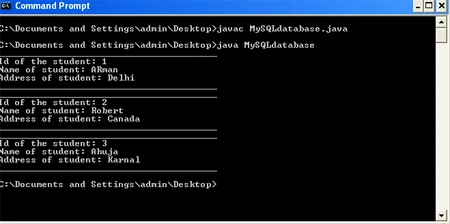
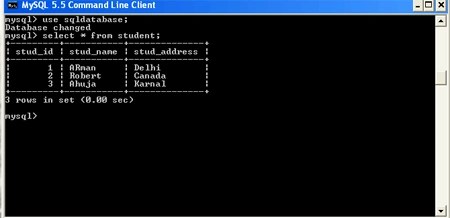
After executing this program we can see our table in MySQL as
Thank You!
Mahesh ChandPosted Oct 13, 2011, 10:48 PM
MySQL and Java related articles. Keep up the good work.