

Introduction and Background
I wonder why designers yet aren't into these tech things, where most of the tech stuff already needs someone from designing and fine arts. I have a few friends of mine who have a great taste of designs, contrasts and other relative "fine arts" related stuff but they lack good programming skills, efficiently writing apps for mobile devices. Same applies to me, I although have (better, not great) experience of writing applications that do not conserve much resources but I lack a good taste of design principles. On a desktop, you can create a monster app, but once on a miniature device such as handhelds. You have to worry more about resources, because they don't have much. For example, battery, RAM and other hardware components are the resources that I am talking about.
While writing a great application for handhelds and other similar mini devices, you have to worry about battery consumption, CPU usage, RAM consumption and other things. Oh and did I mention you also have to make sure that user is paying attention to their surroundings and not wasting their time tapping your "Next", "Next" buttons? These are a few principles one has to follow while writing applications for handhelds and handworns (can I use that name for watches?). That is pretty much self-explanatory, you have to ensure that your application is not consuming too much of CPU, is not executing calculations on a continuous threads and also whether it is battery-friendly or not?
In the following article, you will learn how to create an Android Wear application that adds a new Watch Face to the list, plus that it follows the basic programming design patterns to ensure that the resources are not used too much. Where to use CPU and how much to use it, when to store the resources to be used while drawing the Face and where to, also how to draw the content on screen. If you need to add more components to the screen, how to do that. All of that is collected and compiled in one article for you!
Until the next section, read what I had a chance to hear from OriginalGriff in one of our conversations,
OriginalGriff says:
I've written a few uController applications which run on batteries, and you have got to be really, really careful. Battery life is significant - and if you add too much processing, you can drastically shorten battery life. With embedded devices, that can mean the customer going to the competition.
The current crop of watches are gawd awful because they are not trying to do that: they are trying to be a a "whole phone" on your wrist - and that uses power, lots of it. Where is the point of a watch that won't last all day unless you are really careful what you do with it? People get annoyed enough with modern phones not holding a charge for long enough.
I am sure you get the point of "being cautious" while developing the applications.
Little bit about Android Wear-Smartwatch of our subject!
Before moving one step forward, I wanted to share a bit about Android Wear itself. Android Wear is a new platform provided by Android under Smartwatch category. Android, the leading smartphone operating system, launched their smartwatch versions quite a time ago. It is gaining a limelight rapidly and soon would gain some market share also!
Little bit about Wear Apps
I have another article already set up for you to get yourself started with Android Wear applications, you can head on to that and read it as it has everything that you would require to understand before creating an actual application for Android Wear. The ABC of Android Wear applications.
In order to actually use an application on a real watch, you would have to connect it to your Android device and then install that application on your device. The device will then push the wear app to the wear device, from where it will run on your device.
Why this behavior?
In my opinion, I actually like this kind of framework because it leaves most of the job to the handheld. For example, if you want to download the files, get a reply from web service or to store the data on internet. You can do so from the handheld by passing the data to the handheld.
You would also be able to send requests for network resources to the handheld, handheld in any case will have more battery than the wear device itself. That is why, if you run most of the calculations and store most of the resources on the handheld. It can make your wear application better, in many ways!
Heading off to the studio
In this session I will be using Android Studio to create the wear application and to create the application which has the watch face embedded in itself. The article will only focus on the Watch face part of the application, what it is, how to create it and how to modify it. Plus, how does it look on each device and how to modify the watch based on the device's hardware (square or round). By the end, you will be able to port your ideas to a real Watch!
First of all, create a new project for Android wear (please read the above article, as it provides you with information about creating a project that can be ported on an Android Wear). Make sure you have selected Empty activities, because I will be guiding you step-by-step to create a new Watch face. So, no templating. Once you have created an empty project, read further. Until this stage you are only required to have IDE open and a project created.
Creating the Watch Face
If you have ever programmed an Android application then you already are well familiar with Android Services. Android Services are components that run in background to execute a task. They can start and stop, since they have no UI, they should stop once their work is finished. For example, you can play a music file in background using a service and once file has finished playing the service must stop itself (unless on a repeat). Same way, an Android Wear's Watch Face is a service component. It executes in background and keeps drawing a Face on your watch. In this section, I will walk you through many things about a Watch Face including the "What" and "How"s of Watch Face.
What is a Watch Face?
Putting it simple for you, Watch Face is a service that runs in the background and provides you with a facility to draw graphics in the canvas. The graphics are used to create different faces, write the text, build animations and perform other activities that a developer might want to in their graphical application for Watch. However there are a few things that Watch cannot do, or restrains the developer from doing. They are specially designed for system features only. For example while interaction with Watch Face is allowed, but only single tap is provided. Pinch, drag and other features like a handheld has are not provided in Watch Face.
Android Developers have a great documentation resource in this case and they also provide you with visual feedback and design approaches to be applied to your watches. In this guide you will be taught a few basics about these principles and how to make most out of them in your applications.
Now, if the purpose of a Watch Face is clear to you I think we should continue to next step and create something for this guide. Throughout the process I will explain every bit that I can so that you can understand the procedure of building the application yourself later when you want to.
Getting started-empty project
First of all create a new project, make sure it is empty. A Watch Face basically is a "draw canvas" service. So, in Android APIs there is a service CanvasWatchFaceService and CanvasWatchFaceService.Engine which you need to extend in your application create a Watch Face. The Engine class allows you to actually draw the Watch Face, the methods provided by this class are:
- onCreateEngine
This function is used to get an instance of Engine object. Which can be then used later for different purposes, timers and drawing etc.
- invalidate
This function is similar to View.invalidate function. It would prompt the system to re-draw your Watch Face.
- onDraw
This function is the one we are interested in. It allows us to:
- Draw the objects on canvas.
- Provides us with the bounds of the device, to use while drawing over the canvas.
- Canvas parameter can be used while drawing shapes.
- Like other APIs, Android Canvas object also provides us with methods to draw shapes, such as:
- Circles
- Paths
- Arcs
- Bitmaps
They are simply graphics, drawable in Android language. I will show you a code snippet to convert your drawables to Bitmaps, keep reading. - Text
- Perform other Canvas based functions, provided under Android API.
- A few more functions that I won't talk about until I have explained the service itself.
That was simply an overview of the service, next I will show you how to implement it.
Note: For those who are using Eclipse, please download and install the support libraries and plugins before continuing. They are required, on Android Studio they are already installed once you configure your IDE.
Create a new service, implement the base services for creating a Watch Face. The services would then have the interfaces (functions I mean) for you to perform functions on the device and to determine when an event was occurred. Overriding those methods would allow you to perform you own actions.
I have created the following Java class that would act as the service for our Watch Face.
- import android.graphics.Canvas;
- import android.graphics.Rect;
- import android.os.Bundle;
- import android.support.wearable.watchface.CanvasWatchFaceService;
- import android.view.SurfaceHolder;
- /**
- * Created by AfzaalAhmad on 09/22/2015.
- */
- public class CSharpCornerWearFaceService extends CanvasWatchFaceService {
- @Override
- public Engine onCreateEngine() {
- return new Engine();
- }
- private class Engine extends CanvasWatchFaceService.Engine {
- @Override
- public void onCreate(SurfaceHolder holder) {
- super.onCreate(holder);
- }
- @Override
- public void onPropertiesChanged(Bundle properties) {
- super.onPropertiesChanged(properties);
- }
- @Override
- public void onTimeTick() {
- super.onTimeTick();
- }
- @Override
- public void onAmbientModeChanged(boolean inAmbientMode) {
- super.onAmbientModeChanged(inAmbientMode);
- }
- @Override
- public void onDraw(Canvas canvas, Rect bounds) {
- }
- @Override
- public void onVisibilityChanged(boolean visible) {
- super.onVisibilityChanged(visible);
- }
- }
- }
- <service
- android:name=".CSharpCornerWearFace"
- android:label="@string/my_digital_name"
- android:permission="android.permission.BIND_WALLPAPER" >
- <meta-data
- android:name="android.service.wallpaper"
- android:resource="@xml/watch_face" />
- <meta-data
- android:name="com.google.android.wearable.watchface.preview"
- android:resource="@drawable/preview_digital" />
- <meta-data
- android:name="com.google.android.wearable.watchface.preview_circular"
- android:resource="@drawable/preview_digital_circular" />
- <intent-filter>
- <action android:name="android.service.wallpaper.WallpaperService" />
- <category android:name="com.google.android.wearable.watchface.category.WATCH_FACE" />
- </intent-filter>
- </service>
- <?xml version="1.0" encoding="UTF-8"?>
- <wallpaper xmlns:android="http://schemas.android.com/apk/res/android" />
- android:name
This attribute specifies the code file, Android uses the code file with this name and runs the code in it. You would then need to override and implement the functions required in that code file. We already did.
- android:label
This attribute is used to name the Watch Face in the list. You can use any name, I used "C# Corner Wear", a literal string.
- meta-data
These elements specify the meta-data for your service, Watch Face service specifically. Android Wear app or Wear device would use the data specified here and would show the data for your Watch Face.
- android.service.wallpaper: This would specify the wallpaper element, I have described this above and the method to create it. You would need to create it, because these are required.
- com.google...watchface.preview: This is the default preview for your Watch Face in a rectangular Wear device.
- com.google...watchface.preview_circular: This is the default preview for your Watch Face in a circular Wear device.
- android.service.wallpaper: This would specify the wallpaper element, I have described this above and the method to create it. You would need to create it, because these are required.
- intent-filter
The intents that this application shows interest in. They are self-explanatory.
Once that has been done, we can now consider writing the code to actually draw something on the watch. Our Watch Face has been registered in Android app and would now execute the code in the service to perform actions, such as handling the events, drawing on canvas and hiding or showing the data.
Live preview example
I wanted to show you how our application looks right now, so I think displaying C# Corner on the device would suffice. So I altered the code in the onDraw function and wrote the following code in it,
- @Override
- public void onDraw(Canvas canvas, Rect bounds) {
- final Typeface typeface = Typeface.DEFAULT;
- Paint paint = new Paint()
- {{
- setTextSize(40);
- setARGB(255, 255, 255, 255);
- setTypeface(typeface);
- }};
- canvas.drawText("C# Corner", 50, 100, paint);
- }
- The size of text that we want.
- Color of the text.
- Typeface to use while drawing the text (font-family?)
The function is drawText. There are some other functions also available, such as drawBitmap and drawArc etc. I won't talk about most of them, but drawBitmap will be used here, soon.
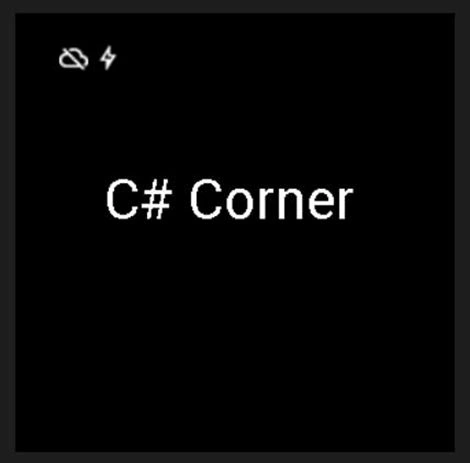
Figure 1: (Square) Android Wear showing C# Corner text rendered on it along with the status icons in the top left corner
Adding some features to it—intermediate level skill
So far I would expect that you are now aware of canvas, Wear service, CanvasWatchFaceService and the functions it provides us with. I will point out a few of these services and then we will head on to the main section to draw something useful on the canvas!
Collecting data
Before you create something, you should ask yourself. "What difference does it make?" What more data does it provide your users, what things does it consider, is it even worthy to upload the application for users? These questions would give you an idea of "What" does the application do.
Although Wear does not have much features as a handheld would have, but you can however use your application to:
- Show the date and time
I would personally recommend that you use Calendar object, but using Time would allow you to work with more features, I somehow still recommend using Calendar instance to get the date and time.
- Show addition information
This is the interesting part, because this is where Wear differs from an ordinary watch. You get to display additional data in the screen also, what ordinary watch doesn't allow. Thus a smartwatch!
- Show details of reminders, or a particular one coming in fast.
- Show weather details.
- Number of missed calls or messages available to read.
- Total cards present.
- Any other data from any API or data source!
Once you have collected the data, you can display that on the canvas just as you would draw anything else. Write the data, draw an icon and user would be able to see it right on their way.
By default, Android provides us with many API contracts, such as Calendar. Where you can get the details about reminders, events etc. These contracts allow your application to get data about user's own databases for content. Then using them you can design your own application in a very user-friendly way. That is exactly how other applications get the data for a user. If you are interested, you can always give a look at the WearableCalendarContact class in the support API.
Creating the members
As already mentioned many times, you must never perform most of the tasks in the Wear itself, it does not have much resources as any other handheld might have. That is why it is not preferred to always keep the CPU or RAM busy. In your onCreateEngine function you can initialize the members, or right in somewhere where you are not going to be most often.
A very legit reason to do so is that fo reach of the Bitmap that you try to render, each of the Paint object that you want to create needs to be in the RAM and also takes CPU. For example, the Bitmap to be rendered, each pixel needs CPU time to be rendered. Thus the more pixels you would need the more CPU time would be consumed and at the same time more battery would be drained that is why it is always recommended to not create (and/or initialize) the members again and again. Do them once, wisely.
I am going to think of what am I gonna make? Here is the list of them:
- Date-time text
- Background color
- Image of bob (I hope admins don't mind!)
So, to use them I would need to initialize them earlier, so that when CPU starts to render everything it already has everything and that this process does not gets cycled over and over again.
- // The paints that we are going to use in our application.
- Paint textPaint, boldTextPaint, boldTimePaint, normalTimePain, datePaint, backGround;
- Bitmap bob;
- // Let us initialize them all here
- bob = BitmapFactory.decodeResource(getResources(), R.drawable.logo);
- backGround = new Paint() {{ setARGB(255, 255, 140, 0); }};
- datePaint = createPaint(false, 25);
- textPaint = createPaint(false, 40);
- boldTextPaint = createPaint(true, 40);
- boldTimePaint = createPaint(true, 40);
- normalTimePaint = createPaint(false, 40);
The function that I am using to create a Paint object is defined as below:
- private Paint createPaint(boolean bold, final int fontSize) {
- Typeface typeface = Typeface.create(Typeface.DEFAULT, Typeface.NORMAL);
- if(bold) {
- typeface.create(Typeface.DEFAULT, Typeface.BOLD);
- }
- return new Paint()
- {{
- setARGB(255, 255, 255, 255);
- setTextSize(fontSize);
- }};
- }
Santhakumar MunuswamyPosted Sep 30, 2015, 3:52 PM
Good Article
Karthikeyan KPosted Sep 30, 2015, 4:15 AM
Good one...Thanks for sharing
Sibeesh VenuPosted Sep 30, 2015, 2:25 AM
Nice Share
Mohammed IbrahimPosted Sep 29, 2015, 3:30 PM
nice
Ankit BansalPosted Sep 29, 2015, 7:25 AM
nice..
Muhammad Aqib ShehzadPosted Sep 29, 2015, 5:35 AM
good article
Harshad PansuriyaPosted Sep 29, 2015, 5:33 AM
Nice Share