Main Objective of this Article
This article shows how to do create, read, update and delete operations in Kendo Grid using the ASP.NET WEB API.
Requirements
- VS2010 and above
- Fiddler/Postman for testing
- SQL Server 2008 and above
Before going through this article ensure that you have a basic understanding of the MVC Architecture, ASP.NET Web API and jQuery.
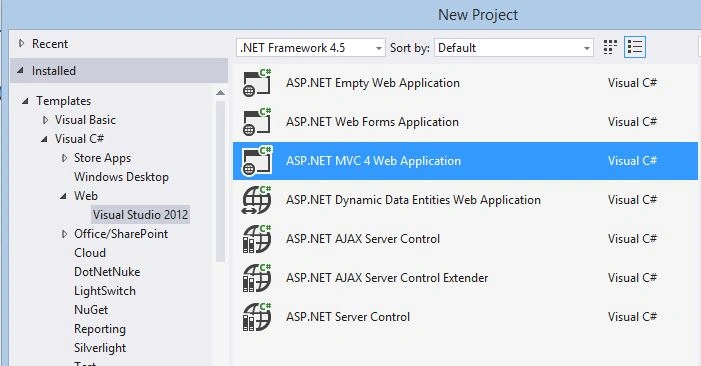
Open the ASP.NET MVC project as shown in Figure 1.
Figure 1
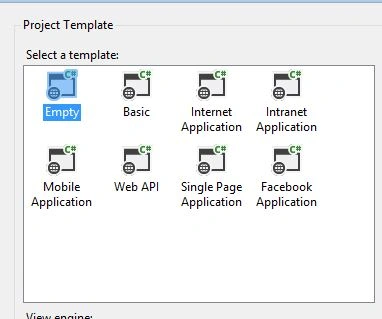
Create one empty application as shown in Figure 2.
Figure 2
Your project structure will be like this figure (Figure 3).

Figure 3
Right-click on the model folder and create a class. In my case I named it Category.
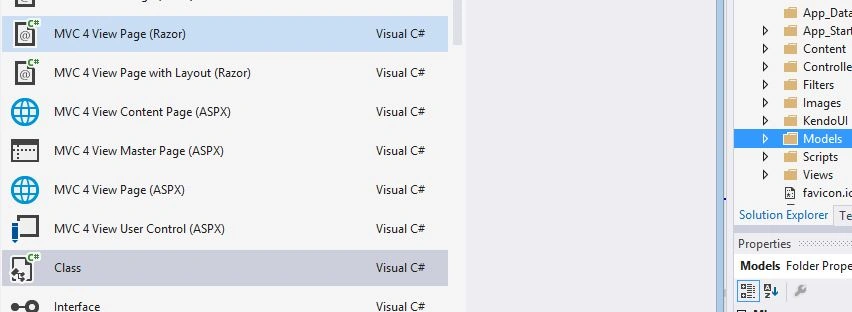
Fill in the property in the Category model class.
In my case it is:
- public class Category
- {
- [Key]
- public int CategoryID {
- get;
- set;
- }
- [Required]
- public string CategoryName {
- get;
- set;
- }
- }
To connect with the database I have used the code first technique in Entity Framework.
Create one more model class called CategoryContext.cs.
Write the following code in that class.
- public class CategoryContext: DbContext
- {
- public CategoryContext(): base("name=TestConnection") {}
- public DbSet < Category > Categories {
- get;
- set;
- }
- }
Establish the connection string in the web config before building. In my case my code is:
- <connectionStrings>
- <add name="TestConnection" connectionString="Data Source=your SQL servername ;Initial Catalog=Test;Integrated Security=True" providerName="System.Data.SqlClient" />
- </connectionStrings>
It's time to create a Controller named CategoryController.cs as shown in Figure 3.
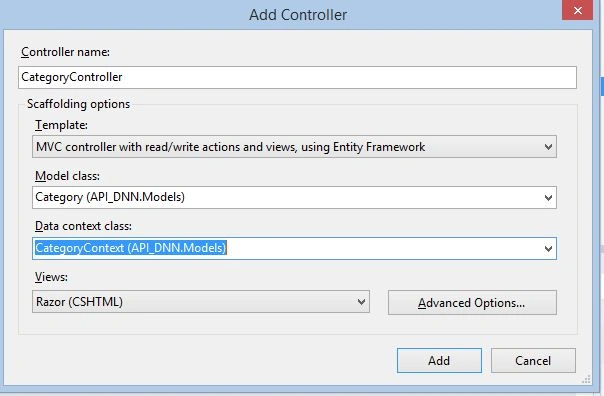
Figure 3
Note: Before scaffolding, build your application once to get a Model classes.
Make sure that if your using MVC 4 that the Entity Framework is version 5 or later.
Open the Category controller class. You will see some predefined code with GET, PUT, POST and DELETE HttpResponses.
I have modified the predefined code based on my application needs, you can refer to it by downloading the source code.
Now you can check these HTTP response/request using the Postman/Fiddler.
First insert some records using HTTP POST request/response as shown in Figure 4.
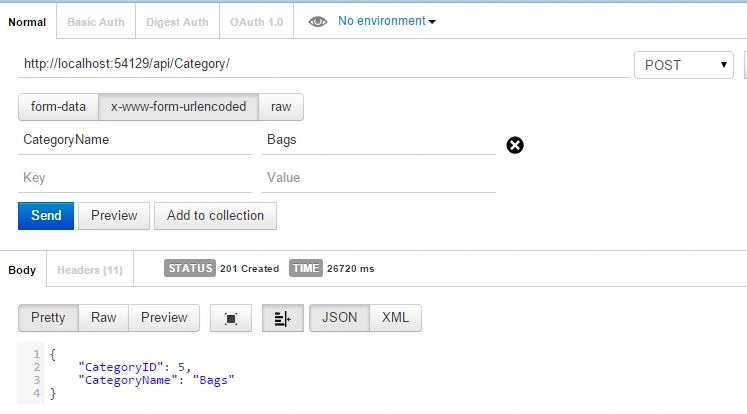
Figure 4
HTTP GET:
As shown in Figure 5.
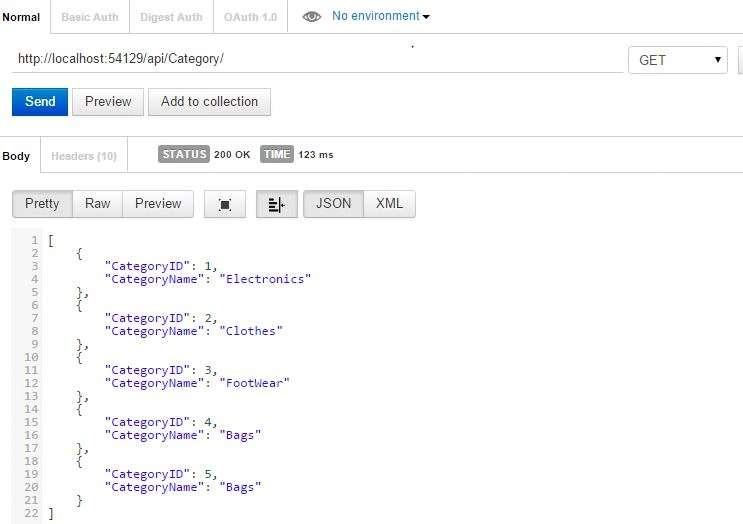
Figure 5
HTTP PUT:
As shown in Figure 6.
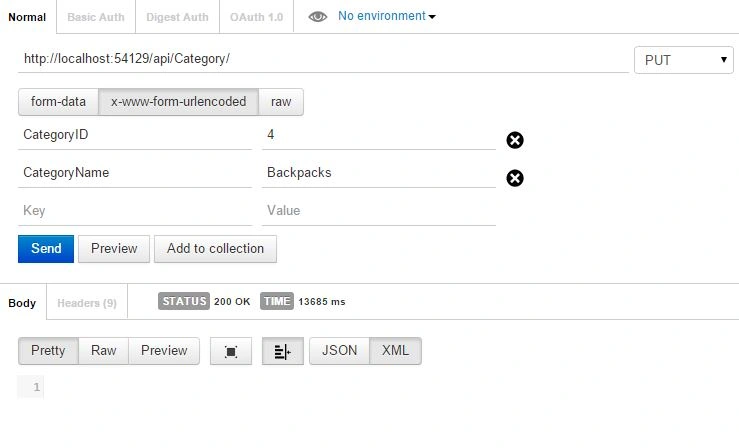
Figure 6
HTTP DELETE:
As shown in Figure 7.
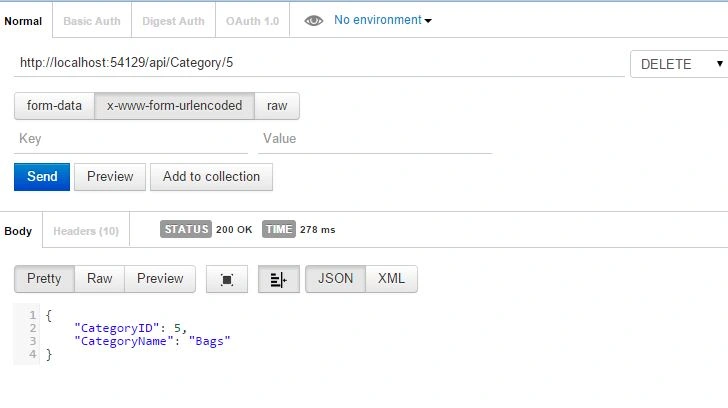
Figure 7 Now to consume the Web API using Kendo UI.
Create one HTML page in the project.
Here is my deign:
- <head>
- <link rel="stylesheet" href="http://cdn.kendostatic.com/2014.3.1316/styles/kendo.common.min.css" />
- <link rel="stylesheet" href="http://cdn.kendostatic.com/2014.3.1316/styles/kendo.default.min.css" />
- <link rel="stylesheet" href="http://cdn.kendostatic.com/2014.3.1316/styles/kendo.dataviz.min.css" />
- <link rel="stylesheet" href="http://cdn.kendostatic.com/2014.3.1316/styles/kendo.dataviz.default.min.css" />
- <script src="http://cdn.kendostatic.com/2014.3.1316/js/jquery.min.js"></script>
- <script src="http://cdn.kendostatic.com/2014.3.1316/js/kendo.all.min.js"></script>
- <title></title>
- </head>
- <body>
- <script>
- $(document).ready(function () {
- dataSource = new kendo.data.DataSource({
- transport: {
- read:
- {
- url: "http://localhost:54129/api/Category",
- dataType: "json",
- },
- destroy:
- {
- url: "http://localhost:54129/api/Category",
- type: "DELETE"
- },
- create:
- {
- url: "http://localhost:54129/api/Category",
- type:"POST"
- },
- update:
- {
- url: "http://localhost:54129/api/Category",
- type: "PUT",
- parameterMap: function (options, operation) {
- if (operation !== "read" && options.models) {
- return {
- models: kendo.stringify(options.models)
- };
- }
- }
- },
- },
- schema:
- {
- model:
- {
- id: "CategoryID",
- fields: {
- CategoryID: { editable: false, nullable: true, type: "number" },
- CategoryName: { editable: true, nullable: true, type: "string" },
- }
- }
- }
- });
- $("#grid1").kendoGrid({
- dataSource:dataSource,
- editable: "inline",
- toolbar: ["create"],
- columns: [
- {
- field: "CategoryID",
- title: "number",
- },
- {
- field: "CategoryName",
- title: "Name"
- },
- {
- command: ["edit",
- {
- name: "destroy",
- text: "remove",
- }
- ],
- }
- ],
- height: "500px",
- pageable: {
- refresh: true,
- pageSizes: true,
- buttonCount: 5
- },
- }).data("kendoGrid");
- });
-
- </script>
- <div class="main-content">
- <div id="grid1"></div>
- </div>
- </body>undefined</html>
In the browser,
the design will be as shown in Figure 8.
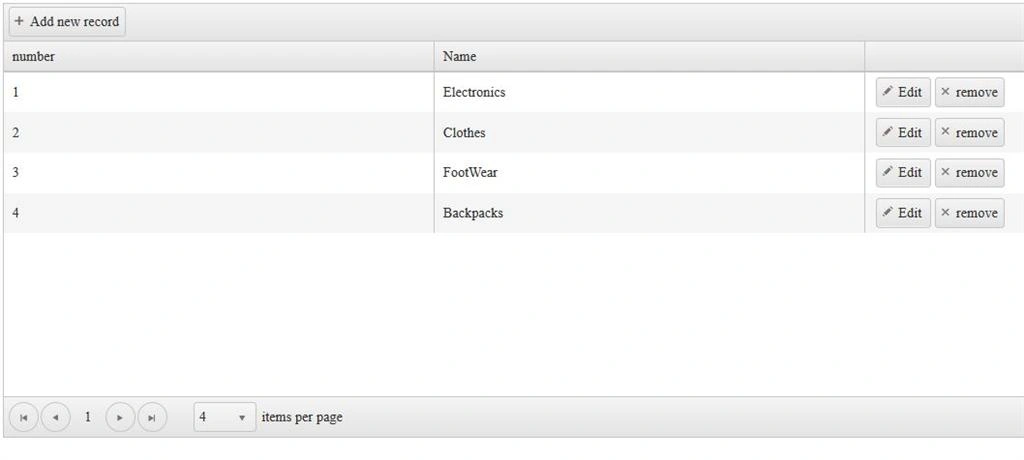
Figure 8
Add a new record as shown in Figures 9 and 10.
Figure 9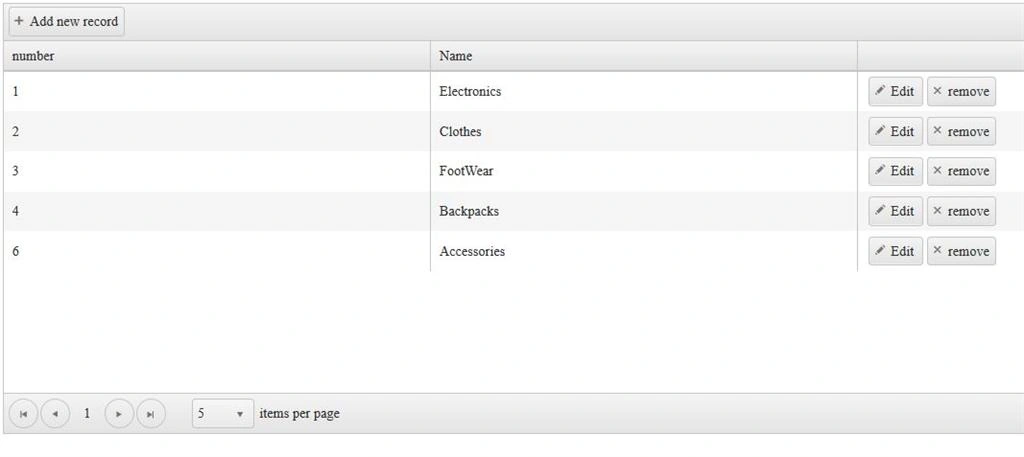 Figure 10
EDIT record as shown in figure 11 and 12.

Figure 11

Figure 12
Delete a record as shown in Figures 13 and 14.

Figure 13

Figure 14
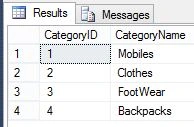
The reflection in the SQL table.



Divakar ChintaPosted Jul 6, 2019, 2:35 PM
Thank You So much, you save my day
Rupali ShindePosted Apr 22, 2016, 1:08 AM
nice , thanks for sharing
Chandradev PrasadPosted Apr 18, 2016, 3:56 AM
Nice post.
Asfend YarPosted Feb 28, 2016, 2:27 PM
and accept my request
Asfend YarPosted Feb 28, 2016, 2:26 PM
keep it up
Asfend YarPosted Feb 28, 2016, 2:26 PM
good
sreenivasa kPosted Dec 28, 2015, 4:29 PM
nice article
Arul RPosted Oct 28, 2015, 5:58 AM
Nice share!!!
Mukesh KumarPosted Oct 20, 2015, 12:49 AM
Good Job Sir
NitinPosted Jun 1, 2015, 9:45 AM
good one
Sibeesh VenuPosted Jun 1, 2015, 1:42 AM
Good one.
Santhakumar MunuswamyPosted May 31, 2015, 11:19 PM
Thanks for nice one
Friyank ParikhPosted May 31, 2015, 2:25 AM
Hello Gowtham, the post is awesome . and it will give new comer a startup for kendo ui, no doubt. but , there are some issue which you must edit and post this blog again. 1 . folder structure is not like folder structure you have shown us in figure 2 , when you select mvc as a empty project. 2. In Add controller section , you asked to add a controller and for kendo and fiddler you are using api , so that's a big difference . controller is way different from API 3. In kendo you have allow to add ID also, but in database its auto increment so that is also one issue. it keeps on adding data even if you pass the same id.4. Delete is not working in database.