

The main focus of this article is to show how DataGridView works. Some simple operations are also done here, like add, delete, clear and so on.
First Approach: Using Datatable
Advantages
- A DataTable is an easy to use variable that allows the user to pull data into it with a consistent format and embed it with other properties that allow us to do sorting, searching and so on.
- It is easy to easily customize.
- It allows implementing business logic using properties.
Working Details
Open your Visual Studio 2012 and open a new project.
- Select Windows on the left side menu bar.
- Select Windows Forms application.
- Provide the name of the project.
- Select the directory/location to store the project.
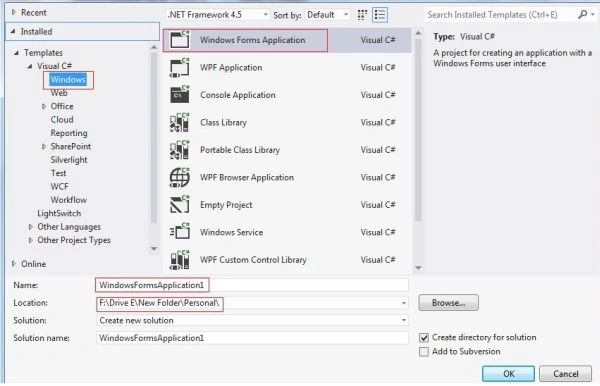
Form Design
- Select your form and add a DataGridView from the toolbox.
- Name it DataGridView2.
Coding Structure
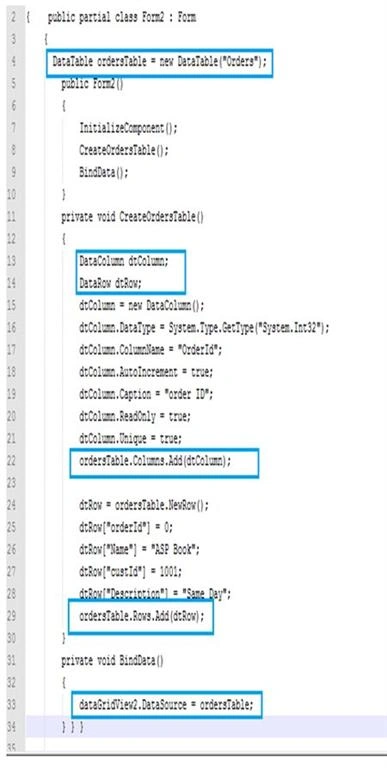
- Declare a datatable orderstable globally.
- Now for the definition of the CreateOrdersTable() and Bindata() methods.
- In the CreateOrdersTable() method declare a data column and a data row. Then add a column and row to the orders table. In the same way you can add multiple columns and rows to the datatable.
- In the binddata method just add the data source to the datatable name.
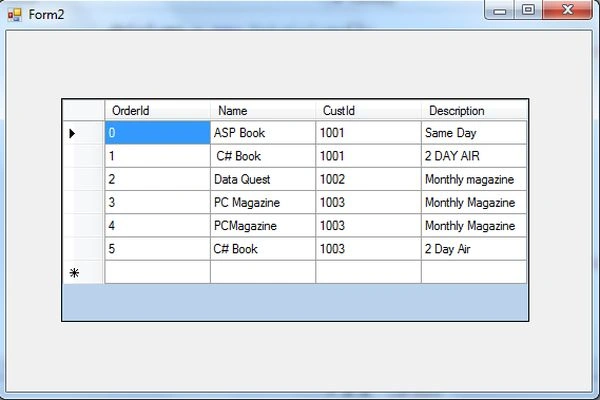
- Run the demo project and you will see the output like this.
Second Approach: Using List
Advantages
- Dynamically auto-size the array. You just need to specify the type of data initially.
- Comparatively faster than a data table.
List Declaration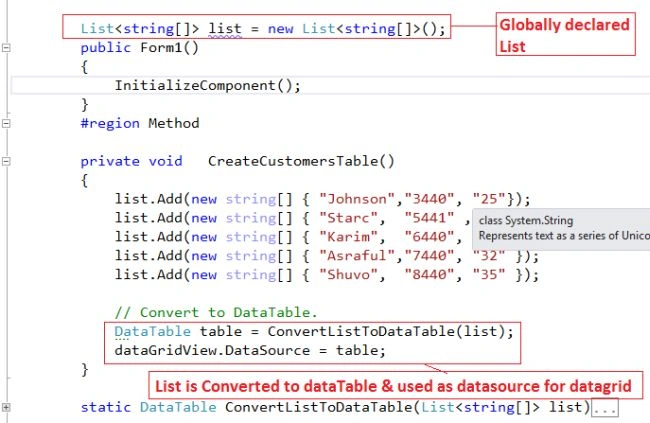
Ui Action
Save Method Action
Method Definition
The following are Actions.
- Check whether or not a row is selected.
- Declaring a list locally and add new items to the list.
- Calling an event for showing new items in the grid view.
Delete Method Action
Method Definition.
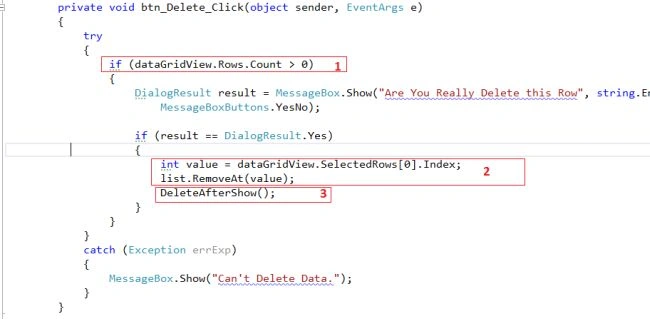
The following are the Actions.
- Check whether a row is selected.
- The selected row is kept in a variable and removed from the row from the list.
- The following shows how to call a method for showing the grid view data after deleting the row.
Comments
Join the conversation! Your thoughts help the community grow.