Abstract
This article explicates the use of two major features of DOT NET. They are (i) Windows Forms and (ii) Data Base Connectivity. This article also focuses on deploying multiple windows forms and shows how to navigate between them. The best business application that explores these two features is a banking application and hence is the subject of this article.
The banking system I have developed uses four windows forms. All the forms are connected to a database. The controls of the forms are populated from the database. The database used in MS-ACCESS.
I will make a sincere attempt to explain the development of such an application with the aid of VS.NET. As all DOT NET developers know, design a windows-form using VS.NET is just at game of drag and drop. The images you will see in this article are self-explanatory and are rich enough to explain their functions.
The following figure shows the runtime view of the first form that is displayed when the system is started. This form (HDFC Bank) consists of many controls. It consists of:
- Label: HDFC Bank.
- Combo box: to select Account Number.
- Text box: to enter password.
- Two action buttons.
(a) Access Account: Enables the user to access his bank account provided he has entered the right password and selected a acceptable Account Number.
(b) EXIT: Exits the application.
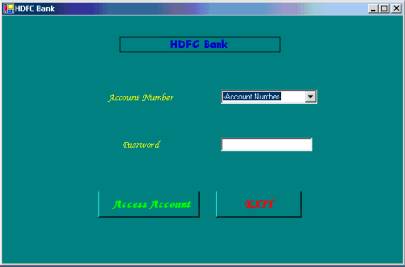
Figure 1: HDFC Bank Opening Form.
The HDFC Bank opening form is liked to the database. Its loads all the account numbers in the combo box shown in the figure. The following fragment of code demonstrates how the combo box is loaded with the account numbers.
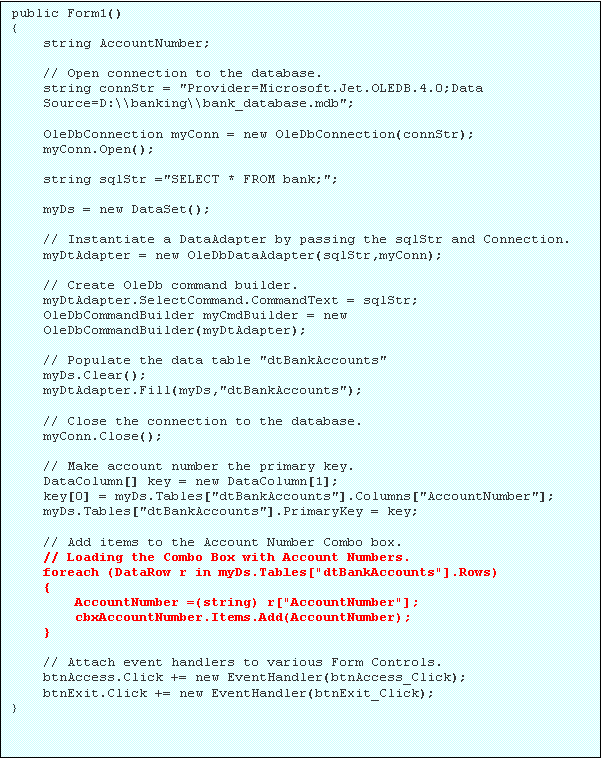
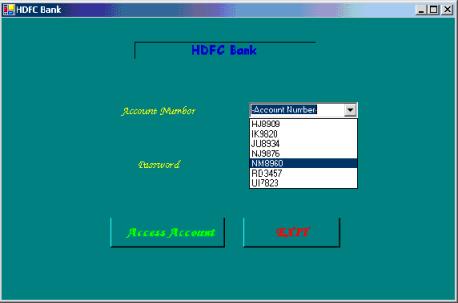
Figure 2: Selecting Account Number.
As shown in the figure above a customer selects his account number from the combo box and is required in enter his password. For testing purposes the password for all the customers was set to pepsi. This is shown in the figure below.
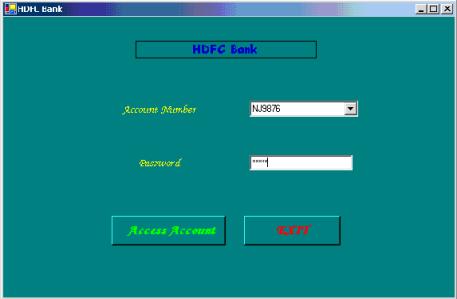
Figure 3: Entering password (please use pepsi).
When the customer enters the correct password and clicks the ACCESS ACCOUNT button the system will then display the second form. This forms gives a welcome message to the customer displaying his name and account balance. The source code to validate the selected account number and the entered password is shown below:

Once the customer is logged in he is provided with four options:
- Deposit: To deposit money into the account.
- Withdraw: Withdraw money from the account.
- AnotherAccount: Enables the customer to access another account (if he has two).
- EXIT: Terminates the application.
Let us call this second form as the Options form. The following figure shows the runtime view of the Options Form:
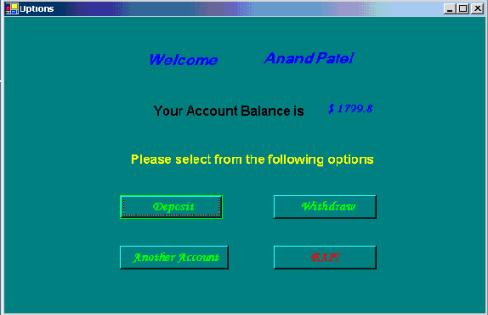
Figure 4: Options Form (Account balance also displayed).
If the customer clicks the Deposit button, the third form called as the Deposit form is shown. The following is the runtime view of this form.
Figure 5: Deposit Form.
Here the customer may also choose to go back to the Options form if he wises show thereby canceling his deposit request. If the entered amount was successfully deposited (after the customer clicks the Deposit button) the customers old balance, current deposit amount and new balance are displayed in the same form. The Deposit button is automatically disabled after a single deposit forcing the customer to go to the options page or exit the system. If the customer wishes to make multiple deposits he will have to click the options button of this form to go the Options form where he can again select to Deposit, Withdraw, Access Another account or terminate the application. The following is the run time image of the Deposit form.
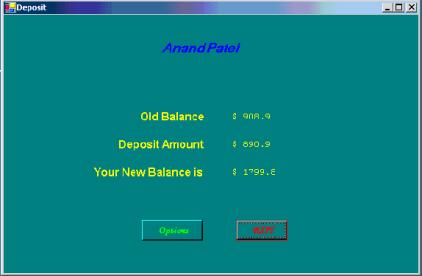
Figure 6: Deposit form (Deposit result showing New Balance).
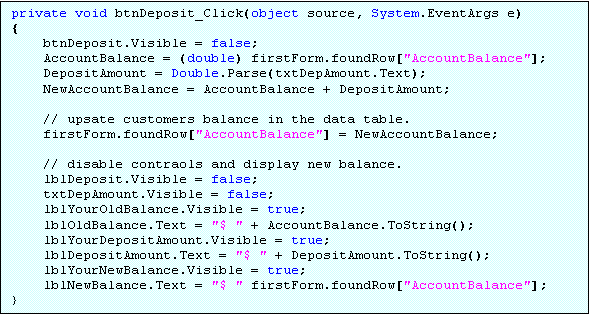
The following code extract demonstrates how a deposit request is processed:
If a customer wishes to withdraw he would click the Withdraw button in the Options form. Care is also taken to ensure that a customer cannot withdraw more then his account balance. This is shown in the following figures.
Figure 7: Options form displayed upon clicking the Options button in the Deposit form (The customer balance is updated).
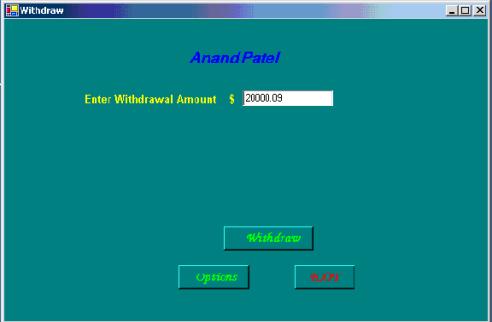
Figure 7: Withdraw form.
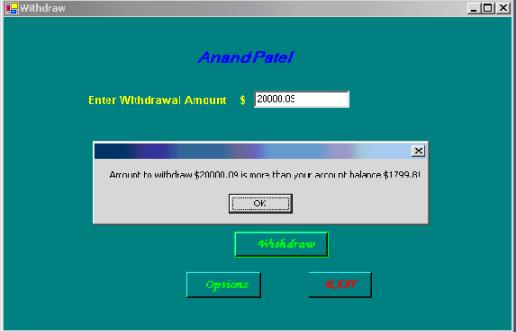
Figure 8: Withdraw form displaying an error message if the customer wants to withdraw more then his account balance.
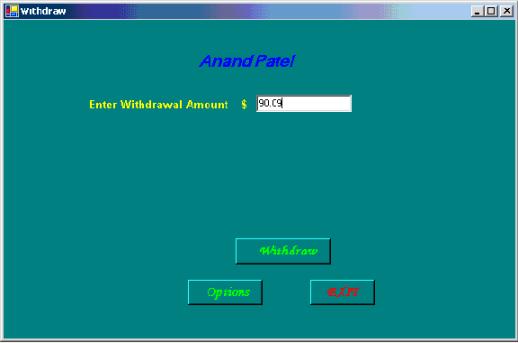
Figure 9: Withdraw form (Reentering the amount to withdraw).
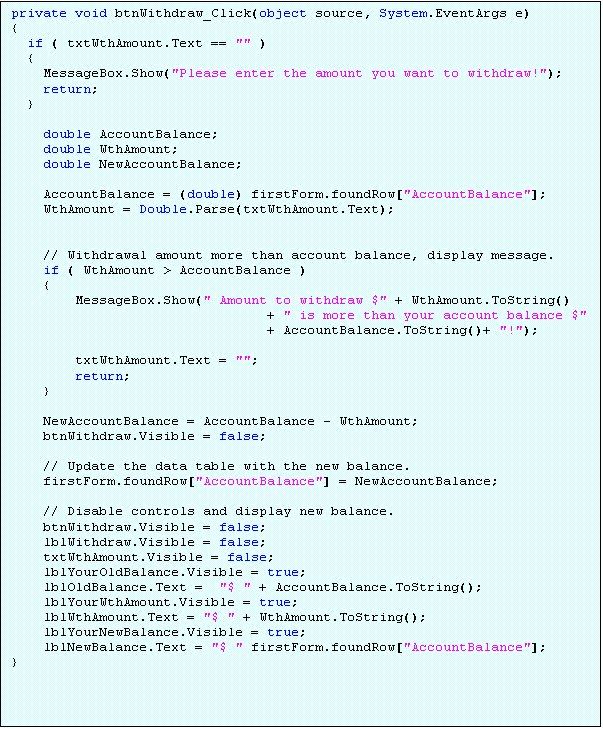
The following code extract shows the action taken when the customer hits the withdraw button.
Withdraw form showing new customer balance is depicted below:
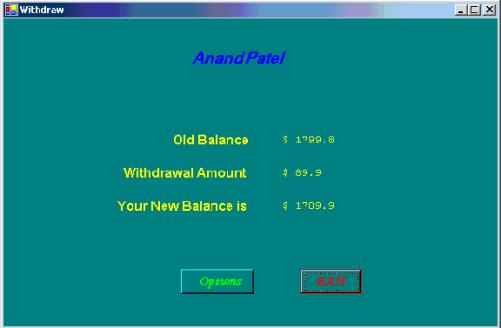
Figure 10: Successful withdrawal. (New account balance displayed).
Finally when the customer clicks the EXIT button the database is updated and the application is terminated.
The following code extract handles the database update operations. The updates are called as batch updates and depends on the row state of the rows of the data table in the data set.
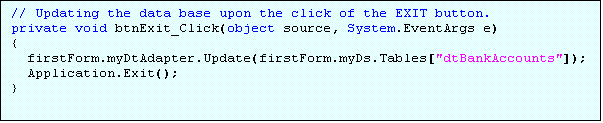
After the database is updated the application is terminated using Application.Exit();