

The ExpressRoute Direct connects directly to Microsoft's global network via strategically located peering points. The ExpressRoute Direct provides 10 Gbps or 100 Gbps connectivity, which supports Active/Active connectivity.
This feature is not generally available in the Azure portal, and we must register this service before using this service.
Step 1
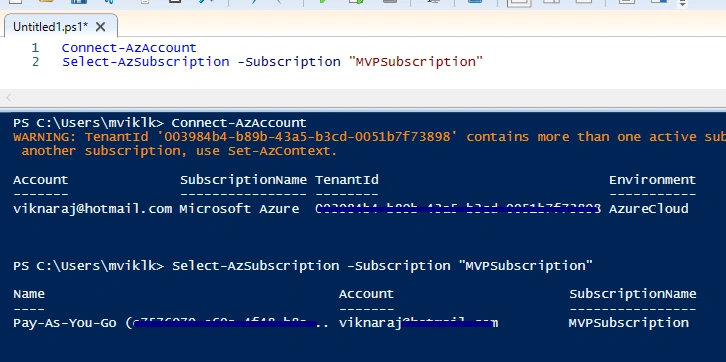
In PowerShell, enter the below commands to enroll in our subscription.
- Connect-AzAccount
- Select-AzSubscription -Subscription “Subscription Name / ID”
Step 2
Enter the below command to register our ExpressRoute Ports and Microsoft Network for our subscription.
- Register-AzProviderFeature -FeatureName AllowExpressRoutePorts -ProviderNamespace Microsoft.Network

Step 3
In the Azure portal, type ExpressRoute Direct in the global search, select ExpressRoute Direct. Click the Create button to open the Create ExpressRoute Direct page.

Step 4
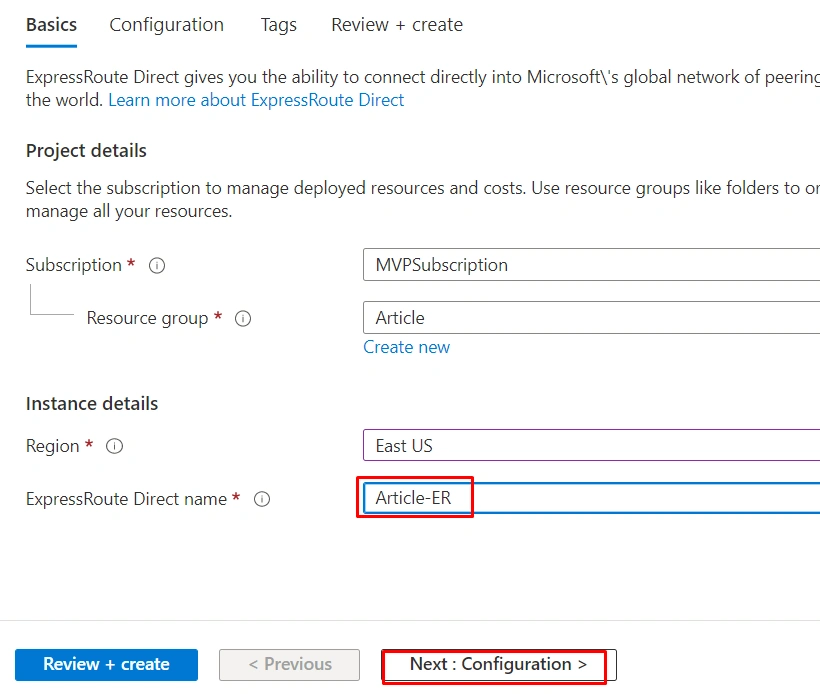
Select the Subscription, Resource group and enter the name for the ExpressRoute Direct. Then, click the Next button for Configuration.
Step 5
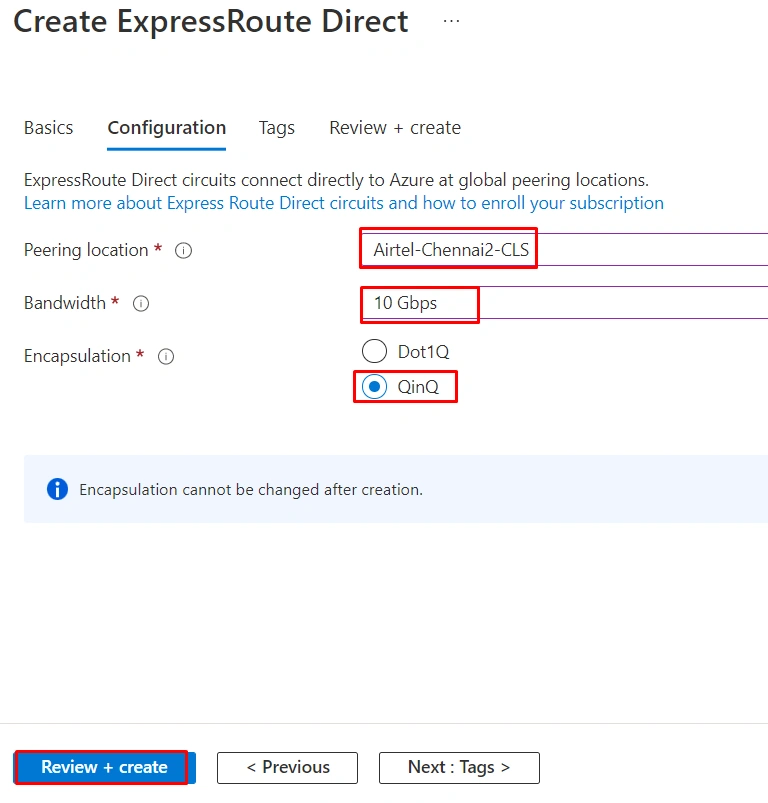
Select the peering location where we will connect to the ExpressRoute Direct. In this demo, we will choose Airtel-Chennai2-CLS.
We can select the Bandwidth we want; if the Bandwidth is not displayed in the Bandwidth section, create a Microsoft Support ticket.
In the Encapsulation, we can choose Dot1Q (We must manage the uniqueness of the C-Tag (VLAN) across the entire ExpressRoute Direct resource) or QinQ (The ExpressRoute circuit will be dynamically assigned an S-Tag and will be unique throughout the ExpressRoute Direct resource). In this demo, we will choose QinQ, select Review + create, and click Create.
Step 6
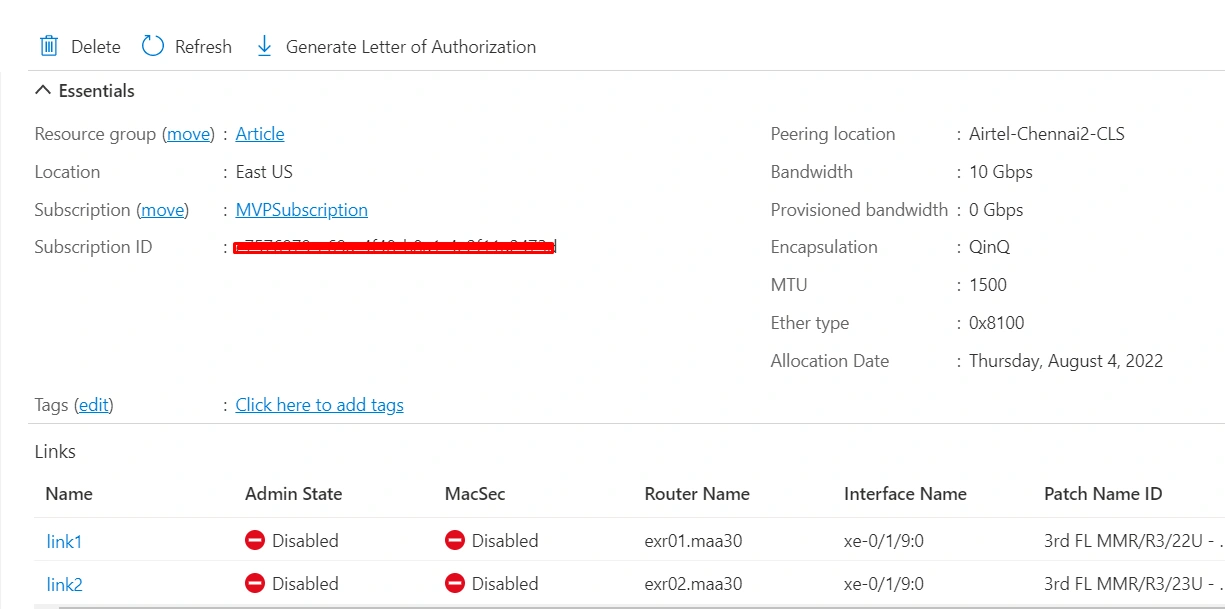
The ExpressRoute Direct deployment is completed. In the ExpressRoute Direct Overview, the Links are disabled.
Step 7
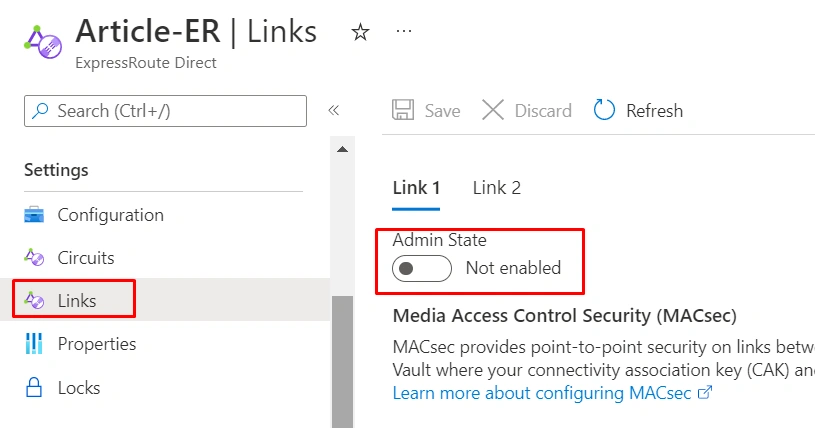
To activate the Links, go to the Links under the Settings and select the Admin Stage to Enable and Save it. Repeat the same step to activate Link 2 as well.
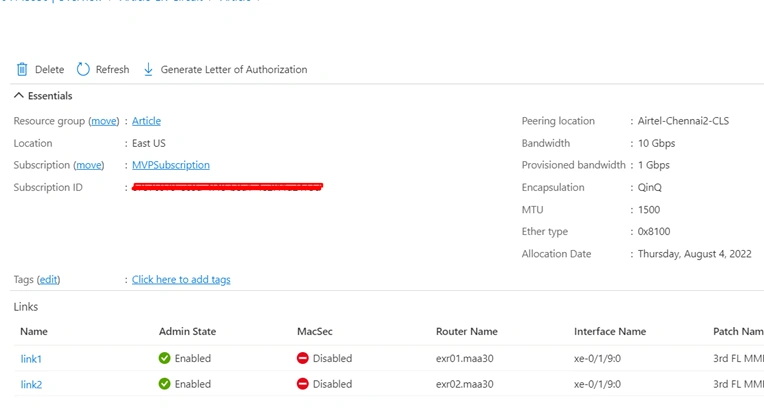
Link 1 and the Link 2 are activated.
Summary
In the article, we learned how to deploy the Azure ExpressRoute Direct. In our next article, we will learn how to create the ExpressRoute connection.
Hadshana KamalanathanPosted Oct 12, 2022, 1:44 AM
Nice Article!
Shanuka MaheshwaranPosted Aug 8, 2022, 7:05 PM
Great Article sir, Thank you for sharing.