Originally available only as part of the Tablet PC SDK, digital ink is now integrated into Microsoft's Windows Presentation Foundation. With the exception of handwriting recognition, Windows programmers can now leverage digital ink in their applications without additional SDKs or runtime libraries.
Enabling Ink
To enable the collection and display of ink input, developers need only include the InkCanvas element in their XAML document.
<Window x:Class="WindowsApplication1.Window1"
xmlns="http://schemas.microsoft.com/winfx/2006/xaml/presentation" xmlns:x="http://schemas.microsoft.com/winfx/2006/xaml"
Title="WindowsApplication1" Width="550" Height="400">
<Grid>
<InkCanvas />
</Grid>
</Window>
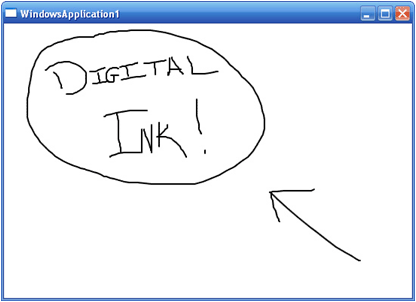
When the above code is compiled, a small black square replaces the mouse cursor when the user hovers over the application window. When the user left-clicks and drags the mouse in the content area, "ink" is invoked and the user is able to draw.
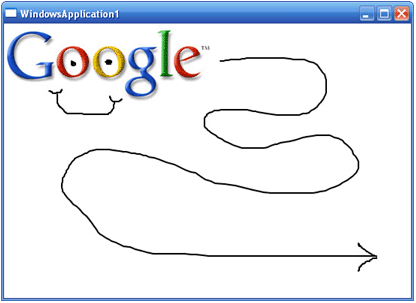
Like other tags in XAML, InkCanvas can be used in conjunction with other layout elements and controls. As such, it may be positioned or layered over other elements. The following example displays an image within an InkCanvas.
<Window x:Class="WindowsApplication1.Window1"
xmlns="http://schemas.microsoft.com/winfx/2006/xaml/presentation" xmlns:x="http://schemas.microsoft.com/winfx/2006/xaml"
Title="WindowsApplication1" Width="550" Height="400">
<Grid>
<InkCanvas>
<Image Source="http://www.google.com/intl/en/images/logo.gif" />
</InkCanvas>
</Grid>
</Window>
When compiled, the user is able to draw on the image because the graphic is a child of the InkCanvas element.
Controlling Stroke Appearance
Using just a bit of C#, it is also possible to control a number of ink properties including stroke color and thickness. These properties are controlled using the DrawingAttributes class.
Using this class, you can either control the appearance of individual strokes using Stroke.DrawingAttributes or the default appearance of any new stroke collected by the InkCanvas using InkCanvas.DefaultDrawingAttributes.
Below is a list of properties supported by the DrawingAttributes class:
|
Name |
Description |
|
Color |
Gets or sets the color of a Stroke. |
|
FitToCurve |
Gets or sets a value that indicates whether Bezier smoothing is used to render the Stroke. |
|
Height |
Gets or sets the height of the stylus used to draw the Stroke. |
|
IgnorePressure |
Gets or sets a value that indicates whether the thickness of a rendered Stroke changes according the amount of pressure applied. |
|
IsHighlighter |
Gets or sets a value that indicates whether the Stroke looks like a highlighter. |
|
StylusTip |
Gets or sets the shape of the stylus used to draw the Stroke. |
|
StylusTipTransform |
Gets or sets the Matrix that specifies the transformation to perform on the stylus' tip. |
Member names and descriptions taken from Microsoft's WinFX SDK
Using a few of the above properties, we can create a simple method for setting the default ink color to blue with a stroke thickness of 2px (2px by 2px).
private void setInkBlue(object sender, RoutedEventArgs e)
{
// set the DefaultDrawingAttributes for a blue pen.
myInkCanvas.DefaultDrawingAttributes.Color = Colors.Blue;
myInkCanvas.DefaultDrawingAttributes.Height = 2;
myInkCanvas.DefaultDrawingAttributes.Width = 2;
}
Editing with InkCanvas
InkCanvas also comes with a few "freebies". One of these features is a built-in editing mode, allowing users to select, drag, resize, and erase ink strokes.
There are two main properties available to control editing: InkCanvas.EditingMode and InkCanvas.EditingModeInverted. The first property controls the tip of the stylus. The second controls the "eraser". Both of these properties use InkCanvasEditingMode to specify how stylus input is handled.
By default, the EditingMode of InkCanvas is set to Ink while EditingModeInverted is set to EraseByStroke.
However, InkCanvasEditingMode supports a number of settings:
|
Name |
Description |
|
EraseByPoint |
Indicates that the pen erases part of a stroke when the pen intersects the stroke. . |
|
EraseByStroke |
Indicates that the pen erases an entire stroke when the pen intersects the stroke. |
|
GestureOnly |
Indicates that the InkCanvas responds to gestures, and does not receive ink. |
|
Ink |
Indicates that ink appears on the InkCanvas when the pen sends data to it. |
|
InkAndGesture |
Indicates that the InkCanvas responds to gestures, and receives ink. |
|
None |
Indicates that no action is taken when the pen sends data to the InkCanvas. |
|
Select |
Indicates that the pen selects strokes and elements on the InkCanvas. |
Names and descriptions taken from Microsoft's WinFX SDK
Specifying either Select or EraseByStroke will override this setting providing alternate functionality. The following method sets the editing mode to select:
// selection
private void Select(object sender, RoutedEventArgs e)
{
// set the EditingMode to Select
myInkCanvas.EditingMode = InkCanvasEditingMode.Select;
}
When this method is called, the user can select and drag a stroke or group of strokes by either directly clicking on the stroke or
"lassoing" a group of strokes.
A similar method can be created to set the editing mode to erase:
// erase
private void Erase(object sender, RoutedEventArgs e)
{
// set the EditingMode to EraseByStroke
myInkCanvas.EditingMode = InkCanvasEditingMode.EraseByStroke;
}
When this method is called, the user can erase ink on the canvas by holding down the left mouse button and moving the cursor (an eraser in this mode) over any stroke.