

Introduction
This article demonstrates how to create a draggable panel in an Android application using Android Studio. Draggable Panel is an Android library created to build a draggable user interface similar to the new YouTube draggable video component based on Fragments or Views.

Understanding the basics
- This Android library offers you the two classes to use and to create your own awesome user interfaces - If you want to use it with fragments, add DraggablePanel to your layout. If you want to use it with Views, use DraggableView and put your Views inside.
- This library works on Android 4.X or higher versions but not in lower versions because the scale effect is not going to work properly when the user tries to drag the view. The clickable zone on a scaled view in Android 2.Xis bigger than the real scaled zone.
Step 1
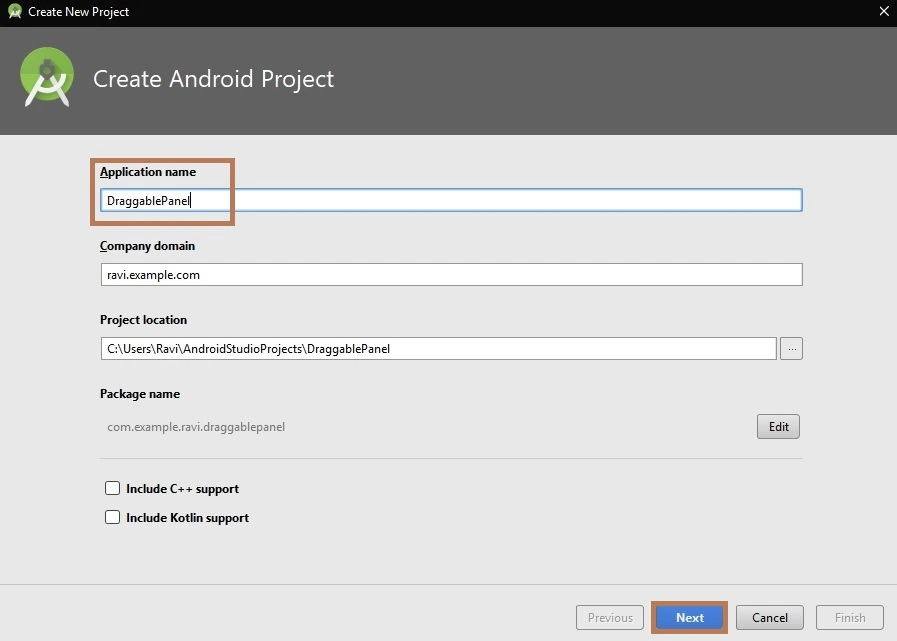
Create a new project in Android Studio from File >> Project and fill all the necessary details.
Next, go to Gradle Scripts >> build.gradle (Module: app).Select build.gradle, The app Gradle compile the code and build types will appear. Just replace that the following code. To make a Button, ImageView, and ListView in your layout XML and add the DraggablePanel in your project or you can also Gradle
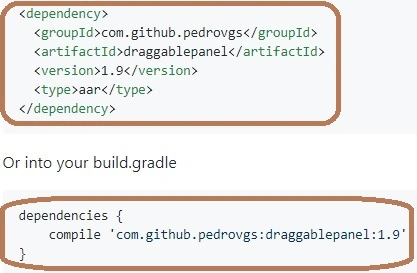
Download the latest JARs or grab via Gradle,
Compile Code
- dependencies {
- compile 'com.github.pedrovgs:draggablepanel:1.9'
- }
or Maven
- <dependency>
- <groupId>com.github.pedrovgs</groupId>
- <artifactId>draggablepanel</artifactId>
- <version>1.9</version>
- <type>aar</type>
- </dependency>
Step 2
Next, go to app >> res >> layout >> activity_main.xml. Select the activity page. The XML code will appear, Just the following code. Create the layout of the Button and draggable panel.
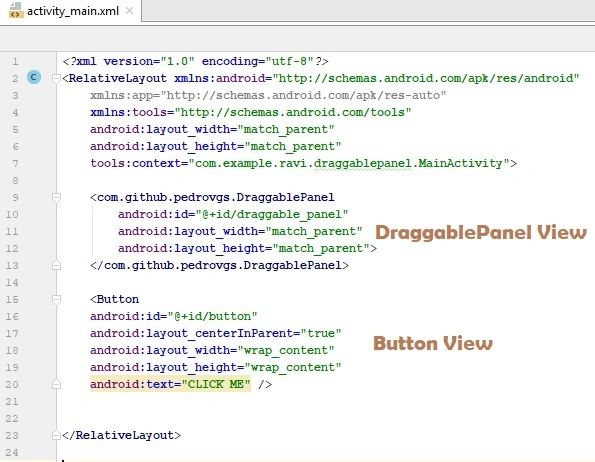
Activity_Main.xml Code
- <?xml version="1.0" encoding="utf-8"?>
- <RelativeLayout xmlns:android="http://schemas.android.com/apk/res/android"
- xmlns:app="http://schemas.android.com/apk/res-auto"
- xmlns:tools="http://schemas.android.com/tools"
- android:layout_width="match_parent"
- android:layout_height="match_parent"
- tools:context="com.example.ravi.draggablepanel.MainActivity">
- <com.github.pedrovgs.DraggablePanel
- android:id="@+id/draggable_panel"
- android:layout_width="match_parent"
- android:layout_height="match_parent">
- <RelativeLayout
- android:layout_width="match_parent"
- android:layout_height="match_parent">
- <Button
- android:id="@+id/button"
- android:layout_centerInParent="true"
- android:layout_width="wrap_content"
- android:layout_height="wrap_content"
- android:text="CLICK ME" />
- </RelativeLayout>
- </com.github.pedrovgs.DraggablePanel>
- </RelativeLayout>
Next, go to app >> res >> values >> string.xml. Select string page. The XML code will appear, Just the following code or add string - array items. Create the layout of the "array - items" 1 - 10.
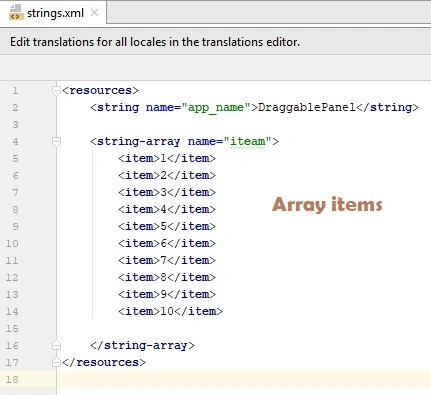
String.xml Code
- <resources>
- <string name="app_name">DraggablePanel</string>
- <string-array name="items">
- <item>1</item>
- <item>2</item>
- <item>3</item>
- <item>4</item>
- <item>5</item>
- <item>6</item>
- <item>7</item>
- <item>8</item>
- <item>9</item>
- <item>10</item>
- </string-array>
- </resources>
Step 3
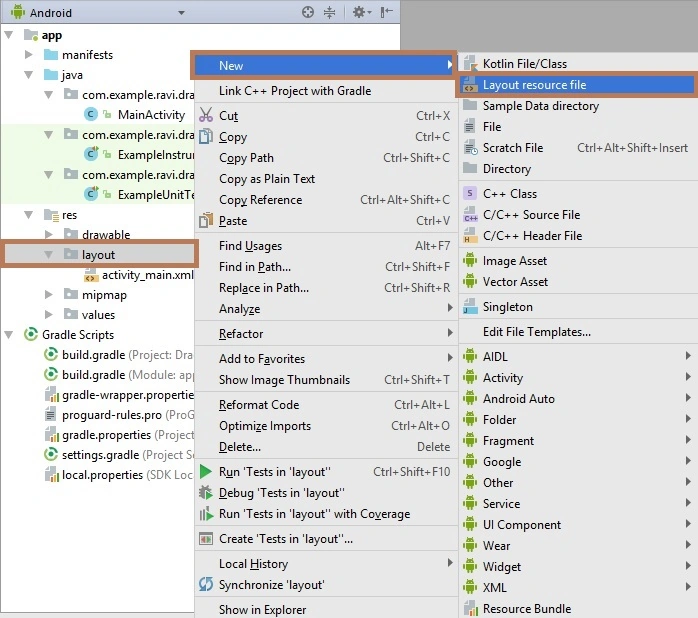
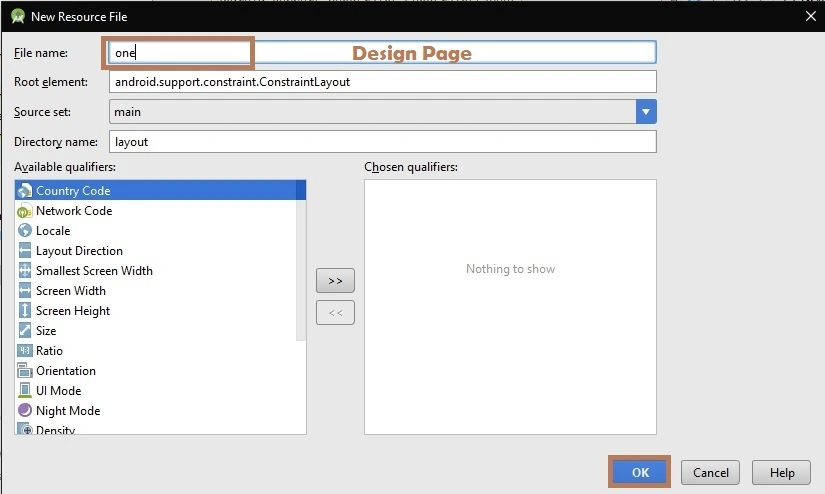
Next, go to app >> res >> layout right click to add New >> Layout Resource File.
One.xml Code
- <?xml version="1.0" encoding="utf-8"?>
- <android.support.constraint.ConstraintLayout
- xmlns:android="http://schemas.android.com/apk/res/android" android:layout_width="match_parent"
- android:layout_height="match_parent">
- <ImageView
- android:layout_width="match_parent"
- android:scaleType="centerCrop" //ImageView
- android:src="@drawable/image"
- android:layout_height="match_parent" />
- </android.support.constraint.ConstraintLayout>
Two.xml Code
- <?xml version="1.0" encoding="utf-8"?>
- <LinearLayout
- xmlns:android="http://schemas.android.com/apk/res/android" android:layout_width="match_parent"
- android:layout_height="match_parent">
- <ListView
- android:layout_width="match_parent"
- android:layout_height="match_parent" //ListView
- android:background="#ffffff"
- android:entries="@array/items">
- </ListView>
- </LinearLayout>
First Page and Second Page Design View
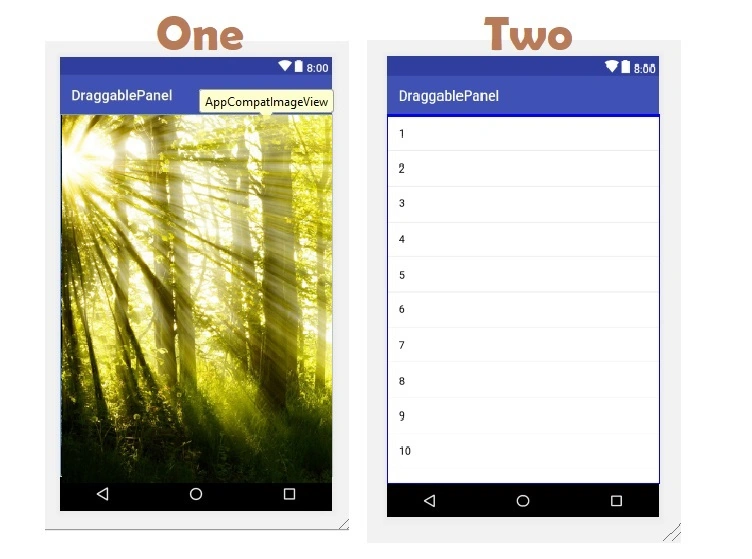
Step 4
In this step, go to app >> Java >> domain name right-click to add >> new >> Java Class. After that, open the Dialog Box and Click ok then again add another one page (Page Name: one, two), the java code will appear. I have provided the code; you can use this code or you can use your own code.
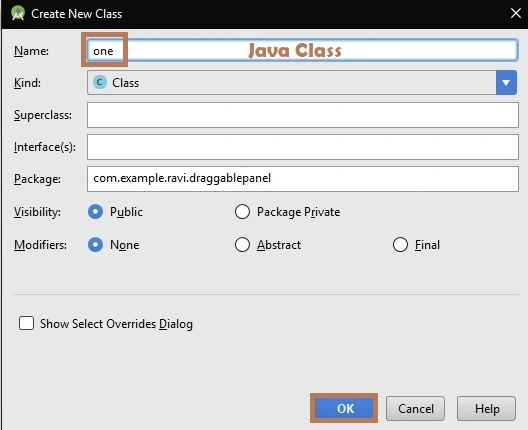
One.java Code
- package com.example.ravi.draggablepanel;
- import android.os.Bundle;
- import android.support.annotation.Nullable;
- import android.support.v4.app.Fragment;
- import android.view.LayoutInflater;
- import android.view.View;
- import android.view.ViewGroup;
- public class one extends Fragment {
- @Nullable
- @Override
- public View onCreateView(LayoutInflater inflater, @Nullable ViewGroup container, @Nullable Bundle savedInstanceState) {
- View view = inflater.inflate(R.layout.one, container, false);
- return view;
- }
- }
Two.java Code
- package com.example.ravi.draggablepanel;
- import android.os.Bundle;
- import android.support.annotation.Nullable;
- import android.support.v4.app.Fragment;
- import android.view.LayoutInflater;
- import android.view.View;
- import android.view.ViewGroup;
- public class two extends Fragment {
- @Nullable
- @Override
- public View onCreateView(LayoutInflater inflater, @Nullable ViewGroup container, @Nullable Bundle savedInstanceState) {
- View view = inflater.inflate(R.layout.two, container, false);
- return view;
- }
- }
Step 5
Next, go to app >> src >> >>main >> java >> MainActivity.java. The java code will appear. Just replace that with the following java code
MainActivity.java Code
- package com.example.ravi.draggablepanel;
- import android.os.Handler;
- import android.support.v7.app.AppCompatActivity;
- import android.os.Bundle;
- import android.view.View;
- import android.widget.Button;
- import com.github.pedrovgs.DraggablePanel;
- public class MainActivity extends AppCompatActivity {
- Button button;
- DraggablePanel draggablePanel;
- @Override
- protected void onCreate(Bundle savedInstanceState) {
- super.onCreate(savedInstanceState);
- setContentView(R.layout.activity_main);
- draggablePanel =(DraggablePanel) findViewById(R.id.draggable_panel);
- draggablePanel.setFragmentManager(getSupportFragmentManager());
- draggablePanel.setTopFragment(new one());
- draggablePanel.setBottomFragment(new two());
- draggablePanel.setTopViewHeight(300);
- draggablePanel.initializeView();
- Handler handler = new Handler();
- handler.postDelayed(new Runnable() {
- @Override
- public void run() {
- draggablePanel.closeToLeft();
- }
- },100);
- button = (Button) findViewById(R.id.button);
- button.setOnClickListener(new View.OnClickListener() {
- @Override
- public void onClick(View view) {
- draggablePanel.maximize();
- }
- });
- }
- }
Step 6
Next, go to Android Studio and deploy the application, Select Emulator or your Android mobile with USB debugging enabled. Give it a few seconds to make installations and set permissions.
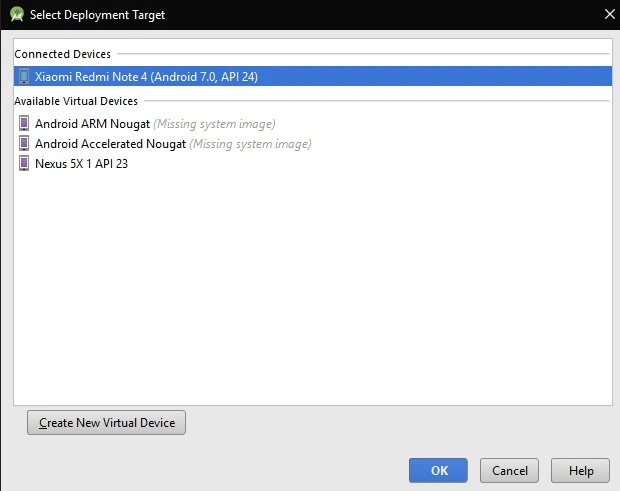
Run the application in your desired emulator (Shift + F10)
Summary
Finally, we have successfully created DraggablePanel Application. Later we will discuss more Android Applications.
Join the conversation! Your thoughts help the community grow.