

File Dialog Boxes In Expression Blend
Hi guys you would be happy to know that Expression blend not only provides a platform for creating interactive graphics and next generation user interfaces but you can also create file handling applications through this. In this article I would be cover the three main and most important aspects of file handling i.e. opening a text file, opening a image file and saving the text file.It is very easy handling files in Expression Blend too. Just go through this article and you will, for sure, learn the basic concepts of handling dialog boxes without much effort.
So here we go:
Step 1 : First of all you need to create
a new project of WPF application with C# language using Expression Blend and
name it as Dialog Boxes.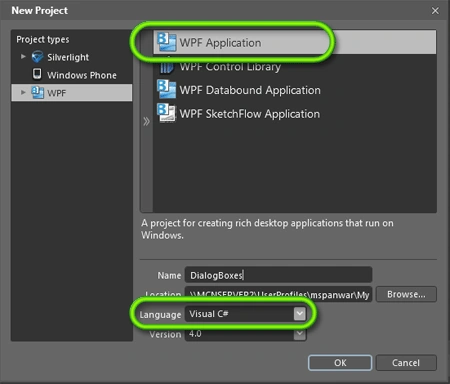
Step 2 : Now you land up into a white
screen called artboard, this is where you have the designing rights. Now First
and foremost thing is to divide the artboard into two rows( upper and lower) and
then divide lower row into two columns such that the left column covers 80%
row and rest the other. For this, move the mouse on the boundaries of the
artboard and you will find straight lines bisecting the artboard these are grid
lines that creates rows and columns. Using these lines divide the artboard as
told above. This artboard now appears as below: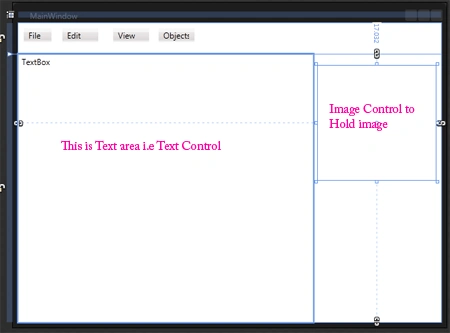
Step 3 : Go-to assets and select Menu
and drag it into the artboard on the upper row. Do this three menus i.e. File
menu, Edit menu and View menu.
Step 4 : Select TextBox from the toolbox
(or assets if its not in toolbox) and drag it onto the lower row first column
and name it as "tb1".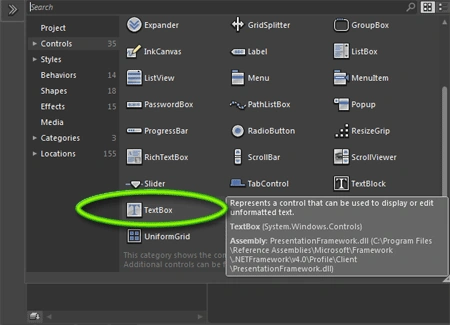
Step 5 : Again visit the toolbox/assets
and add an image control to the next column of the lower row.
Step 6 : Now Right click on the menu and
in the window that pops up select add menuitem name this menu item as "File".

Similarly rename the Edit menu and View menu then to the File menu add three
menuitem namely Open, Open Image and Save Text. It may happen that while
adding these menu items these menuitem may fall out of main menu control for
this hold ALT and drag the item to the parent menu.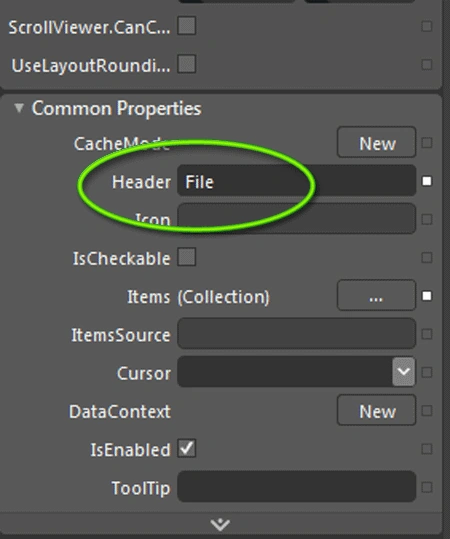
Step 7 : Next task is to set area for
the text field. For this select the textbox and go to --> Objects--> Autosize -->
Fill. This fills the entire column with the textbox.

Step 8 : Then select the Textbox and
go to --> Layout property--> Vertical scrollbar visibility--> Set this as auto. This
is done so that the text is completely wrapped into the textfield.

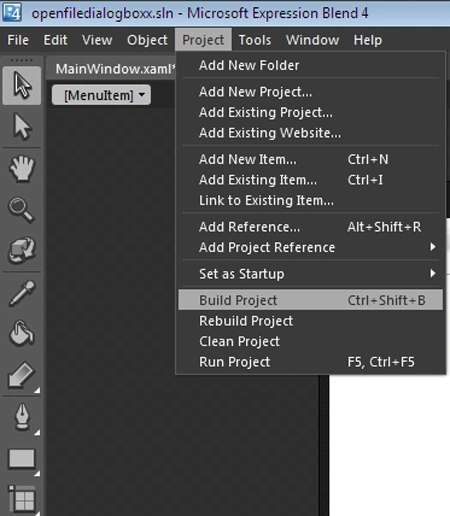
Step 9 : Now you have to build the project for this go to project and select Build.
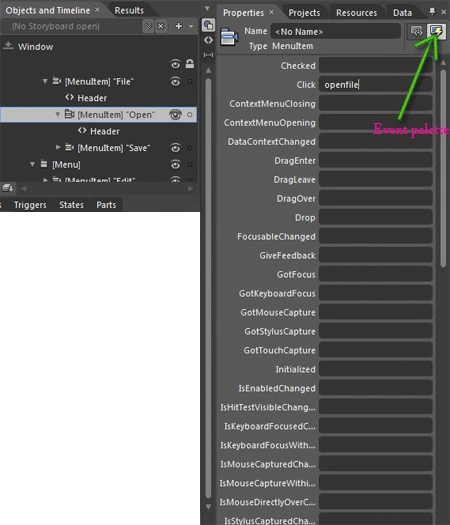
Step 10 : Now the main work starts. First of all we'll use Open file dialogbox for opening and displaying text files into the textfield. For this select the "Open" menuitem from the object and timeline window and goto the even palette and on "Click" event type the name of the click event or click method name. Here I have named it as openfile. As soon as you press enter you see this screen. It is here to add OpenDialogBox coding to make the Open menuitem in working state.
using
System;
using
System.Collections.Generic;
using
System.Text;
using
System.Windows;
using
System.Windows.Controls;
using
System.Windows.Data;
using
System.Windows.Documents;
using
System.Windows.Input;
using
System.Windows.Media;
using
System.Windows.Media.Imaging;
using
System.Windows.Shapes;
namespace openfiledialogboxx
{ /// <summary>
/// Interaction logic for MainWindow.xaml
/// </summary>
public partial class MainWindow : Window
{
public MainWindow()
{
this.InitializeComponent();
// Insert code required on object creation below this point.
}
private void openfile(object sender, System.Windows.RoutedEventArgs e)
{
// here Add event handler implementation for Open file dialog box.
}
}
}
Step 11 : Now we start coding in the openfile() method. Type the following lines but before adding these lines include the folowing namespace
using System.IO; at the top. After this
start writing the following lines:
private
void openfile(object sender, System.Windows.RoutedEventArgs e)
{
// here Add
event handler implementation
for Open file dialog box.
Microsoft.Win32.OpenFileDialog fd =
new
Microsoft.Win32.OpenFileDialog();
fd.InitialDirectory =
"D:\\";
fd.Filter ="All
Files (*.*)|*.*|Text files (*.txt)|*.txt";
fd.RestoreDirectory =
true
;
bool?
result = fd.ShowDialog();
if(result==true)
{
String mypath =
fd.FileName.ToString();
if(File.Exists(mypath))
tb1.Text =
System.IO.File.ReadAllText(mypath);
}
}
Step 12 : Now we have to insert the image into the image control using file dialogbox. For this select the openimage menuitem from the Object and timeline and and goto Events --> Click--> Type here the name you would like to give to your method of importing image file into the image control. In this project I have named it as imagopen and we have to code in imagopen() method. Type the following lines below:


Join the conversation! Your thoughts help the community grow.