

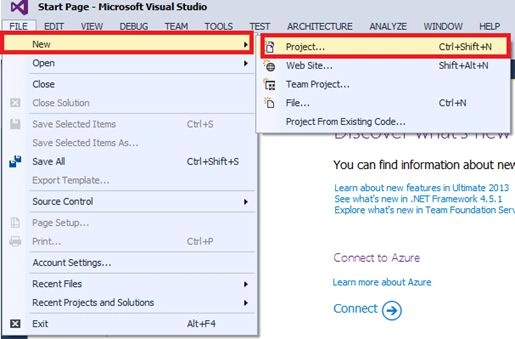
Step 1: Open Visual Studio and click File=> New=> Project.
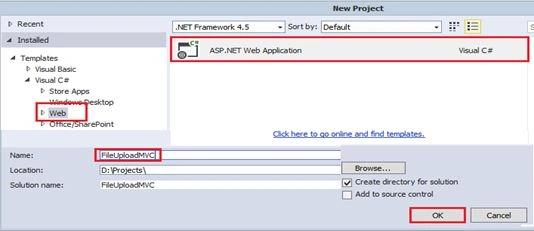
Step 2: Now, select ASP.NET Web Application. Then create Project name. Here our project name is “FileUploadMVC” and then click on OK button.
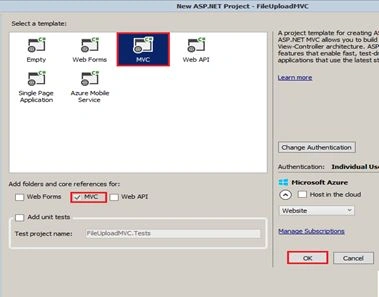
Step 3: Select the MVC template, then click on OK Button.
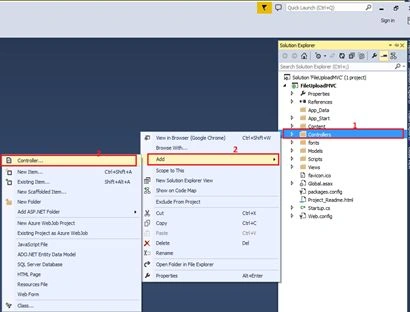
Step 4: Now you need to create Controller. So first of all you will right click on Controller folder, then add Controller.
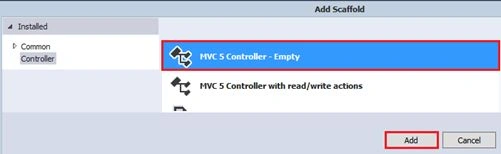
Step 5: Here select the Empty MVC 5 Controller.
Click add button.
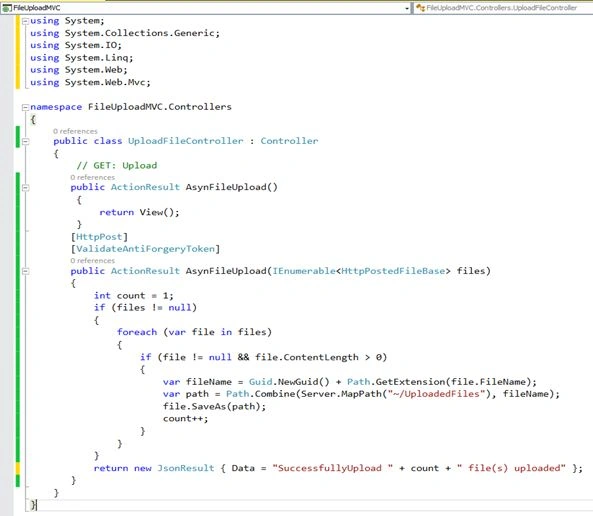
Step 6: Here I have added “AsynFileUpload” Action into “UploadFile” Controller.
Controller section code
- using System;
- using System.Collections.Generic;
- using System.IO;
- using System.Linq;
- using System.Web;
- using System.Web.Mvc;
- namespace FileUploadMVC.Controllers {
- public class UploadFileController: Controller {
- // GET: Upload
- public ActionResult AsynFileUpload() {
- return View();
- }
- [HttpPost]
- [ValidateAntiForgeryToken]
- public ActionResult AsynFileUpload(IEnumerable < HttpPostedFileBase > files) {
- int count = 1;
- if (files != null) {
- foreach(var file in files) {
- if (file != null && file.ContentLength > 0) {
- var fileName = Guid.NewGuid() + Path.GetExtension(file.FileName);
- var path = Path.Combine(Server.MapPath("~/UploadedFiles"), fileName);
- file.SaveAs(path);
- count++;
- }
- }
- }
- return new JsonResult {
- Data = "Successfully " + count + " file(s) uploaded"
- };
- }
- }
- }
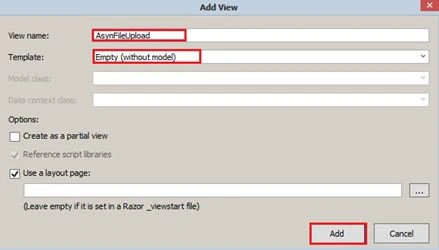
Step 7. Now right click on “Actions Method” in Controller section. Then add view.
Step 8: In this section , I used jQuery code to upload the file to the server.
- @ {
- ViewBag.Title = "FileUpload";
- } < h2 > AsynFileUpload < /h2>
- @using(Ajax.BeginForm("AsynFileUpload", "UploadFile", new AjaxOptions() {
- HttpMethod = "post"
- }, new {
- enctype = "multipart/form-data"
- })) {
- @Html.AntiForgeryToken() < input type = "file"
- name = "file"
- id = "ful" / > < input type = "submit"
- value = "upload file" / >
- } < div class = "progress" > < div class = "progress-bar" > 0 % < /div> < /div> < div id = "status" > < /div> < style > .progress {
- position: relative;
- width: 450 px;
- border: 1 px solid# ddd;
- padding: 1 px;
- }.progress - bar {
- width: 0 px;
- height: 30 px;
- background - color: green;
- } < /style>
- @section scripts { < script src = "http://malsup.github.com/jquery.form.js" > < /script> < script > (function() {
- var bar = $('.progress-bar');
- var percent = $('.progress-bar');
- var status = $('#status');
- $('form').ajaxForm({
- beforeSend: function() {
- status.empty();
- var percentValue = '0%';
- bar.width(percentValue);
- percent.html(percentValue);
- },
- uploadProgress: function(event, position, total, percentComplete) {
- var percentValue = percentComplete + '%';
- bar.width(percentValue);
- percent.html(percentValue);
- },
- success: function(d) {
- var percentValue = '100%';
- bar.width(percentValue);
- percent.html(percentValue);
- $('#fu1').val('');
- alert(d);
- },
- complete: function(xhr) {
- status.html(xhr.responseText);
- }
- });
- })(); < /script>
- }
Click on Choose File button and select the file.
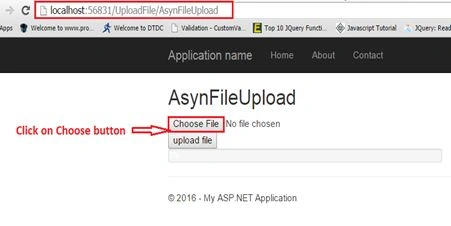
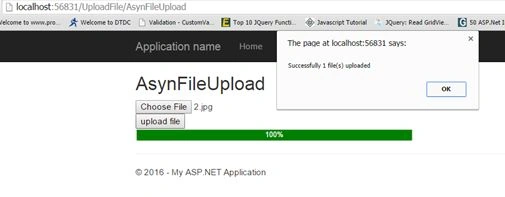
Here our file successfully uploaded.
Sonu ChaudharyPosted May 18, 2018, 12:50 AM
Really helping one article.
Gagan SharmaPosted Aug 8, 2016, 9:24 AM
Good one ..
Avinash ThakurPosted Aug 5, 2016, 12:21 PM
Thanks to all
Prasanna MuraliPosted Aug 5, 2016, 11:45 AM
Nice one...
Kartik KumarPosted Aug 5, 2016, 9:13 AM
Very nice article
Munesh SharmaPosted Aug 5, 2016, 7:10 AM
Nice
Vignesh ManiPosted Aug 5, 2016, 6:51 AM
Nice
SubashPosted Aug 5, 2016, 4:13 AM
Good Explanation
Bhavik PatelPosted Aug 4, 2016, 10:33 PM
Nice