

Introduction
Assume that you need to send recently added application requests to your department head on a daily basis. You can create a scheduled FLOW to achieve this. Use the Recurrence trigger while creating the FLOW. Set the time and frequency for when it will be triggered. You can fetch items/records from your data source, in my demonstration I am fetching items from the SharePoint list using the Get Items action.
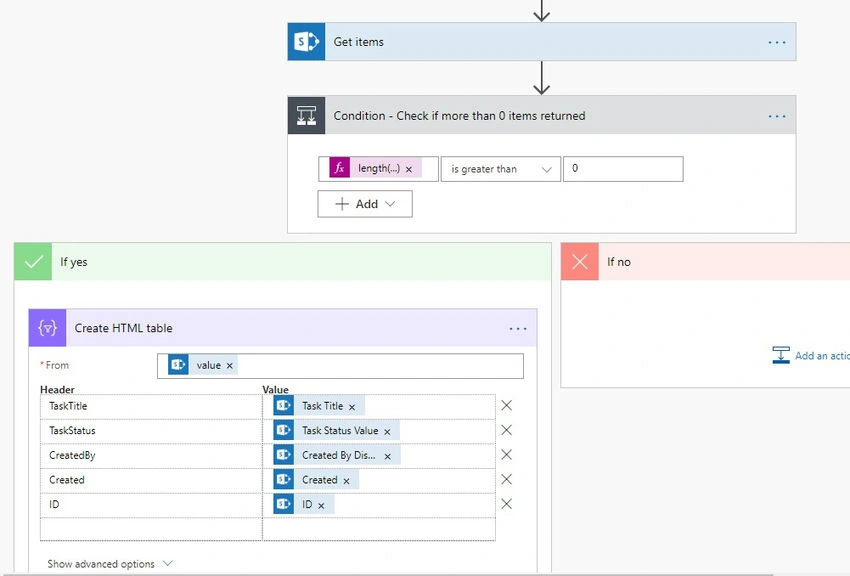
You can use the Create HTML table action in FLOW to generate an HTML table from the data fetched using the Get Items action. In this action, you can choose to let it generate the table columns automatically or you can specify the column names and values in it, as shown below - choose output of Get Items action in the From field, enter the column name in the Header section and choose the column from your data source in the Value section.
Problem
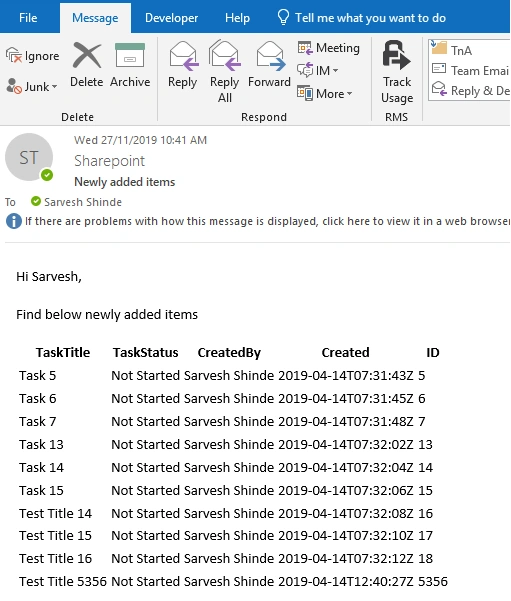
If you use the output of the Create HTML table action directly to send an email, then the mail looks something like below, without any borders and no space between the cells. So, how can we format this HTML table? How can we add border padding and other style attributes if we want to?
Solution
Yes, we can format an HTML table easily using some more actions in FLOW. We will be using compose action, with replace function. We will replace html tags in such a way that we add border and padding properties into it. Below is an overview of steps – check comments added in each action to understand what it does.
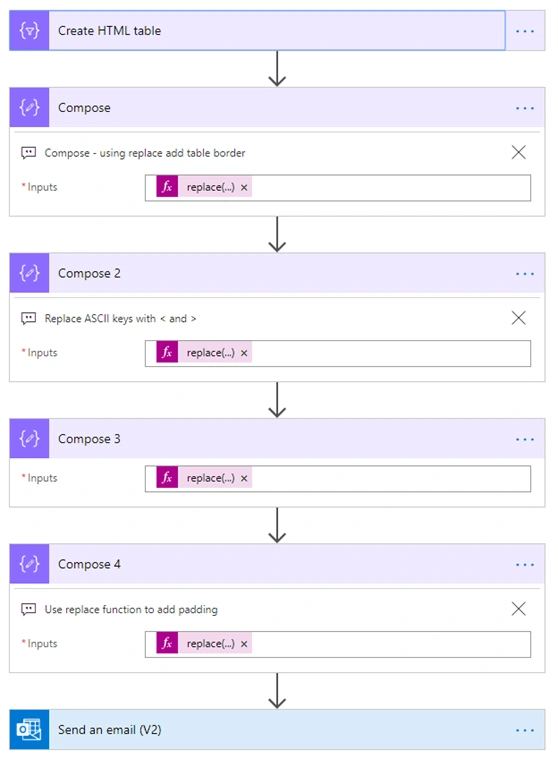
First action after Create HTML table is, Compose, to add table border. Use the below code through expression window. Here we are replacing <table> tag with same tag but with border propery <table border=“1”>
replace(body('Create_HTML_table'), '<table>', '<table border="1">')
Second compose action
In Compose 2, we need to replace encoded or ASCII chars with their actual symbols so that UI render tool treats it as correct html tags. Use the below code in expression window.
Note. Here we are using output of previous step.
replace(
    replace(
        outputs('Compose'),
        '<',
        '<'
    ),
    '>',
    '>'
)
Third compose action
Compose 3, is to replace encoded or ASCII chars with its symbol for double quotes. Use below code in expression window.
Note. Here we are using output of previous step, compose 2
replace(outputs('Compose_2'), '"', '"')
Last Compose action
Compose 4, is to add padding. Use the below code in expression window and make sure you use the output of previous step. Here we are replacing <td> tag with same td tag but with style property.
replace(outputs('Compose_3'), '<td>', '<td style="padding:5px">')
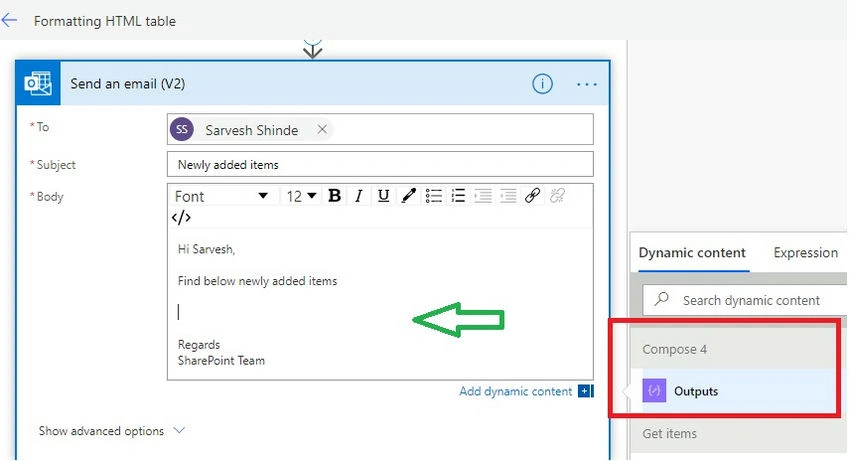
As shown below use output of last compose action, in body section of Send email action. Save your FLOW and test it. If you have observed MS product team is continuously working towards enhancing every action in the FLOW - as they have enhanced Send email action to include rich text box features for Body section.
This is how your users will get an email with border and cell padding added. You can do much more than this using style properties. It's just matter of replacing html tags with whatever you want.
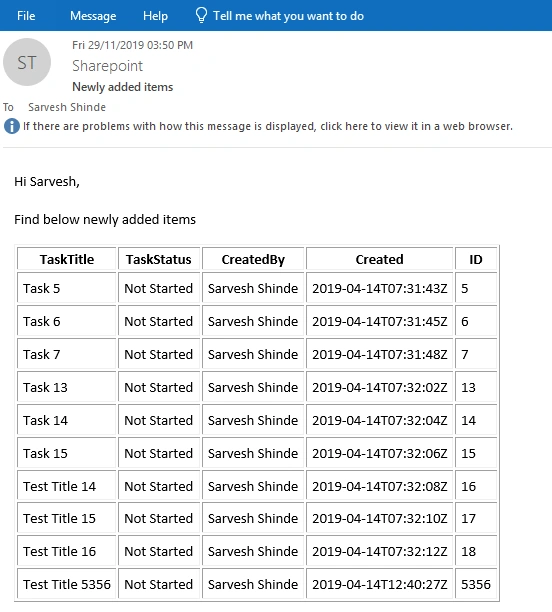
You can even add/generate hyperlinks dynamically in this table using anchor tag, using which the end user can open specific items.
Thanks for reading, hope this helps.
Nada FathyPosted Jan 22, 2024, 6:26 AM
Sarvesh Shinde Would you please help me ?
Nada FathyPosted Jan 22, 2024, 6:23 AM
The flow worked without the condition when i added the condition it's failed
puneet guptaPosted Sep 14, 2020, 1:42 AM
Hi Sarvesh thanks for sharing the nice information , can you please let me know how generate hyperlinks dynamically in this table because I am trying to include anchor tag but link is not generated I am getting entire URL of the item rather than link.
Mohan RaoPosted Apr 25, 2020, 1:02 PM
Alredy have html file in SP library, please help me how To wrap long word to fit In td.
Nash A.Posted Mar 9, 2020, 2:44 PM
How would you append rows to the table created this way? I have to create table consisting of certain list items only. So need to create table inside Apply for each action. I ended up creating an array variable and appending items to this array variable. And finally converting array to HTML table.
Dharmendra Kumar PanditPosted Jan 2, 2020, 9:38 AM
Nice one.............