

Introduction
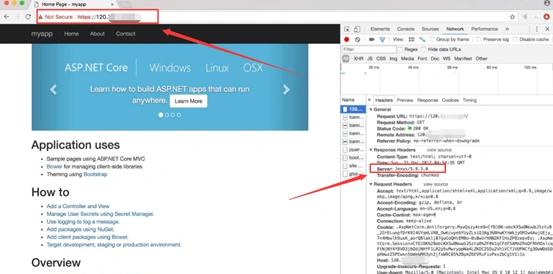
In this article, you will learn how to host your ASP.NET Core project on Linux with Jexus Web Server.
What is Jexus Web Server ?
Jexus is a free and high-performance Web Server and load balancing gateway on Linux platform . Jexus supports ASP.NET and ASP.NET CORE not only, but also supports PHP! It also contains reverse proxy, intrusion detection and other important functions.
Prerequisites
- Install .NET SDK on your server (Here I use CentOS 7.x).
- An existing ASP.NET Core application (Here I will create a new one).
Copy over your app
Run dotnet publish -c release from the dev environment to package an app into a self-contained directory that can run on the server.
Copy the publish folder to the server using whatever tool (SCP, FTP, etc.) integrates into your workflow.
Test the app, from the command line, run dotnet myapp.dll.
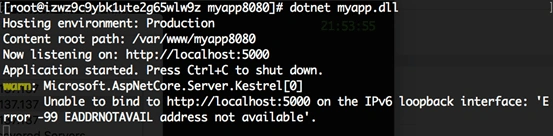
OK, the app runs well.
You may notice that there are some warning messages but we don't need to worry about them. Jexus will help us to handle this!
Install Jexus
- curl https://jexus.org/release/x64/install.sh | sh
Note
When you install Jexus, your account requires root privileges!
Configure Jexus
When we use Jexus, one configuration file corresponds one website. If we have 3 websites, we need to create 3 configuration files!
Copy a default configuration file , and modify it.
- cp /usr/jexus/siteconfig/default /usr/jexus/siteconfig/myapp
- vim /usr/jexus/siteconfig/myapp
Here is an example configuration file for our application.
- ######################
- # Web Site: Default
- ########################################
- port=8080
- root=/ /var/www/myapp8080
- hosts=* #OR your.com,*.your.com
- # addr=0.0.0.0
- # CheckQuery=false
- # NoLog=true
- AppHost={
- cmd=dotnet /var/www/myapp8080/myapp.dll;
- root=/var/www/myapp8080;
- port=0
- }
- # NoFile=/index.aspx
- # Keep_Alive=false
- # UseGZIP=false
- # UseHttps=true
- # ssl.certificate=/x/xxx.crt #or pem
- # ssl.certificatekey=/x/xxx.key
- # ssl.protocol=TLSv1.0 # TLSv1.1 or TLSv1.2...
- # ssl.ciphers=
- # DenyFrom=192.168.0.233, 192.168.1.*, 192.168.2.0/24
- # AllowFrom=192.168.*.*
- # DenyDirs=~/cgi, ~/upfiles
- # indexes=myindex.aspx
- # rewrite=^/.+?\.(asp|php|cgi|pl|sh)$ /index.aspx
- # reproxy=/bbs/ http://192.168.1.112/bbs/
- # host.Redirect=abc.com www.abc.com 301
- # ResponseHandler.Add=myKey:myValue
- # Jexus php fastcgi address is '/var/run/jexus/phpsvr'
- #######################################################
- # fastcgi.add=php|socket:/var/run/jexus/phpsvr
- # php-fpm listen address is '127.0.0.1:9000'
- ############################################
- # fastcgi.add=php|tcp:127.0.0.1:9000

DeepakPosted Feb 14, 2020, 10:23 PM
Is there similar article for windows?
Anupam SinghPosted Jan 3, 2018, 4:51 AM
Thanks for sharing, I am exploring asp.net core now a days.