

In this write-up, we will see how to connect Office 365 Exchange Online Service to PowerShell for handling the O365 account services with PowerShell Commands. Just follow all the steps to know the process.
MS Office 365 is a very popular email client nowadays. Also, most people prefer Exchange Online for Business because it works with a GUI interface, however, people mostly use PowerShell commands for navigating their Office 365 Account. That’s why here I am going the discuss how to connect Office 365 Exchange Online Services to PowerShell. So, follow all the given steps for connecting the O365 services like Skype for business, security etc., with PowerShell.
Requirements for connecting O365 with Windows PowerShell
- The Office 365 account should be a member of Global Admin Role.
- Install Microsoft .NET Framework 4.5 and Windows Management Framework 3.0, 4.0 or the latest version.
- In the end, download and install the modules of PowerShell for Office 365, SharePoint Online, and Skype on your PC.
- Windows Azure Active Directory tool
- Microsoft Online Services Sign-In Assistant for IT Professionals RTW
- Skype for Business Online, Windows PowerShell Module
Connect Office 365 Admin account with PowerShell
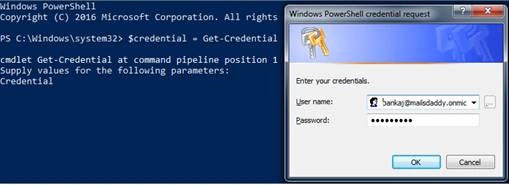
Step 1
$credential = Get-Credential
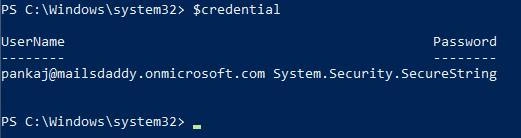
Step 2
$credential
Step 3
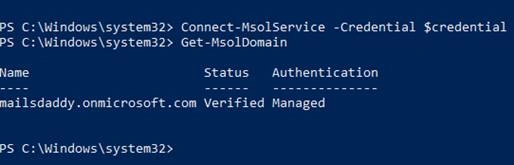
Connect-MsolService -Credential $credential
Step 4
Get-MsolDomain
Step 5
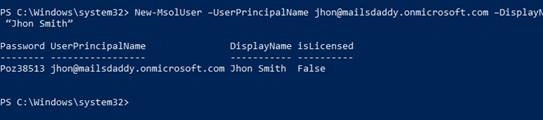
New-MsolUser –UserPrincipalName [email protected] –DisplayName “Jhon Smith”
Step 6
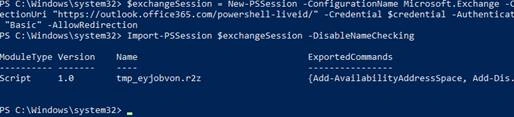
$exchangeSession = New-PSSession -ConfigurationName Microsoft.Exchange -ConnectionUri "https://outlook.office365.com/powershell-liveid/" -Credential $credential -Authentication "Basic" -AllowRedirection
After that, import the PS session or remote session.
Import-PSSession $exchangeSession –DisableNameChecking
Step 7
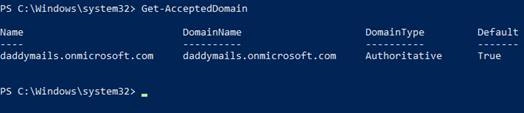
Get-AcceptedDomain
Connect Security & Compliance Center to PowerShell
Step 1
$ccSession = New-PSSession -ConfigurationName Microsoft.Exchange -ConnectionUri https://ps.compliance.protection.outlook.com/powershell-liveid/ -Credential $credential -Authentication Basic –AllowRedirection

Step 2
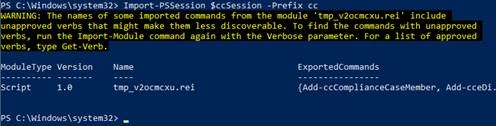
Import-PSSession $ccSession -Prefix cc
Note
If nothing creates a problem, you will get the following figure.
Connect Skype for Business online with PowerShell
Step 1
Import-Module SkpyeOnlineConnector
Step 2
$sfboSession = New-CsOnlineSession -Credential $credential
Step 3
Import-PSSession $sfboSession
Once you put the command, a process will run on the screen; you need to wait.

Join the conversation! Your thoughts help the community grow.