

In this article, we are going to create a custom Content Type using Visual Studio 2010.
Steps Involved
Creating Empty SharePoint Project
- Open Visual Studio 2010.
- Go to File => New => Project.
- Select 2010 from the installed templates SharePoint and choose Empty SharePoint Project.
- Name it as CustomContentType.
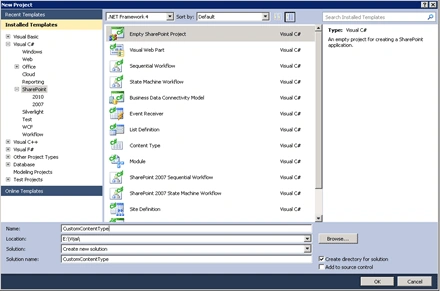
- Click Add.
- Enter the SharePoint server farm URL.
- Select 'Deploy it as a Farm Solution".
- Click Finish.
Adding Content Type
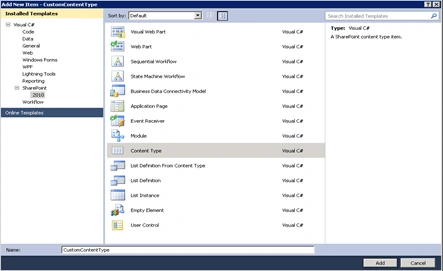
- Right-click the Solution Explorer and select Add a new item.
- Select Content Type from the installed templates SharePoint and name it as CustomContentType.
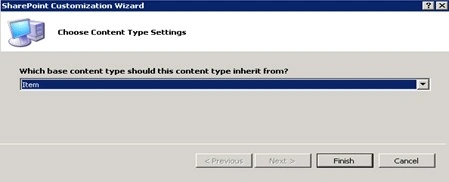
- Choose the base content type from which our custom content type should inherit, I have chosen "Item" as a base content type.
- Double-click the Elements.xml file.
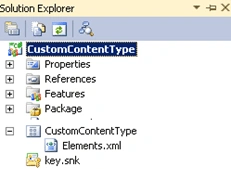
- Replace the code with the below one.
<?xml version="1.0" encoding="utf-8"?> <Elements xmlns="http://schemas.microsoft.com/sharepoint/"> <!-- Parent ContentType: Item (0x01) --> <ContentType ID="0x0100eb248db87d3f40efa20cdfae86fe0b50" Name="Custom Content Type" Group="Custom Content Types" Description="My Content Type" Inherits="TRUE" Version="0"> <FieldRefs> </FieldRefs> </ContentType> </Elements> - In the above code, we are adding a Custom Content Type; with the group name as "Custom Content Types".
- Build the solution.
- Deploy the solution.
Testing
- Go to the SharePoint site.
- Go to Site Actions => Site Settings =>Galleries =>Site Content Types.
- You will see the Custom Content Type that we have created in the group "Custom Content Types".

Join the conversation! Your thoughts help the community grow.