

Introduction
- Android Studio (Download Android Studio)
- Java
- Programming skills
- Confidence
Step 1- Open Android Studio.
Then, select Start a New Project.
Specify your App name.
Select the category to which you’re going to develop an app for Smartphone and Tablet, Wear, Android TV..etc.
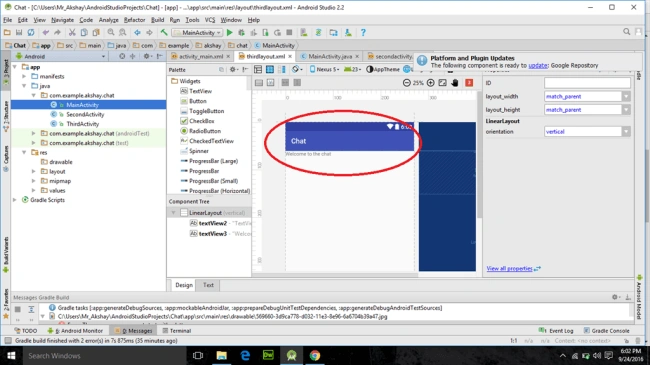 The above picture shows that my app's name is Chat. It is displaying "Welcome to the chat" as the text View which can be dragged from the toolbar on the left side.
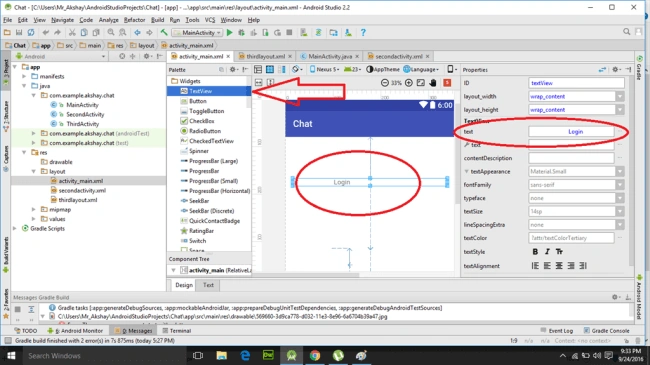
Step 2- Add the Text View label from Toolbar and change the default text to log in.
The above picture shows that my app's name is Chat. It is displaying "Welcome to the chat" as the text View which can be dragged from the toolbar on the left side.
Step 2- Add the Text View label from Toolbar and change the default text to log in.
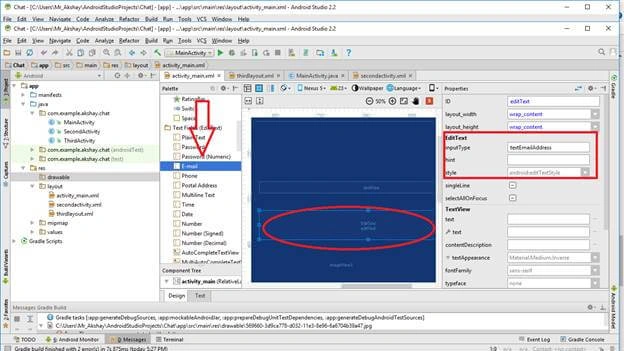
 Step 3- Now, add the Email label and Password label from the toolbar to insert, by dragging and dropping into mainactivity design page.
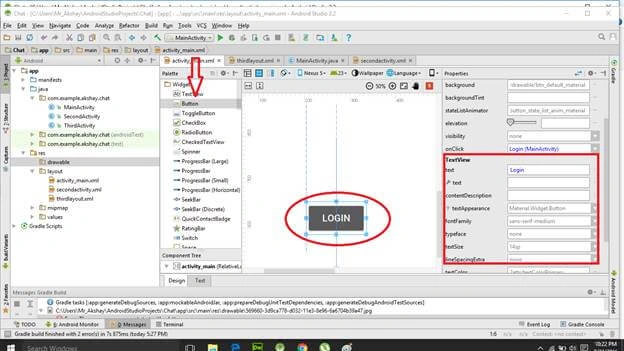
 Step4- Then, add a button to mainactivity as the Login button. Here, we have created the button as Login by drag and drop.
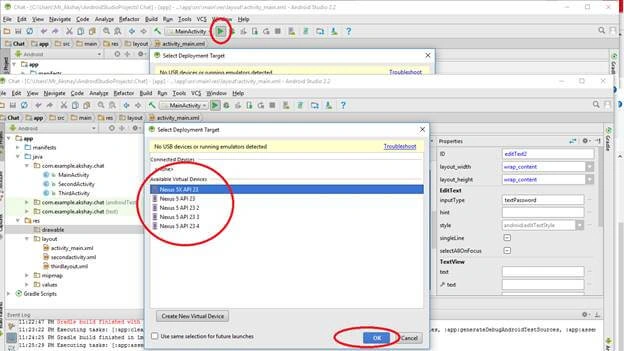
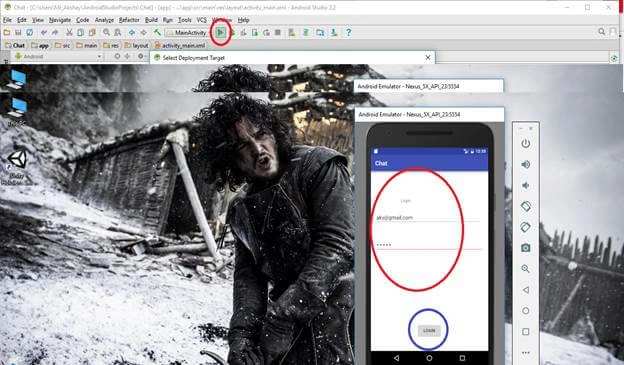
 Step 5- Now, we need to execute our Login page interface in our virtual device. It’s an emulator that enables us to run our Android Operating System in Android Studio to run our apk file created.
 Our Login Page interface is created successfully, by just simply dragging and dropping. In my next article, I will continue by showing you how to access multiple user-interactive pages using different button functions.
Vijayaragavan SPosted Sep 26, 2016, 7:25 PM
Good.....
Humayun Kabir MamunPosted Sep 26, 2016, 12:33 AM
Nice...