

Introduction
In this article, we will create a demo application using React, Redux, and web API. We will learn the basics of Redux and how to use Redux in a React application. Download the code from here.
Prerequisites
- Basic knowledge of React, Redus, and Web API
- Visual Studio
- Visual Studio Code
- SQL Server Management Studio
- Node.js
- Bootstrap
This article covers the following,
- Create React Project
- Basic of Redux
- Environment setup for Redux
- Create a Web API Project
- Install Bootstrap and Axios
Redux
Redux is a predictable state container for Javascript applications. We can use Redux with any Javascript framework or library.
According to the Redox official website:
Redux is a predictable state container for JavaScript apps. It helps you write applications that behave consistently, run in different environments (client, server, and native), and are easy to test. On top of that, it provides a great developer experience, such as live code editing combined with a time-traveling debugger. You can use Redux together with React, or with any other view library. It is tiny (2kB, including dependencies), but has a large ecosystem of addons available.
Create a ReactJS project
First, let's create a React application with the following command.
- npx create-react-app reduxapp
Environment setup for Redux
Install Redux
- npm install redux react-redux
Install Redux-Logger
Install Redux-Logger using the following command.
- npm install redux-logger
Install redux-thunk
Install redux-thunk using the following command.
- npm install redux-thunk
Install redux-devtools-extension
Install redux-devtools-extension using the following command.
- npm install redux-devtools-extension
- npm install --save axios
- npm install bootstrap
Now right click on the Src folder and add a new folder named 'redux', and inside this, create a new folder named 'user'.
Inside the user folder, create 6 files named:
- userActions.js
- userReducer.js
- userTypes.js
- index.js
- rootReducer.js
- store.js
File structure of Redux folder:
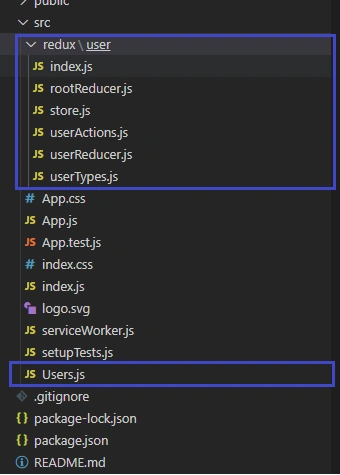
Now open userTypes.js file and add following code:
- export const GET_USERS_REQUEST = 'GET_USERS_REQUEST'
- export const GET_USERS_SUCCESS = 'GET_USERS_SUCCESS'
- export const GET_USERS_FAILURE = 'GET_USERS_FAILURE'
- import axios from 'axios'
- import {
- GET_USERS_REQUEST,
- GET_USERS_SUCCESS,
- GET_USERS_FAILURE
- } from './userTypes'
- export const GethUsers = () => {
- return (dispatch) => {
- dispatch(getUsersRequest())
- axios
- .get('https://localhost:44317/Api/Student/Getdetaisl')
- .then(response => {
- const users = response.data
- console.log(response.data);
- dispatch(getUsersSuccess(users))
- })
- .catch(error => {
- dispatch(getUsersFailure(error.message))
- })
- }
- }
- export const getUsersRequest = () => {
- return {
- type: GET_USERS_REQUEST
- }
- }
- export const getUsersSuccess = users => {
- return {
- type: GET_USERS_SUCCESS,
- payload: users
- }
- }
- export const getUsersFailure = error => {
- return {
- type: GET_USERS_FAILURE,
- payload: error
- }
- }
- import {
- GET_USERS_REQUEST,
- GET_USERS_SUCCESS,
- GET_USERS_FAILURE
- } from './userTypes'
- const initialState = {
- loading: false,
- users: [],
- error: ''
- }
- const reducer = (state = initialState, action) => {
- switch (action.type) {
- case GET_USERS_REQUEST:
- return {
- ...state,
- loading: true
- }
- case GET_USERS_SUCCESS:
- return {
- loading: false,
- users: action.payload,
- error: ''
- }
- case GET_USERS_FAILURE:
- return {
- loading: false,
- users: [],
- error: action.payload
- }
- default: return state
- }
- }
- export default reducer
- import { createStore, applyMiddleware } from 'redux'
- import { composeWithDevTools } from 'redux-devtools-extension'
- import logger from 'redux-logger'
- import thunk from 'redux-thunk'
- import rootReducer from './rootReducer'
- const store = createStore(
- rootReducer,
- composeWithDevTools(applyMiddleware(logger, thunk))
- )
- export default store
- import { combineReducers } from 'redux'
- import userReducer from './userReducer'
- const rootReducer = combineReducers({
- user: userReducer
- })
- export default rootReducer
Now create a component named Users and add the following code:
- import React, { useEffect } from 'react'
- import { connect } from 'react-redux'
- import { GethUsers } from './redux/user/userActions'
- function Users ({ userData, GethUsers }) {
- useEffect(() => {
- GethUsers()
- }, [])
- return userData.loading ? (
- <h2>Loading</h2>
- ) : userData.error ? (
- <h2>{userData.error}</h2>
- ) : (
- <div>
- <div class="row">
- <div class="col-sm-12 btn btn-info">
- How to Build an Application Using Reactjs and Redux
- </div>
- </div>
- <div>
- {userData &&
- userData.users &&
- userData.users.map(user => <p>{user.Email}</p>)}
- </div>
- <table class="table" >
- <thead class="thead-dark">
- <tr>
- <th scope="col">Name</th>
- <th scope="col">Age</th>
- <th scope="col">Address</th>
- <th scope="col">City</th>
- <th scope="col">Salary</th>
- <th scope="col">Department</th>
- </tr>
- </thead>
- <tbody>
- { userData.users.map(item => {
- return <tr key={item.Id}>
- <td>{item.Name}</td>
- <td>{item.Age}</td>
- <td>{item.Address}</td>
- <td>{item.City}</td>
- <td>{item.Salary}</td>
- <td>{item.Department}</td>
- </tr>
- })}
- </tbody>
- </table>
- </div>
- )
- }
- const mapStateToProps = state => {
- return {
- userData: state.user
- }
- }
- const mapDispatchToProps = dispatch => {
- return {
- GethUsers: () => dispatch(GethUsers())
- }
- }
- export default connect(
- mapStateToProps,
- mapDispatchToProps
- )(Users)
Create a Web API Project
Open Visual Studio and click on create a new project:
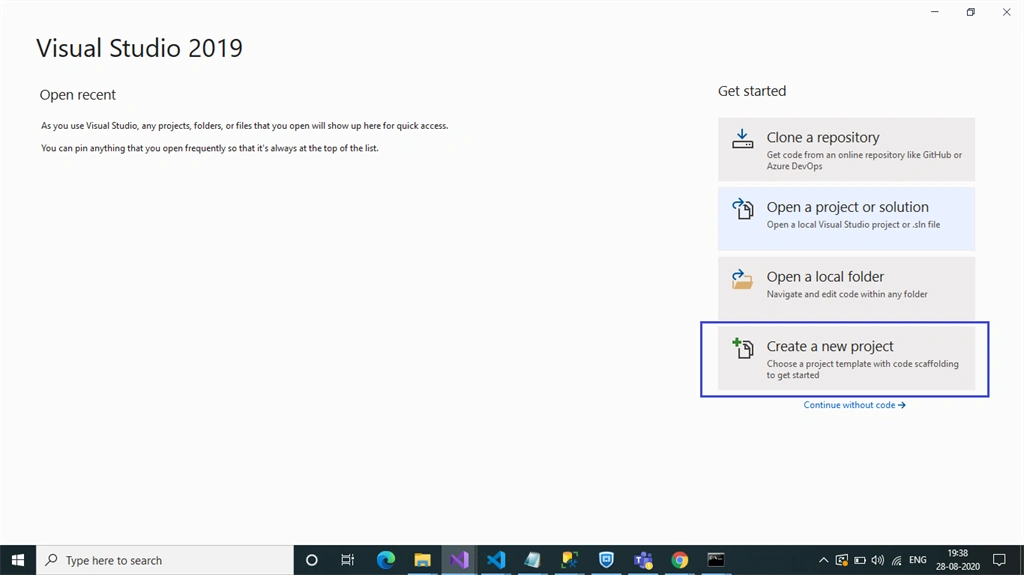
Now select the project and click on the Next button.
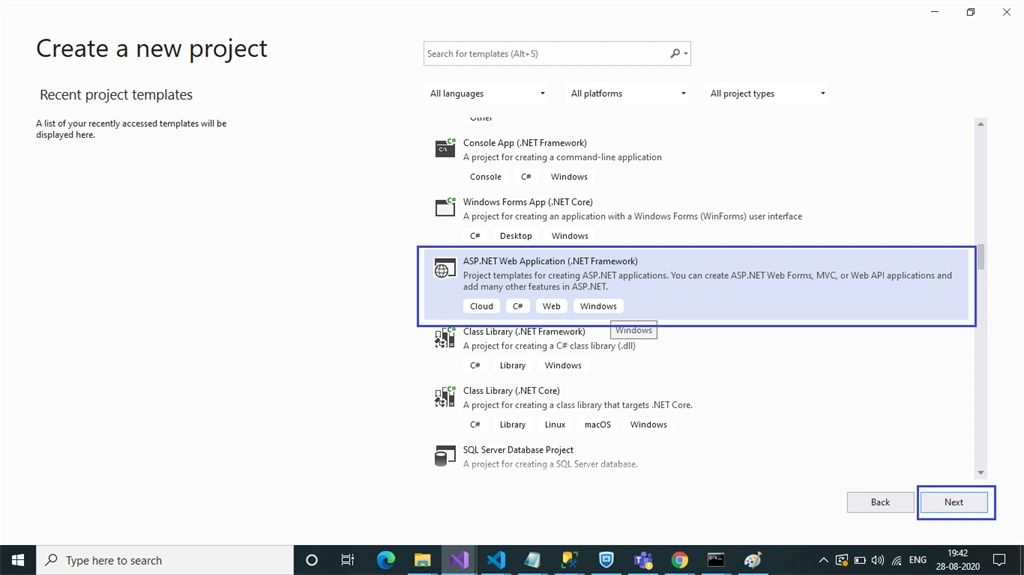
Now select the project name and project location and click on the Create button.
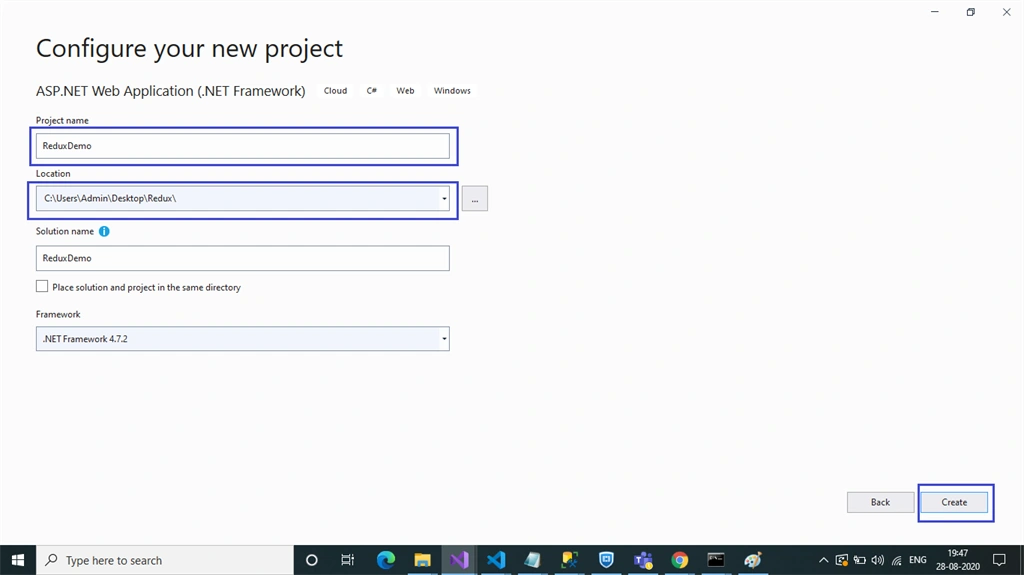
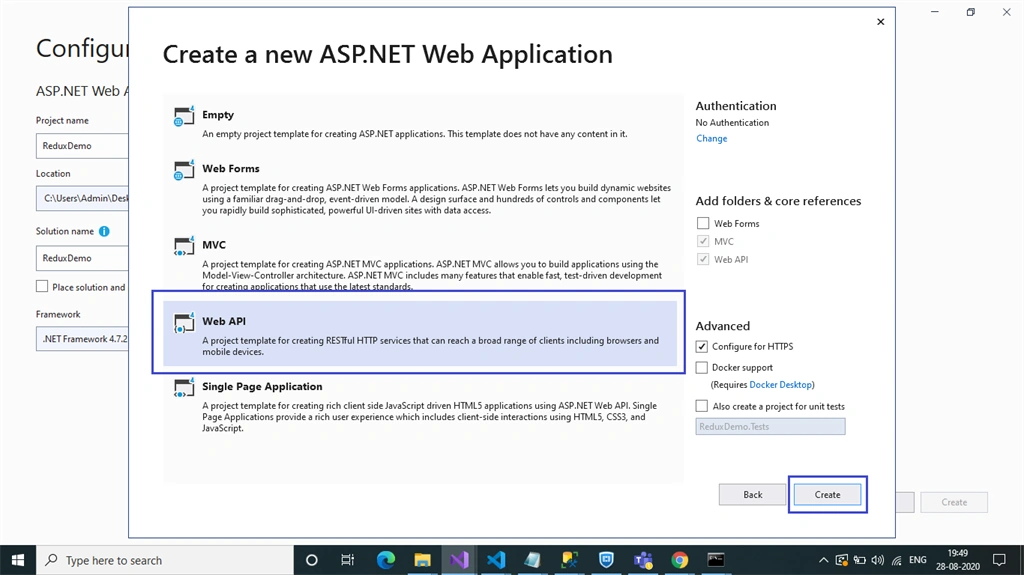
Choose the template as Web API.
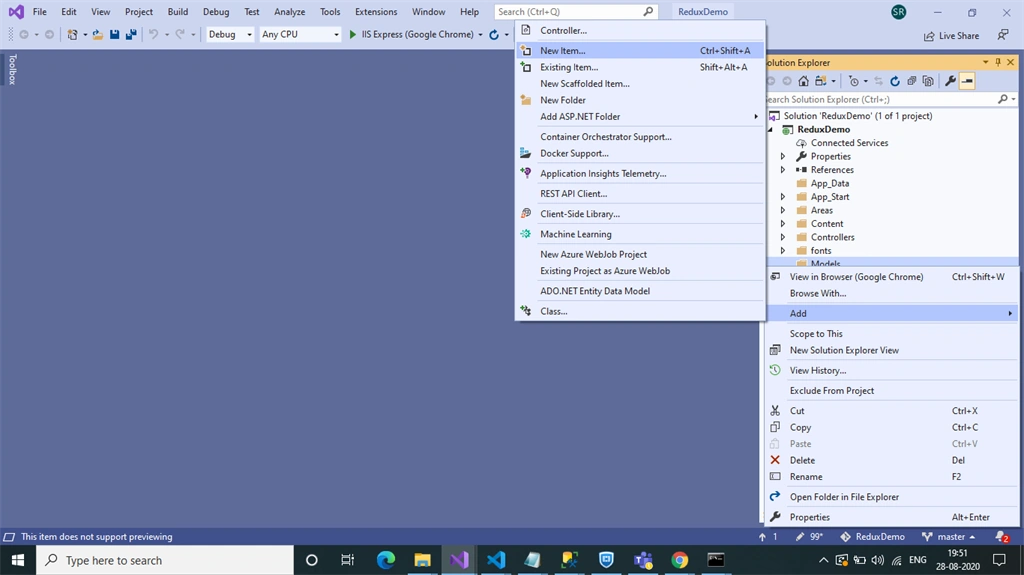
Right-click the Models folder from Solution Explorer and go to Add >> New Item >> data.
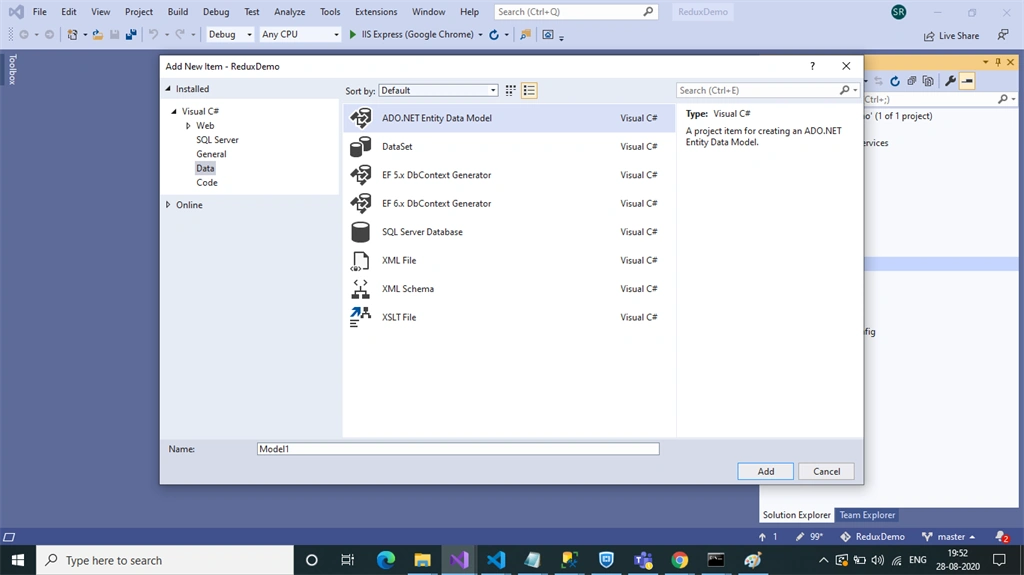
Click on the "ADO.NET Entity Data Model" option and click "Add".
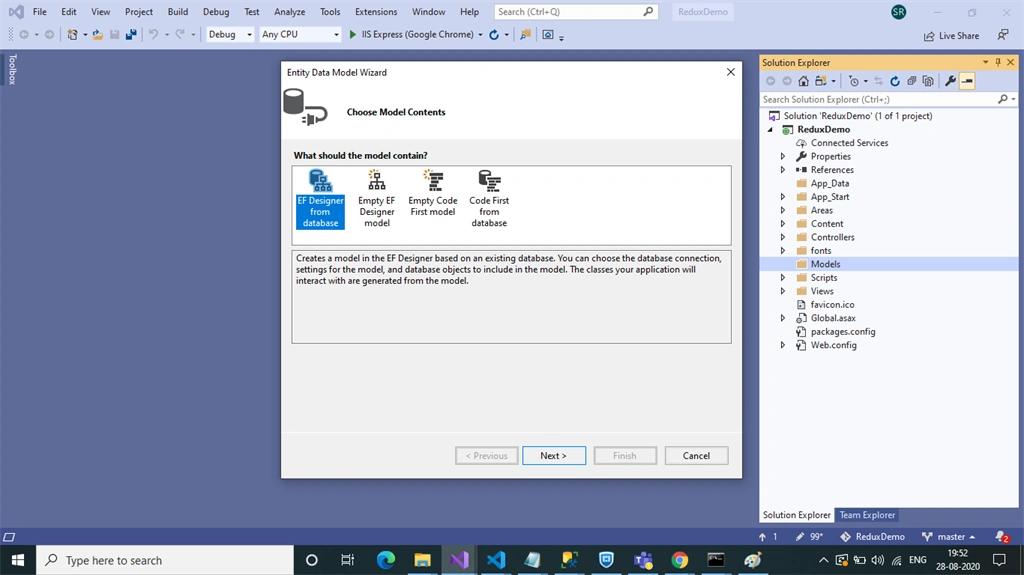
Select EF Designer from the database and click the "Next" button.
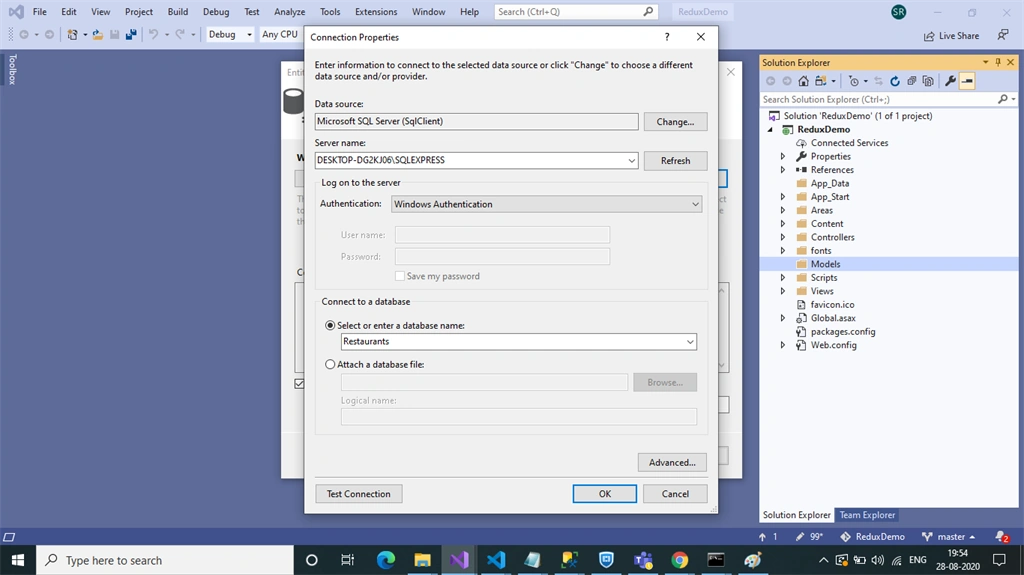
Add the connection properties, select the database name on the next page, and click OK.
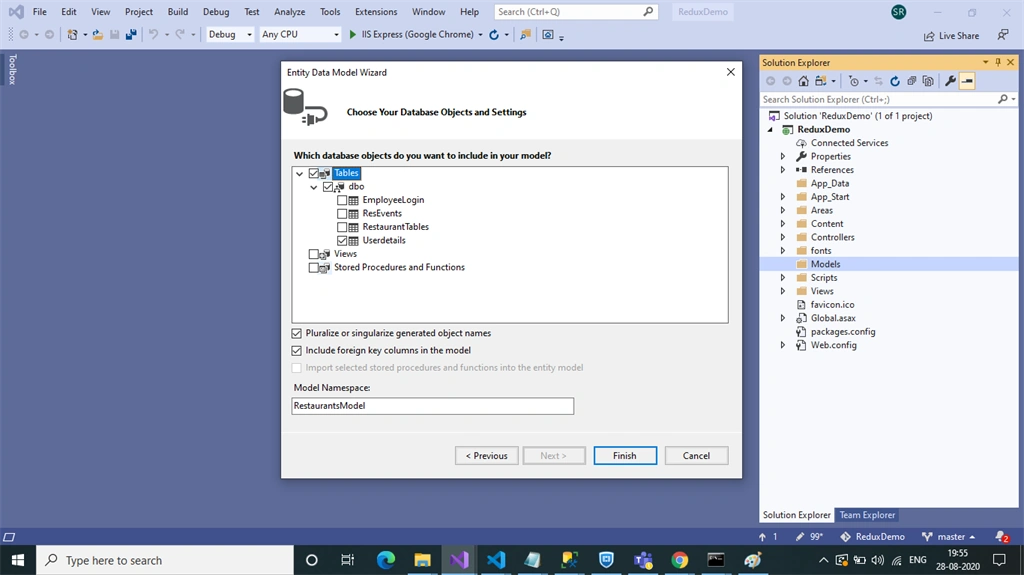
C
heck the "Table" checkbox. The internal options will be selected by default. Now, click the "Finish" button.
Right-click on the Controllers folder and add a new controller. Name it "Users controller" and add the following namespace in the Users controller.
- using Reduxdemo.Models;
- using System;
- using System.Collections.Generic;
- using System.Linq;
- using System.Net;
- using System.Net.Http;
- using System.Web.Http;
- using Reduxdemo.Models;
- namespace Reduxdemo.Controllers
- {
- [RoutePrefix("Api/Users")]
- public class UsersController : ApiController
- {
- RestaurantsEntities DB = new RestaurantsEntities();
- [Route("Getuser")]
- [HttpGet]
- public object Getuser()
- {
- return DB.Userdetails.ToList();
- }
- }
- }
- EnableCorsAttribute cors = new EnableCorsAttribute("*", "*", "*");
- config.EnableCors(cors);
Now, run the application using the 'npm start' command and check the result.

Summary
In this article, we learned how to create a react-redux application. You can download the code from Github.
Join the conversation! Your thoughts help the community grow.