

Introduction
In this article, I’m going to show you how to do a distributed file system on Windows Server 2019 in the proper method and easiest way.
What is distributed file system?
A distributed file system (DFS) is essentially a virtual file system that spans across multiple physical storage locations, often on different servers or even geographical locations. It presents itself to users as a single, unified system, making it transparent where the files are actually stored. This allows users to access and manage files as if they were stored locally on their own devices, regardless of their actual location.
Distributed file systems (DFS) offer significant advantages over traditional centralized file systems, particularly for organizations managing large amounts of data or geographically dispersed teams. Here are some of the key benefits of DFS.
- Scalability: Easily grows to accommodate increasing data storage and user needs by adding more storage servers. This avoids the limitations of single servers and allows for seamless expansion.
- High availability and fault tolerance: Data redundancy and replication across multiple servers ensure data remains accessible even if one server fails. This minimizes downtime and data loss risks, providing increased reliability and stability.
- Performance: Distributes file access requests across multiple servers, leading to faster data access and improved responsiveness, especially for large datasets or concurrent access. This can significantly enhance user experience and productivity.
- Location transparency: Users can access and manage files as if they were stored locally, regardless of their actual location. This simplifies collaboration and file sharing across teams and geographical boundaries.
- Centralized management: Provides a single point of control for managing user access, permissions, and data replication across the entire system. This simplifies administration and ensures consistent policies are applied.
Note. Here I used 2 servers’ servers one fully configured such as an ADDS and DHCP in server two just connecting the domain.
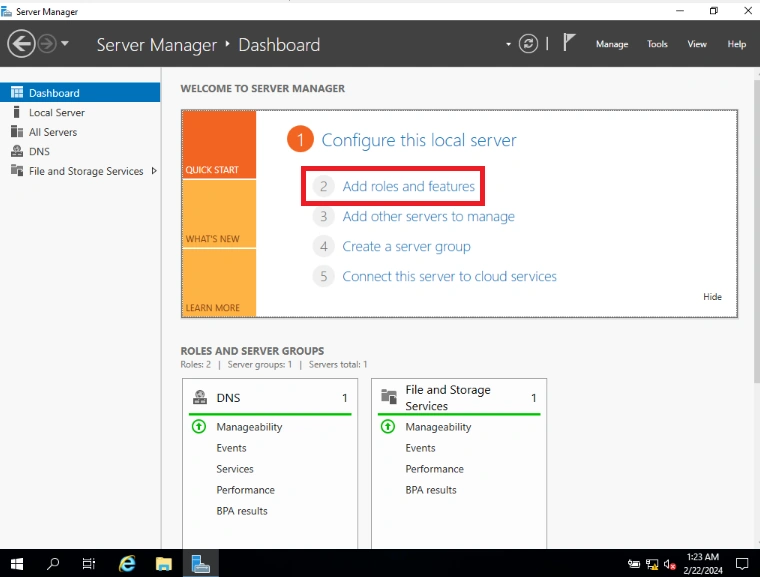
Step 1. On your server dashboard click "Add roles and features".
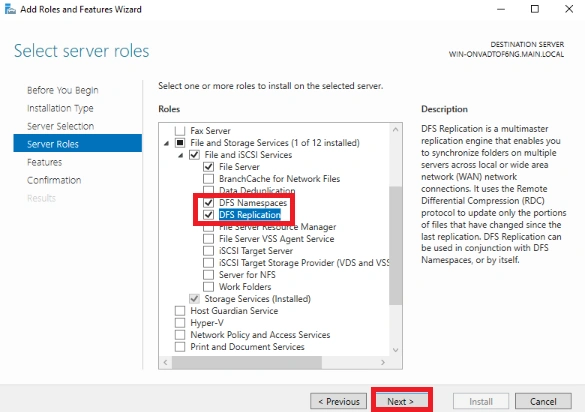
Step 2. Install "DFS Replication" and "DFS Namespace" features.
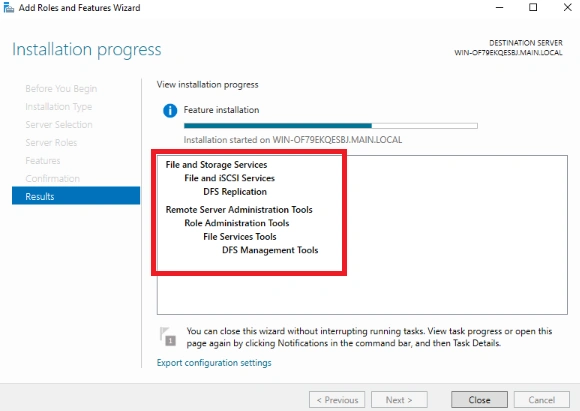
Step 3. Come to your main server and install the "DFS Replication" features only.
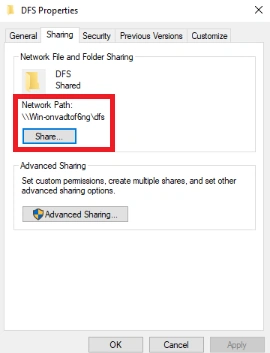
Step 4. On your main server create a folder and do advance share and normal share to that folder if you want to know how to do a shared folder you can find my past article on c sharp Corner https://www.c-sharpcorner.com/article/how-to-share-a-drive-and-mapping-for-client-user/
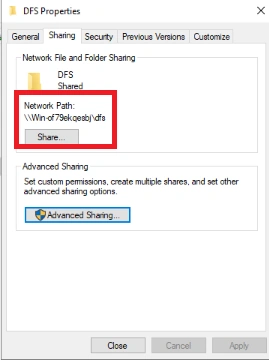
Step 5. Come to your member server and do the same sharing with the same folder name.
Join the conversation! Your thoughts help the community grow.