

Introduction
One of the hottest discussion points in Android technology is how to earn money using Android applications. In this case, ‘AdMob’ of Google is the best platform for the applications for monetization and maximizing the revenue. Over 1 million apps are using ’AdMob’ to generate reliable revenue with more than $1 billion paid to the developers.
In this article, I am going to illustrate the steps of how you can display ads in your application to earn money.
Step 1
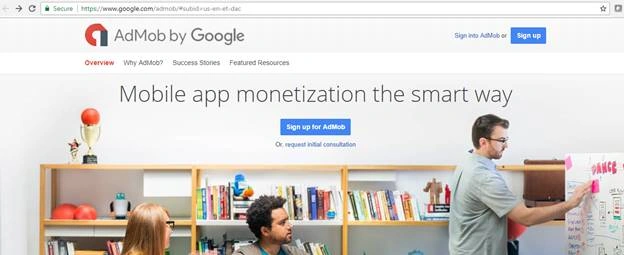
First of all, you have to sign up for AdMob by visiting the URL - https://www.google.com/admob/#subid=usenetdac
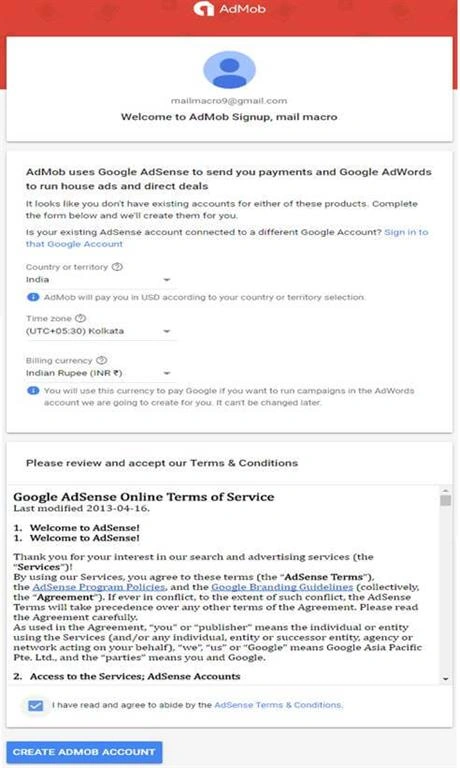
Create AdMob account by providing – Country Name, Timezone, and billing currency, and also, accept the terms and conditions. Then, click on "Create AdMob Account."
 Step 3
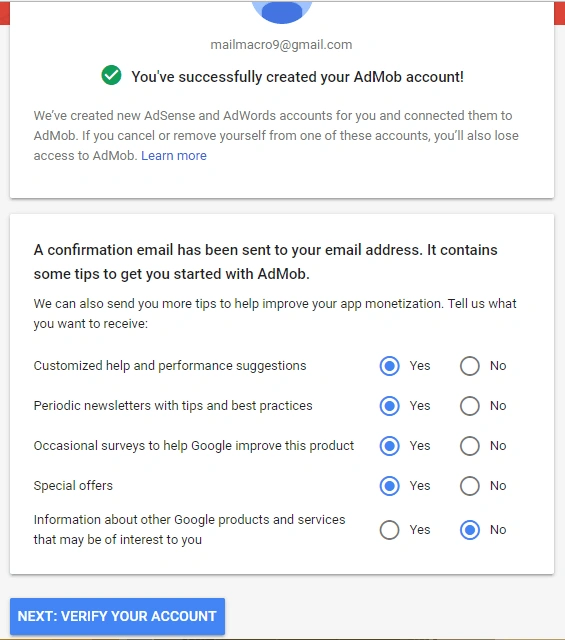
Let Google know your suggestions and inform you of updates. To verify your Gmail account.
 Step 4
Verify your account and contacts, then continue to ‘AdMob’ account.
Step 5
Now, move to your dashboard and click on Apps > Add your First App by giving your application name. Here, you have to select your project status too, i.e., whether you have published your app or not. Now, choose the app platform - either Android or iOS.
Step 6
Now, you have to create an ad unit by selecting your project and clicking on the ‘ADD AD UNIT’ button.
Step 7
Choose your ad type from below.
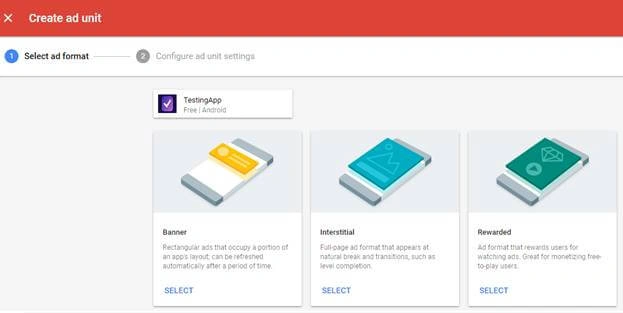 There are three categories of Google Advertisement Banner (like a ribbon), Interstitial (full screen), and Rewarded (videos). Here, I am going to illustrate by selecting the Banner Ads.
Step 8
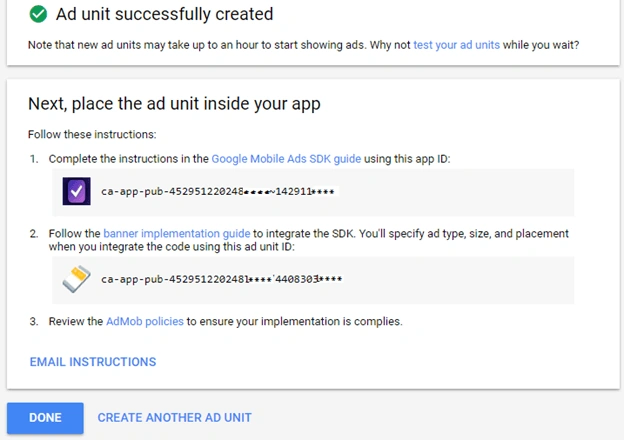
While selecting the Banner type, you have to create an ad unit for this particular project by giving the ad unit name.
 Step 9
Finally, you have to set up the payments by submitting your addresses, etc. and all. You are done with the AdMob configuration for your app
Step 10
Now, you have to integrate your app with App id and Unit id in the following way.
Create an app first –In this example, I am using Android Studio 3.0.1 with Kotlin. See my article Getting started with Android and Kotlin if you want to use a lower version of Android Studio for Kotlin development.
Create a New Project, give the name and location of the project, select the ‘Phone and Tablet’ app category. Set the minimum SDK 19, click "Next". Select an empty Activity > Next > Finish.
Step 11
Make your project ready as below –
project.gradle file – add the following maven if not exist in this file.
- allprojects {
- repositories {
- google()
- jcenter()
- maven {
- url "https://maven.google.com"
- }
- }
- }
- build.gradle(Module :app)
Add the following dependency in this file -
implementation 'com.google.android.gms:playservicesads:11.6.0'
Step 12
Add the following XML code to your activity_main.xml file.
- <android.support.constraint.ConstraintLayout
- xmlns:android="http://schemas.android.com/apk/res/android"
- xmlns:app="http://schemas.android.com/apk/resauto"
- xmlns:tools="http://schemas.android.com/tools"
- xmlns:ads="http://schemas.android.com/apk/resauto"
- android:layout_width="match_parent"
- android:layout_height="match_parent"
- tools:context="manigautam.app.newtestingapplication.MainActivity"
- >
- <com.google.android.gms.ads.AdView
- android:id="@+id/topicaddview"
- android:layout_width="wrap_content"
- android:layout_height="wrap_content"
- ads:adSize="BANNER"
- app:layout_constraintBottom_toBottomOf="parent"
- ads:adUnitId="caapppub8744339993361257/7857148840"
- >
- </com.google.android.gms.ads.AdView>
- </android.support.constraint.ConstraintLayout>
Step 13
Add the following Kotlin code to your MainActivity.kt file.
- import android.os.Bundle
- import com.google.android.gms.ads.AdRequest
- import com.google.android.gms.ads.AdView
- class MainActivity : AppCompatActivity() {
- override fun onCreate(savedInstanceState: Bundle?) {
- super.onCreate(savedInstanceState)
- setContentView(R.layout.activity_main)
- var addview: AdView =findViewById(R.id.myaddview)
- //finding view
- var addRequest: AdRequest = AdRequest.Builder()
- .addTestDevice(AdRequest.DEVICE_ID_EMULATOR).build()
- //initializing AdRequest
- addview.loadAd(addRequest)
- //load view with AdMob.
- }
- }
Step 14
Add the internet permission to AndroidManifest.xml.
- <usespermission android:name="android.permission.INTERNET"/>
Step 15
All done! Now, you can build and run your app for output.
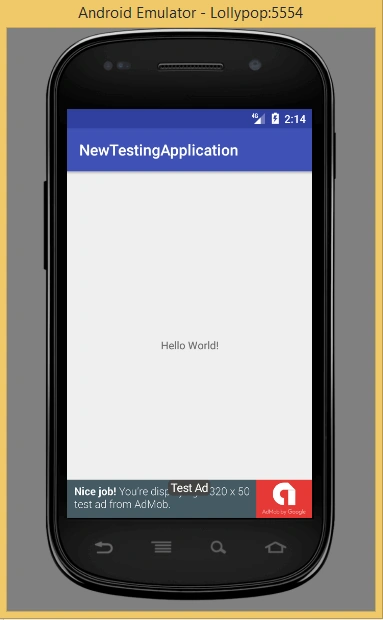 Congratulations!! You can see at the bottom of the app, there is a sample advertisement.
witness LeePosted Dec 3, 2021, 7:40 AM
I also got my first income through AdMod, but it was not as much as I expected. Do you have any tips?Apps that are the main sources of AdMob revenue:MK Headset-Bluetooth headset control https://play.google.com/store/apps/details?id=com.meker.bluetoothheadset&hl=zh-TW
mike alfredPosted May 5, 2021, 8:20 AM
I am so happy, I'm a living testimony. I got my blank ATM card last weekfrom William scot hackers. At first when I was in doubt.Then I decided to give it a trial to my surprise the card was delivered, I went testing it on the ATM machine I was shocked when I use it to withdraw $ 3000 and now I have withdraw $ 20000 in total. The card is real, I'm so happy thank you William scot hackers. If interested you can email [email protected] WhatsApp on +17079868085
Sagar Pandurang KapPosted Dec 29, 2017, 12:45 AM
Good article.Helpful..