

In this article I will integrate or use the Timer in a Windows Store Application Using XAML and C#. Sometimes the developer needs to do work at some time interval and to delay until that time they need to have a mechanism to automatically trigger an event at a specific time interval. So, this article will help those who want to run their particular block of code at a regular time interval.
So, here I will use the DispatcherTimer class to do that in a Windows Store Application.
Introduction of DispatcherTimer
The DispatcherTimer can be used to run code on the same thread that produces the UI thread. This provides a timer that is integrated into the Dispatcher queue, which is processed at a specified interval of time and at a specified priority.
Here I will discuss some necessary members of this class.
Methods of DispatcherTimer Class.
There are mainly two types of methods of this class.
- Start: Starts the DispatcherTimer with specified members.
- Stop: Stops the DispatcherTimer.
Properties of DisptacherTimer Class.
- Interval: It specified the time interval of the trigger. In the other words it gets or sets the amount of time between interval ticks.
- IsEnabled: It gets a value that indicates whether the timer is running or not. It returns Boolean, true if the timer is enabled; otherwise, false. By default it sets false.
Event
DispatcherTimer has a Tick event.
- Tick: The Tick event fires after the time specified the for the interval has elapsed.
Note: Tick continues firing at the same interval until the Stop method is called.
So, I think you are now all familiar with the DispatcherTimer Class from the preceding description.
Now, let's start to create an application in which I integrated the DispatcherTimer Class.
First, choose Blank Template of the Windows Store using XAML.
Step 1
After that, I design my UI interface in XAML file, as in:
<Page
x:Class="TimerInWindowsStoreApps.MainPage"
xmlns="http://schemas.microsoft.com/winfx/2006/xaml/presentation"
xmlns:x="http://schemas.microsoft.com/winfx/2006/xaml"
xmlns:local="using:TimerInWindowsStoreApps"
xmlns:d="http://schemas.microsoft.com/expression/blend/2008"
xmlns:mc="http://schemas.openxmlformats.org/markup-compatibility/2006"
mc:Ignorable="d" Loaded="Page_Loaded_1" >
<Grid Background="{StaticResource ApplicationPageBackgroundThemeBrush}">
<StackPanel Orientation="Vertical" Margin="20,50" HorizontalAlignment="Center">
<TextBlock x:Name="TimerLog" FontSize="30"></TextBlock>
<TextBlock x:Name="TimerStatus" FontSize="25"></TextBlock>
<StackPanel Orientation="Horizontal">
<Button x:Name="TimerStart" Content="Start" Click="TimerStart_Click_1"></Button>
<Button x:Name="TimerStop" Content="Stop" Click="TimerStop_Click_1"></Button>
</StackPanel>
</StackPanel>
</Grid>
</Page>
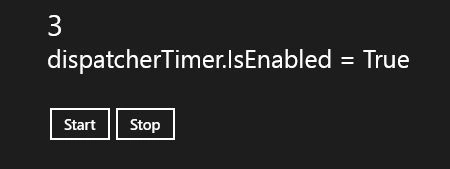
In the above code I use two buttons for starting and stopping the timer and texblocks to display the status of the timer.
Step 2
Now, let's explore the DispatcherTimer Class in .cs file.
First I create a method that sets up all the necssary members of the DispatcherTimer class. Here we need to follow some steps.
- Create object of DispatcherTimer Class:
DispatcherTimer dispatcherTimer = newDispatcherTimer();
- Registered Tick event:
dispatcherTimer.Tick += dispatcherTimer_Tick;
- Set the Interval property:
dispatcherTimer.Interval = newTimeSpan(0, 0, 1);
- At last, start the timer using Start() method:
dispatcherTimer.Start();
- And, stop the timer using Stop() method:
dispatcherTimer.Stop();

Georgie WebberPosted Apr 18, 2013, 2:37 AM
Windows Store Applicatio is now converted to Windows 8 App by Microsoft in .NET fRAMEWORK 4.5 WITH VISUAL STUDIO 2102..
Nikolay PraysPosted Mar 19, 2013, 3:15 PM
What is "Windows Store Application"? Where is it in Visual Studio?