

Introduction
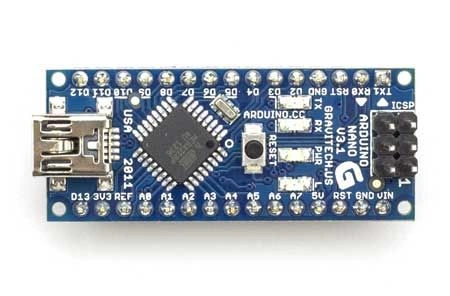
Figure 1 Arduino board
- Tiny size (or, compact) is one of the major advantages of this board.
- Bread-board friendly.
But, when we talk about the cons of this board then, I would say:
- There is no direct power-source jack. So, you use any power source.
- But, the preceding statement is not quite true. Since it's a low voltage board you can use a power source using the Vin Pin, but you need to take a few precautions. Otherwise, it will burn the board.
- More or less, it is equivalent to an Arduino UNO.
Specifications
We will light a Red LED using a digital pin. So, you need a few pre-requisites for this demo.
 Sketch
And, it will turn on the LED constantly.
Sketch
And, it will turn on the LED constantly.
 It is one of the most compact and smallest Arduino board. So, you can use this tiny board in your prototype more often than Uno or mega. It is, however, better to avoid it if you have a bulk of code or more input/output operations.
- Microcontroller: Atmel ATmega 168(v2) or ATmega328 (v3)
- Operating Voltage: 5v
- Input Voltage: 7-12v
- Digital I/O Pins: 14
- Analogue Input Pins: 8
- Flash Memory: 16Kb or 32Kb (depends upon ATmega board)
- SRAM: 1Kb or 2Kb (depends upon ATmega board)
- EEROM: 512Bytes or 1Kb
- Clock Speed: 16MHz
- A Red LED
- Arduino Nano
- 1kOhm Resistor
- Two jumper wires
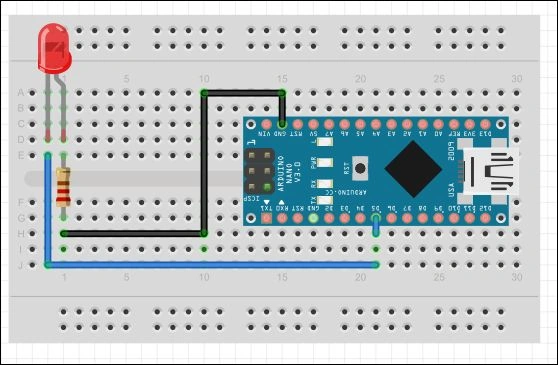
Connection Layout
Figure 2 Connection Layout
- int LED = 5;
- void setup() {
- pinMode(LED, OUTPUT);
- digitalWrite(LED, HIGH);
- }
- void loop() {
- // nothing
- }
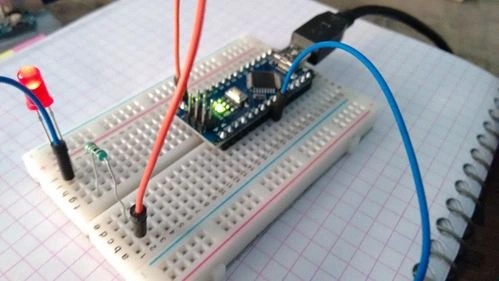
Figure 3 LED Constantly
Abhishek Kumar RaviPosted May 24, 2015, 12:17 PM
Sir, Your words are always inspiration to us :)
Mahesh ChandPosted May 24, 2015, 11:02 AM
Great Abhishek. It is fascinating to see work you guys doing with these new IoT and cutting-edge trends.
Saineshwar BageriPosted May 23, 2015, 10:00 AM
cool technology
Manoj BhoirPosted May 23, 2015, 9:59 AM
Nice article.
NitinPosted May 23, 2015, 8:48 AM
good one
Abhishek JaiswalPosted May 22, 2015, 3:48 PM
Good one, keep going!! :)
Santhakumar MunuswamyPosted May 22, 2015, 2:44 PM
Thanks for nice article