

Ollama stands for (Omni-Layer Learning Language Acquisition Model), a novel approach to machine learning that promises to redefine how we perceive language acquisition and natural language processing.
Ollama is an open-source project that serves as a powerful and user-friendly platform for running LLMs on your local machine. It acts as a bridge between the complexities of LLM technology and the desire for an accessible and customizable AI experience. This makes it ideal for AI developers, researchers, and businesses prioritizing data control and privacy. Ollama provides a user-friendly interface and seamless integration capabilities, making it easier than ever to leverage the power of LLMs for various applications and use cases.
By running models locally, you maintain full data ownership and avoid the potential security risks associated with cloud storage. Offline AI tools like Ollama also help reduce latency and reliance on external servers, making them faster and more reliable.
How Ollama works?
Ollama creates an isolated environment to run LLMs locally on your system, which prevents any potential conflicts with other installed software. This environment already includes all the necessary components for deploying AI models, such as.
- Model weights: The pre-trained data that the model uses to function.
- Configuration files: Settings that define how the model behaves.
- Necessary dependencies: Libraries and tools that support the model’s execution.
To put it simply, first, you pull models from the Ollama library. Then, you run these models as-is or adjust parameters to customize them for specific tasks. After the setup, you can interact with the models by entering prompts, and they’ll generate the responses.
This advanced AI tool works best on discrete graphical processing unit (GPU) systems. While you can run it on CPU-integrated GPUs, using dedicated, compatible GPUs instead, like those from NVIDIA or AMD, will reduce processing times and ensure smoother AI interactions.
As I recommend checking Ollama’s official GitHub page for GPU compatibility.
Key Features of Ollama
- Local Execution: One of the distinguishing features of Ollama is its ability to run LLMs locally, mitigating privacy concerns associated with cloud-based solutions. By bringing AI models directly to users' devices, Ollama ensures greater control and security over data while providing faster processing speeds and reduced reliance on external servers.
- Extensive Model Library: Ollama offers access to an extensive library of pre-trained LLMs, including popular models like Llama 3. Users can choose from a range of models tailored to different tasks, domains, and hardware capabilities, ensuring flexibility and versatility in their AI projects.
- Seamless Integration: Ollama seamlessly integrates with a variety of tools, frameworks, and programming languages, making it easy for developers to incorporate LLMs into their workflows. Whether it's Python, LangChain, or LlamaIndex, Ollama provides robust integration options for building sophisticated AI applications and solutions.
- Customization and Fine-tuning: With Ollama, users have the ability to customize and fine-tune LLMs to suit their specific needs and preferences. From prompt engineering to few-shot learning and fine-tuning processes, Ollama empowers users to shape the behavior and outputs of LLMs, ensuring they align with the desired objectives.
Stepwise Guide to start Ollama
Prerequisites
- Computer: Ollama is currently available for Linux and macOS, and windows operating systems.
- Basic understanding of command lines: While Ollama offers a user-friendly interface, some comfort with basic command-line operations is helpful.
Step 1. Download Ollama
- Visit the official Ollama website: https://ollama.com/
- Click on the download button corresponding to your operating system (Linux, macOS, or Windows (preview)).
- This will download the Ollama installation script.
Step 2. Install Ollama
- Open a terminal window.
- Navigate to the directory where you downloaded the Ollama installation script (usually the Downloads folder).
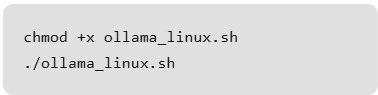
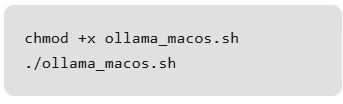
- Depending on your operating system, use the following commands to grant the script execution permission and then run the installation.
- For Linux
- For macOS
- For Windows: Direct installations by clicking the downloaded file and following the on-screen instructions during the installation process.
- For Linux
Step 3. Pull Your First Model (Optional)
- Ollama allows you to run various open-source LLMs. Here, we'll use Llama 3.2 as an example.
- Use the following command to download the Llama 3.2:1b model.
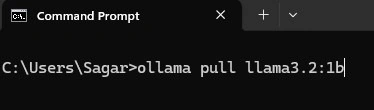
Replace 'llama3.2:1b' with the specific model name.
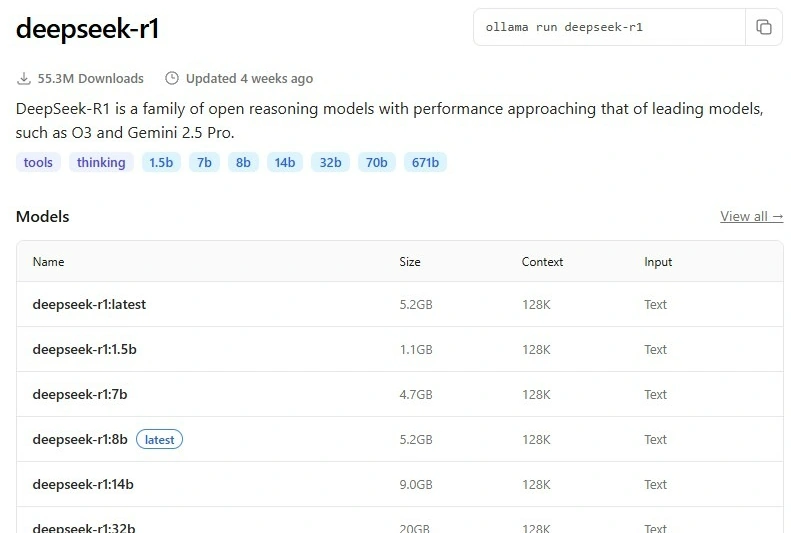
The Ollama library curates a diverse collection of LLMs, each with unique strengths and sizes. Some examples are as follows.
- Llama 3 (8B, 70B)
- Phi-3 (3.8B)
- Mistral (7B)
- Neural Chat (7B)
- Starling (7B)
- Code Llama (7B)
- Llama 2 Uncensored (7B)
- LLaVA (7B)
- Gemma (2B, 7B)
- Solar (10.7B)
You can get more list from Ollama’s website, which enlist all models with their desired family version, which varies based on parameter size, i.e., [1b, 8b,20B].
Step 4. Run and Use the Model
Once you have a model downloaded, you can run it using the following command.

Likewise, we can download multiple models and list them using the command below.
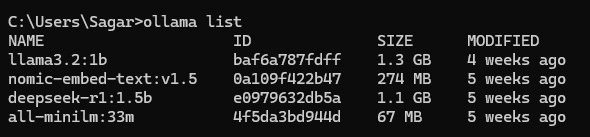
In our case, we will be running llama3.2:1b.

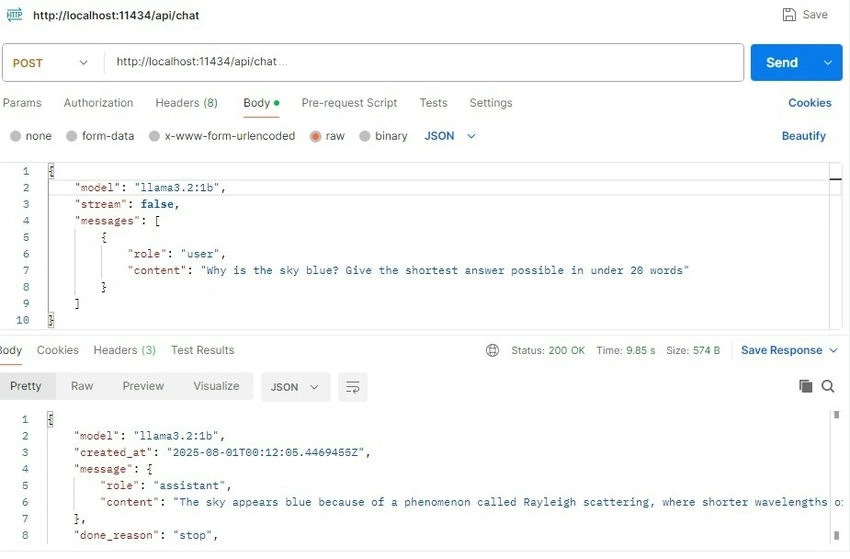
Similarly, we can interact with Ollama and a specific model using Postman through an API request.
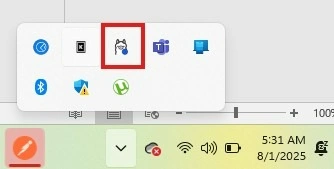
As we have Ollama running, an icon appears at the bottom right of your screen.
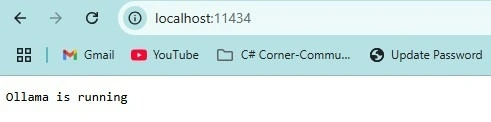
Along to that if you hit an URL on your browser http://localhost:11434/, it will show you that Ollama is at running stage.
Interacting with Ollama’s LLM models via the REST API. Visit Ollama’s Github link for more details.
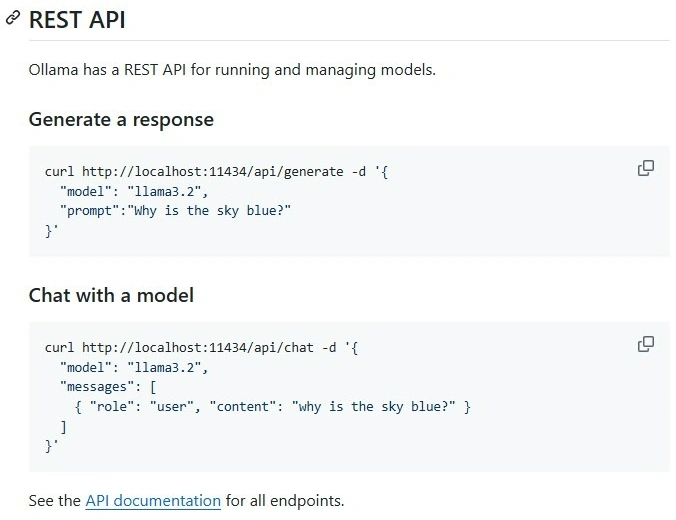
Using Postman, we can call an API request for chat as shown in the snapshot below.
Applications of Ollama
- Creative Writing and Content Generation: Writers and content creators can leverage Ollama to overcome writer's block, brainstorm content ideas, and generate diverse and engaging content across different genres and formats.
- Code Generation and Assistance: Developers can harness Ollama's capabilities for code generation, explanation, debugging, and documentation, streamlining their development workflows and enhancing the quality of their code.
- Language Translation and Localization: Ollama's language understanding and generation capabilities make it an invaluable tool for translation, localization, and multilingual communication, facilitating cross-cultural understanding and global collaboration.
- Research and Knowledge Discovery: Researchers and knowledge workers can accelerate their discoveries by using Ollama to analyze, synthesize, and extract insights from vast amounts of information, spanning literature reviews, data analysis, hypothesis generation, and knowledge extraction.
- Customer Service and Support: Businesses can deploy intelligent chatbots and virtual assistants powered by Ollama to enhance customer service, automate FAQs, provide personalized product recommendations, and analyze customer feedback for improved satisfaction and engagement.
- Healthcare and Medical Applications: In the healthcare industry, Ollama can assist in medical documentation, clinical decision support, patient education, telemedicine, and medical research, ultimately improving patient outcomes and streamlining healthcare delivery.
Conclusion
Ollama is ideal for developers and businesses looking for a flexible, privacy-focused AI solution. It lets you run LLMs locally and provides complete control over data privacy and security.
Additionally, Ollama’s ability to adjust models makes it a powerful option for specialized projects. Whether you’re developing chatbots, conducting research, or building privacy-centric applications, it offers a cost-effective alternative to cloud-based AI solutions.
Finally, if you’re looking for a tool that offers both control and customization for your AI-based projects, Ollama is worth exploring.
Join the conversation! Your thoughts help the community grow.