

Introduction
Today we are going to explain how to use Localization in Windows Store apps. Windows Store apps support Localization and Globalization of apps. Localization is the process of translating the application User Interface (UI) or adapting graphics for a specific culture.
In this article we are usng string resources for the application User Interface (UI). The application User Interface will be changed depending on the culture or language of the system of your application.
Step 1
Open Visual Studio 2012 and start a new Windows Store apps project or open an existing project where you want to use Localization.
Step 2
In Solution Explorer click on "Open package.appxmanifest" to open it then go to the Application UI tab, and set your default Language to "en-US".

Step 3
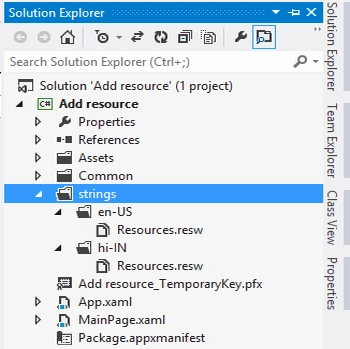
In the Solution Explorer, right-click the project and select "Add" > "New Folder". The folder name is "strings".
Step 4
Right-click the strings folder and add two new folders. Name then "en-US" and "hi-IN".
Step 5
Now right-click on each of the "en-US" and "hi-IN" folders and select "Add" > "New Item". Select "Resources File (.resw)" for both folders.
Step 6
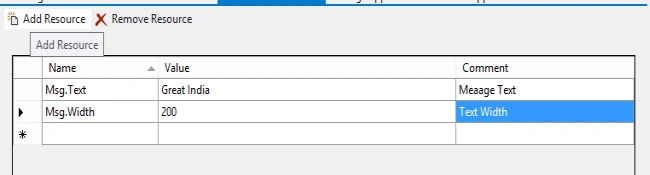
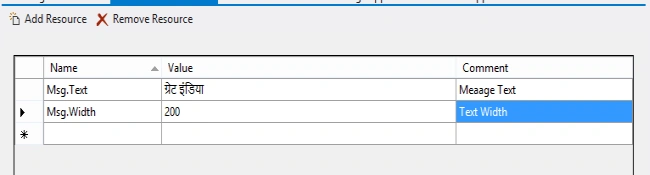
In "Resource.resx" click on "Add resource". Add a string resource as in the following:
String resource for "en-US".
String resource for "hi-IN".
Step 7
Now go the "MainPage.xaml" page and add a TextBlock control. Now add a resource to the UI control as in the following:
<TextBlock HorizontalAlignment="Left" Text="" TextWrapping="Wrap" FontSize="30" x:Uid="Msg" />


Comments
Join the conversation! Your thoughts help the community grow.