

Introduction
- In this article, I have explained how to measure water level and purity in a Tank with Arduino Mega 2560.
- It can be used to give information about the purity of a tank and the water level.
Parts
- Arduino Mega 2560
- SRF-05 ultrasonic
- LED-2
- Hookup wires
SRF-05 Ultrasonic
- The SRF005 ultrasonic range sensor detects objects in its path.
- It can be used to calculate the range of the object.
- It is sensitive enough to detect a 3cm diameter broom handle at a distance of over 3m.
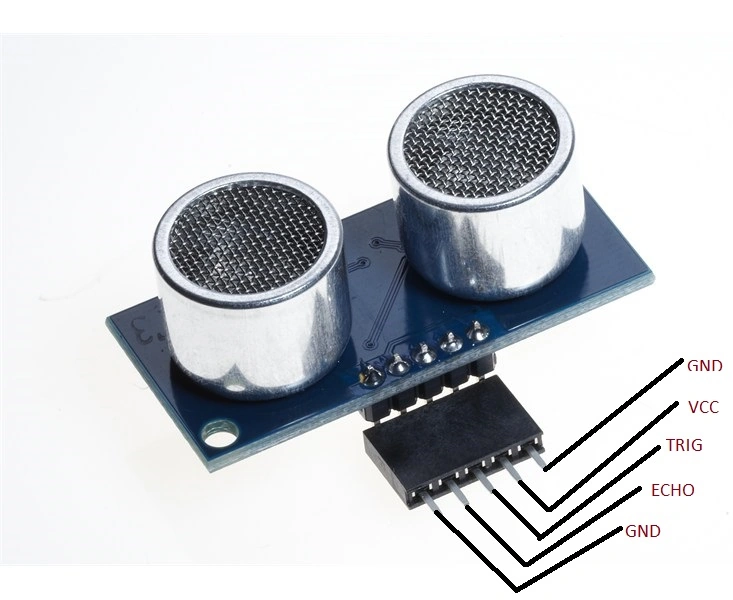 Figure 1: SRF-05 Ultrasonic
Connection:
Step 1: Connection from Sensor to Arduino board
- Connect the GND of the sensor to the Gnd of the board.
- Connect the VCC of the sensor to the 5V of the board.
- Connect the trigger of the sensor to the digital pin 03 of the board.
- Connect the echo of the sensor to the digital pin 04 of the board.
Step 2: Connection From LEDs to Arduino board
Led 1 connection:
- positive pin = 13
- negative pin = Gnd
Led 2 connection:
- positive pin = 12
- negative pin = Gnd
- #define ECHOPIN 03 // Pin to receive echo pulse
- #define TRIGPIN 04 // Pin to send trigger pulse
- void setup(){
- Serial.begin(9600);
- pinMode(ECHOPIN, INPUT);
- pinMode(TRIGPIN, OUTPUT);
- pinMode(13, OUTPUT);
- pinMode(12, OUTPUT);
- }
- void loop(){
- digitalWrite(TRIGPIN, LOW); // Set the trigger pin to low for 2uS
- delayMicroseconds(2);
- digitalWrite(TRIGPIN, HIGH); // Send a 10uS high to trigger ranging
- delayMicroseconds(10);
- digitalWrite(TRIGPIN, LOW); // Send pin low again
- int distance = pulseIn(ECHOPIN, HIGH); // Read in times pulse
- distance= distance/58; // Calculate distance from time of pulse
- Serial.println(distance); // print distance
- delay(50); // Wait 50mS before next ranging
- digitalWrite(13, HIGH); // set the tank meter board LED on
- digitalWrite(12, HIGH); // set the Arduino onboard LED on
- delay(1000); // wait for a second
- digitalWrite(13, LOW); // set the tank meter board LED off
- digitalWrite(12, LOW); // set the Arduino onboard LED off
- delay(1000); // wait for a second
- }
- It is used to check the range of the water in a tank
- The pulse and distance are shown in the serial monitor
- When the tank meter is on, led is ON
- When the tank meter is off, led is OFF.
Output
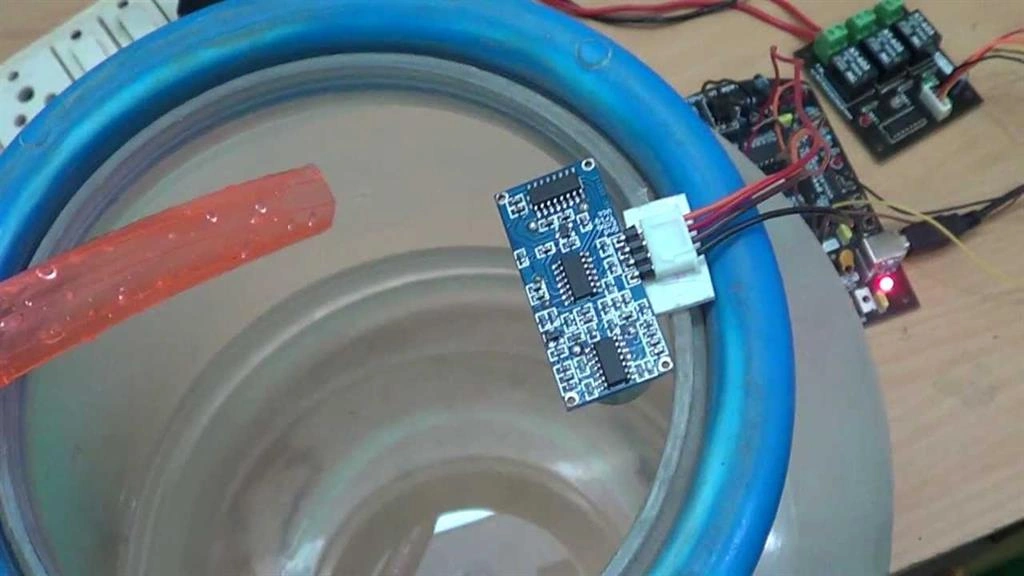
Figure 2 : Output
Sr KarthigaPosted May 25, 2016, 8:17 AM
thank you santhakumar sir
Sr KarthigaPosted May 25, 2016, 8:17 AM
thank you prasanna
Santhakumar MunuswamyPosted May 21, 2016, 2:17 AM
Thank you for nice work
Prasanna MuraliPosted May 20, 2016, 10:07 AM
Nice one....
Sr KarthigaPosted May 5, 2016, 2:54 AM
thank you bhavik sir
Sr KarthigaPosted May 5, 2016, 2:53 AM
thank you raja sir
Bhavik PatelPosted May 5, 2016, 12:25 AM
good job
RajaPosted May 5, 2016, 12:15 AM
Great Work... :)
Vignesh ManiPosted May 4, 2016, 4:25 PM
Good one
Sr KarthigaPosted May 4, 2016, 10:56 AM
Thank you debasis sir
Debasis SahaPosted May 4, 2016, 10:20 AM
Nice One..
Sr KarthigaPosted May 4, 2016, 9:51 AM
thank you pritam sir
Sr KarthigaPosted May 4, 2016, 9:51 AM
thank you nitin sir
Sr KarthigaPosted May 4, 2016, 9:51 AM
Thank you mohammed sir
Pritam ZopePosted May 4, 2016, 9:01 AM
Nice.......
NitinPosted May 4, 2016, 7:36 AM
Thanks for sharing
Mohammed IbrahimPosted May 4, 2016, 6:40 AM
nice