

Introduction
Azure Logic Apps Standard is a cloud-based platform for automating logic app workflows that connect our apps, data, services, and systems. You can easily build highly scalable integration solutions for your corporate and business-to-business (B2B) situations with this platform. You may use either the Logic App (Consumption) resource type or the Logic Apps Standard resource type to construct a logic app.
The Consumption resource type is for multi-tenant Azure Logic Apps or integration services, whereas the Standard resource type is for single-tenant Azure Logic Apps.
Stateful and Stateless workflows in Standard LogicApp
Stateful Workflow
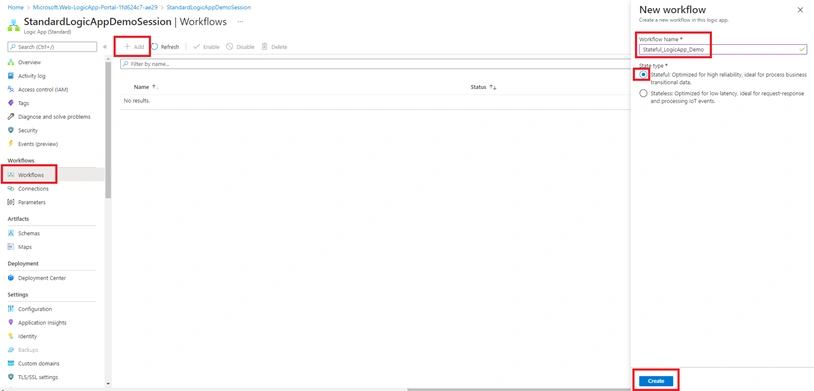
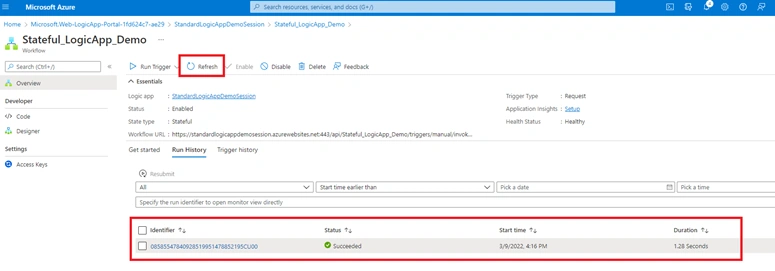
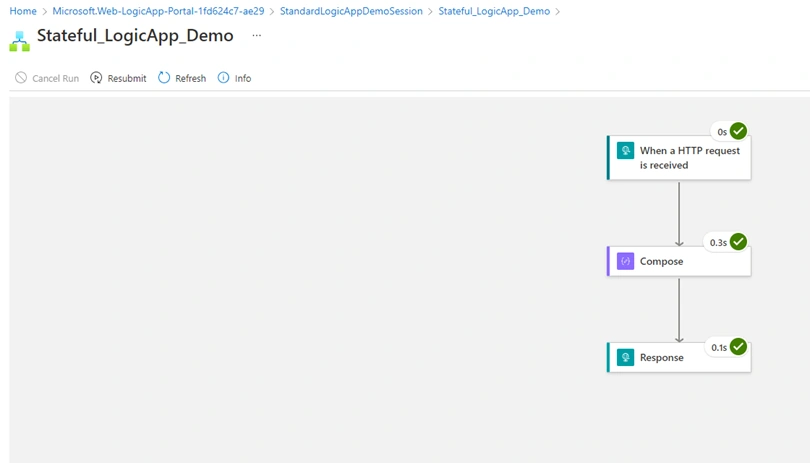
When you need to keep, evaluate, or refer to data from prior events, create a stateful process. These workflows save and transfer all of the inputs and outputs for each action, as well as their states, to external storage, allowing for post-run analysis of the details and history.
If there are disruptions, stateful workflows give excellent resiliency. You can recreate interrupted runs from the preserved state and repeat the workflows to completion after services and systems have been restored. Stateful workflows can run for significantly longer periods of time than stateless processes.
Stateless Workflow
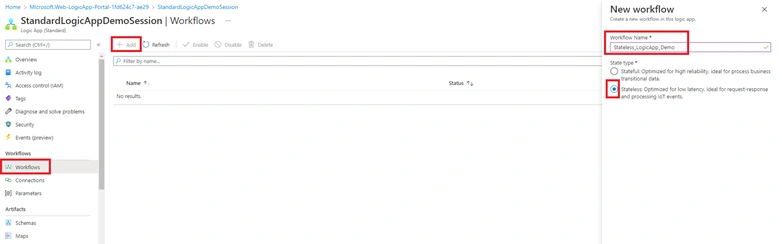
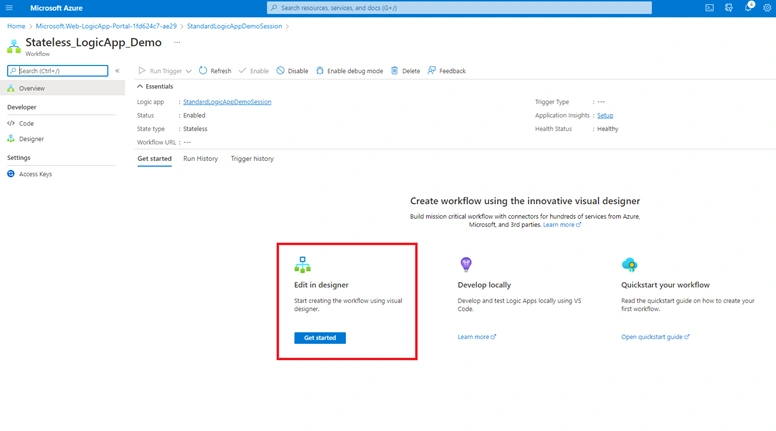
When you don’t need to maintain, evaluate, or refer to data from prior events in external storage for subsequent review, create a stateless workflow. These workflows save all of the inputs and outputs for each operation, as well as their states, in memory rather than on disc. Because the run information and history aren’t kept in external storage, stateless workflows feature shorter runs (usually less than 5 minutes), faster performance (quicker reaction times), higher throughput, and lower running costs. Interrupted runs are not automatically restored if there are outages, thus the caller must manually resubmit interrupted processes.
Create First Standard Logic-App
Login to the Azure portal ➜ Search Resource Groups ➜ then select Resource Group, under which you want to create Standard LogicApp.
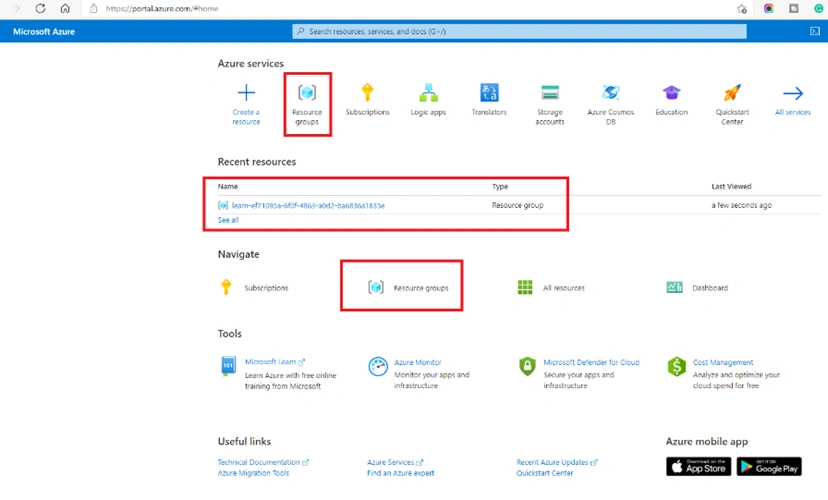
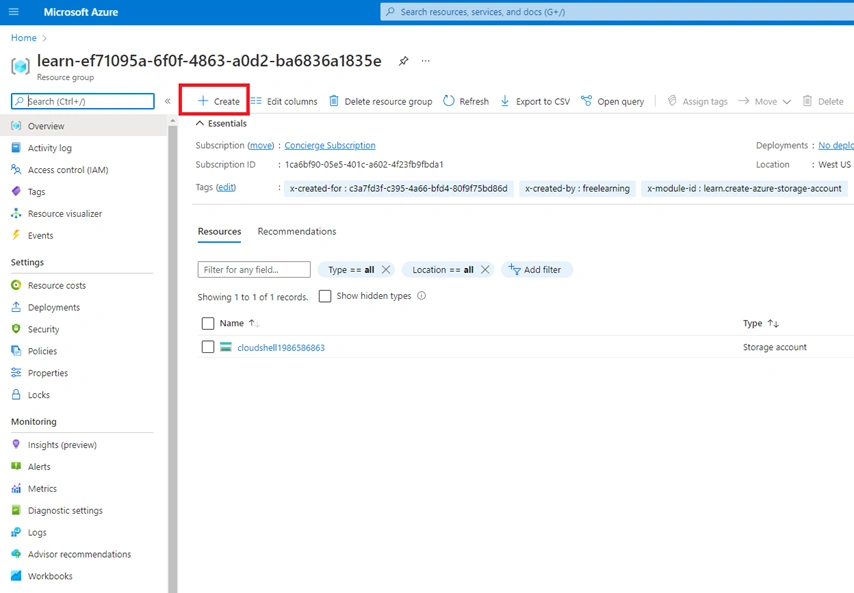
After opening the Resource Group, you will see an icon ‘+ Create’ which will help to create Standard LogicApp. Click on + Create icon.
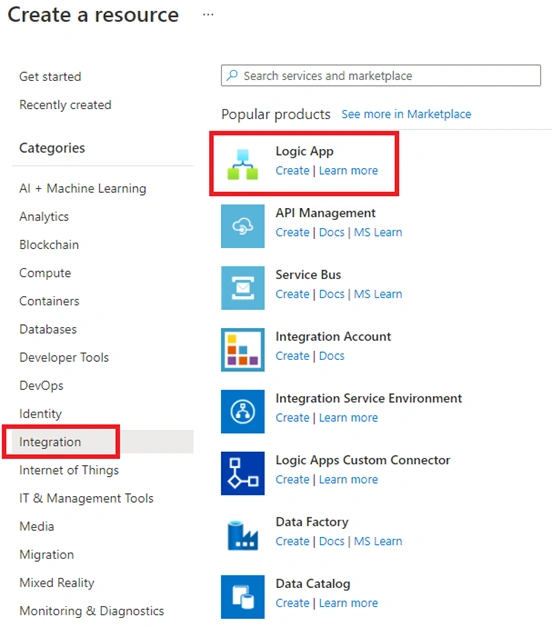
It’ll open a new page where either you can directly search LogicApp in search box or you can click on Integration from list of categories. After that LogicApp icon will appear, click on Create.
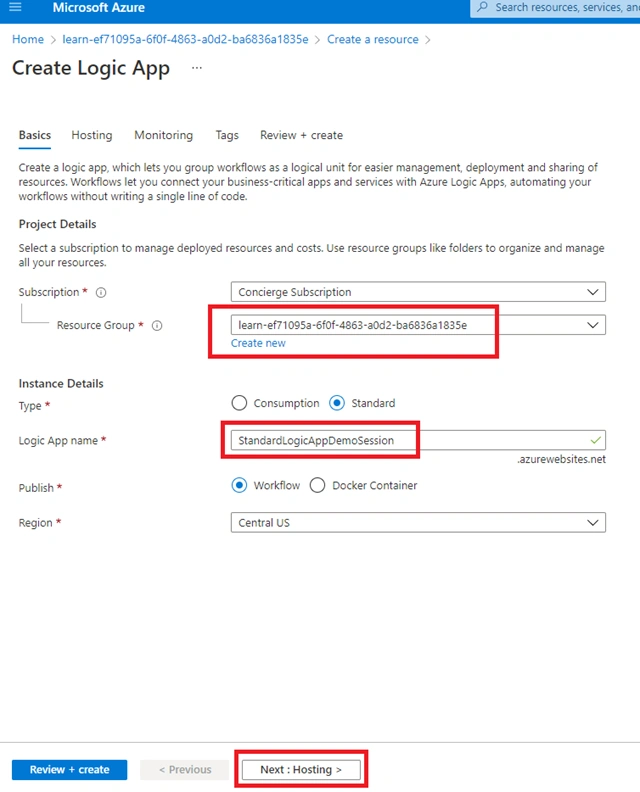
It’ll open a new window where we need to fill all the required details. Let’s fill in the basic details first, like,
- Subscription
- Resource Group
- Type - We are going to create Standard LogicApp so we have to choose ‘Standard’
- Publish - Here we have 2 options, either we can publish on Docker container or can use the workflow. In this article, we’ll use workflow.
- Region
Then click on Next: Hosting to configure the hosting and other configurations.
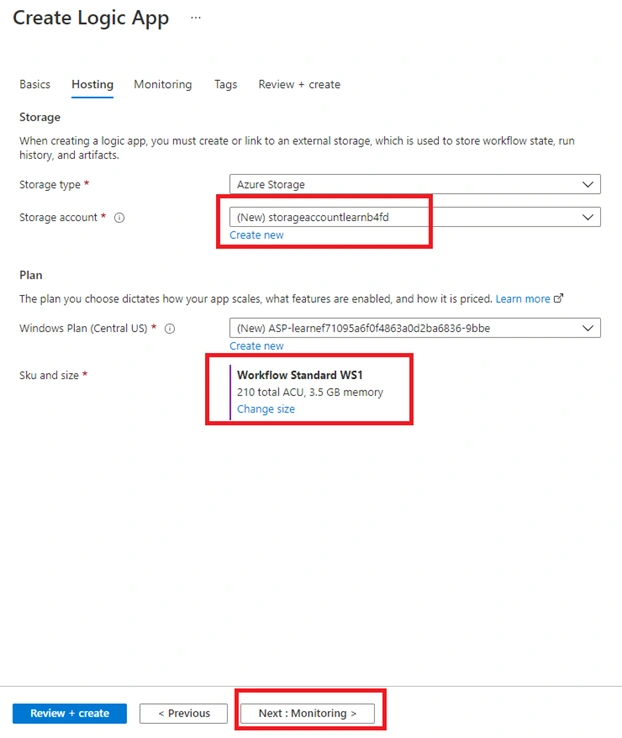
Under Hosting configuration, we need to provide the storage & Plan details.
For Storage,
- Storage Type -> Storage type could be Azure storage or SQL & Azure storage. In this article we’ll use Azure storage
- Storage Account à You can use the existing storage account or create new storage account. In this article we’ll create new storage account.
For Plan
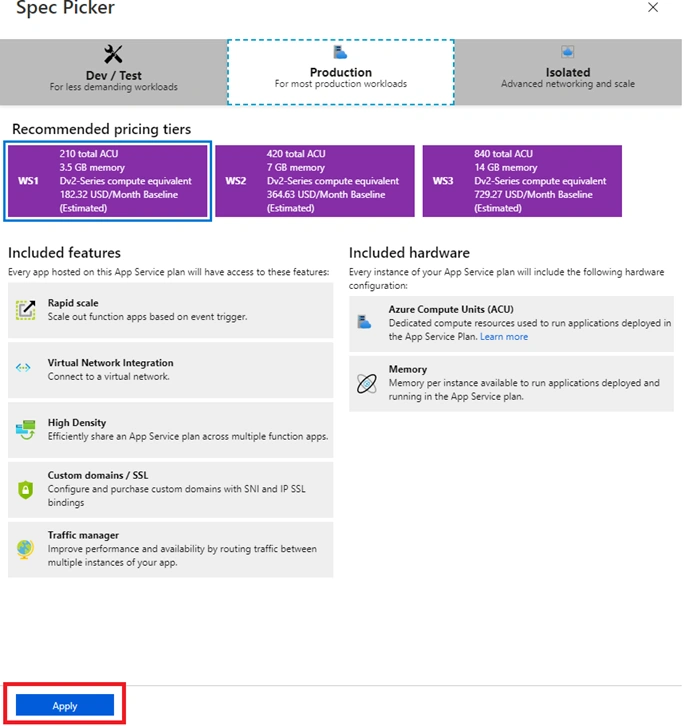
The plan you choose dictates how your app scales, what features are enabled, and how it is priced.
- Windows Plan
- Sku & Size
Click on Next: Monitoring to configure the Monitoring and other configurations.
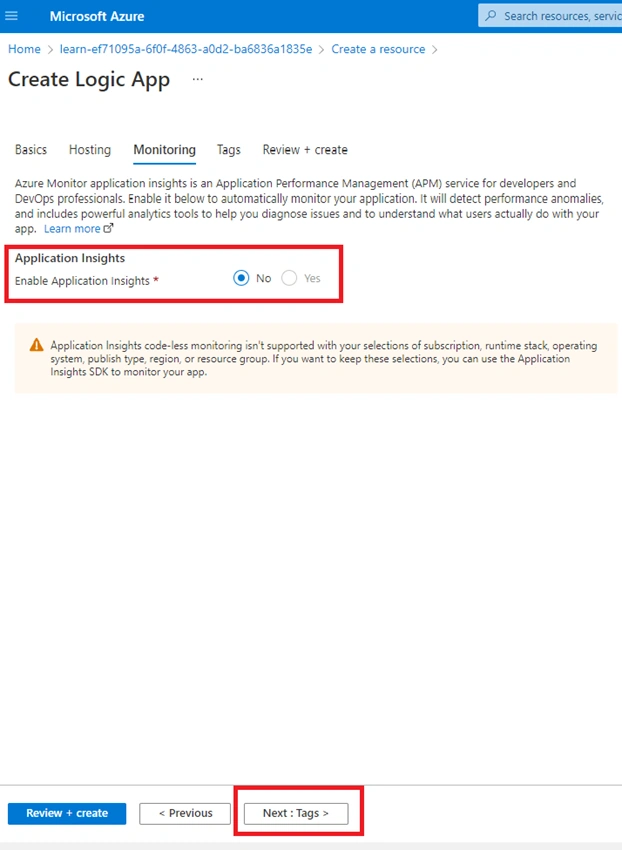
In Monitoring section, we can enable application insight to monitor the application. It will detect performance anomalies and includes powerful analytics tools to help you diagnose issues and to understand what users actually do with your app.
For this article, we are not going to use it. So we’ll keep the default value ‘No’.
Click on Next: Tags to setup the Tags and other configurations.
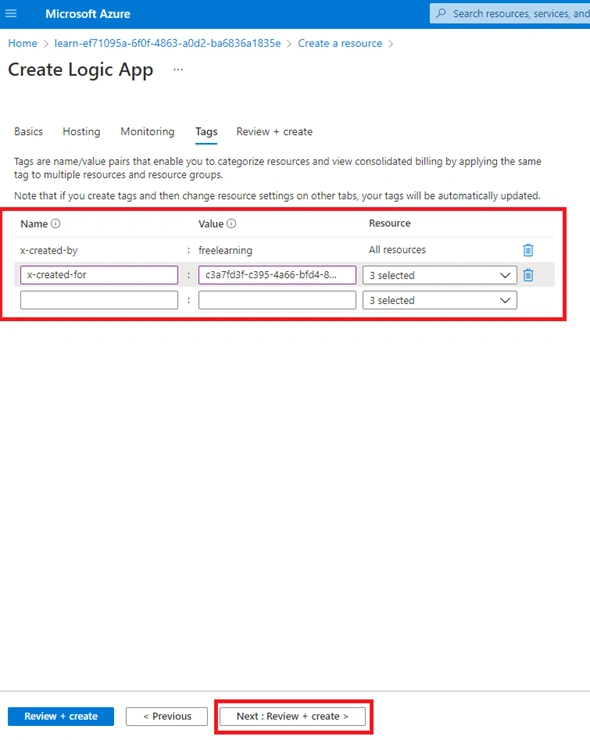
Tags are name/value pairs that enable you to categorize resources and view consolidated billing by applying the same tag to multiple resources and resource groups.
Based on your need to requirement, you can add the Tags, otherwise leave it as it is.
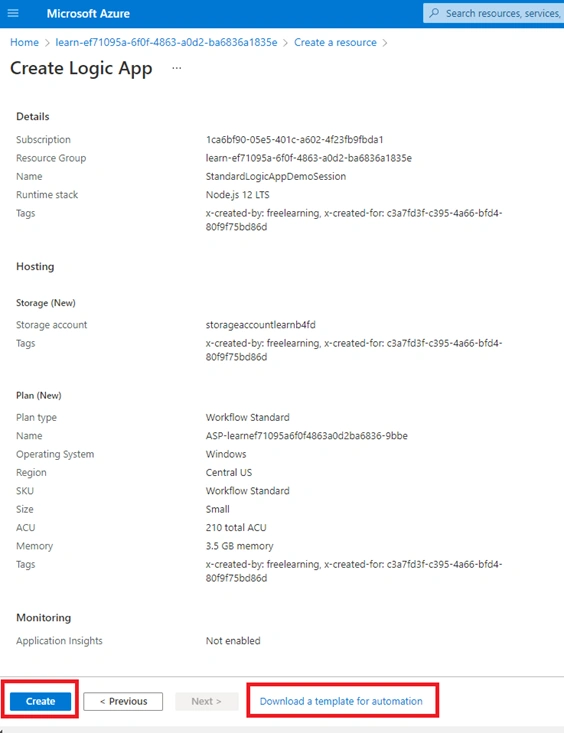
Click on Next: Review + Create to check the final configurations and validation.
Join the conversation! Your thoughts help the community grow.