

Introduction
We have seen a "Menu" button on an Android
screen, but how is it useful and how can we create a menu in android application? This article will help you to do the same.
Building Menus in an Android Application
Menu is generally used to give
extra functionality to an application. One perfect example is, while we are making a phone call, we may want to see other contacts or messages. This is where the Option
Menu comes in picture. This can be done using the same.
Menu has 3 types:
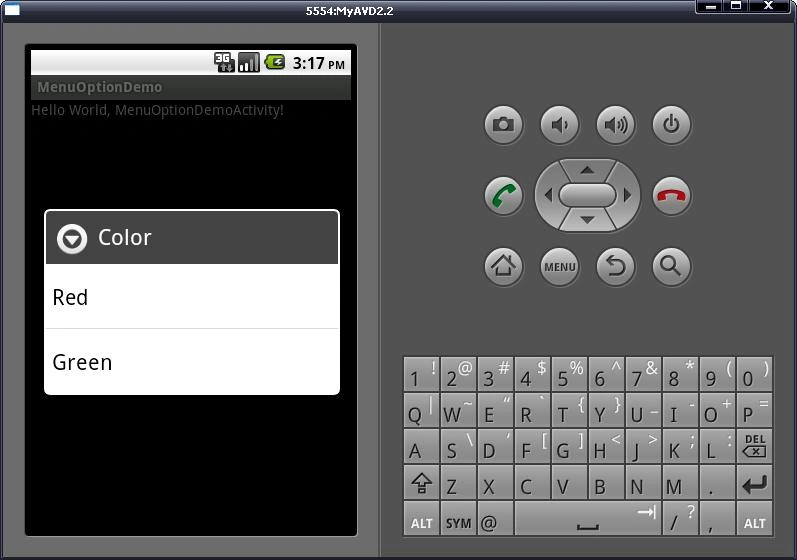
- Option Menu (Visible if touch "Menu" button)
- Context Menu (Visible if long press on any View. View is anything like Button, EditText)
- Sub Menu
The following tutorial will guide you towards creating this kind of application step by step.
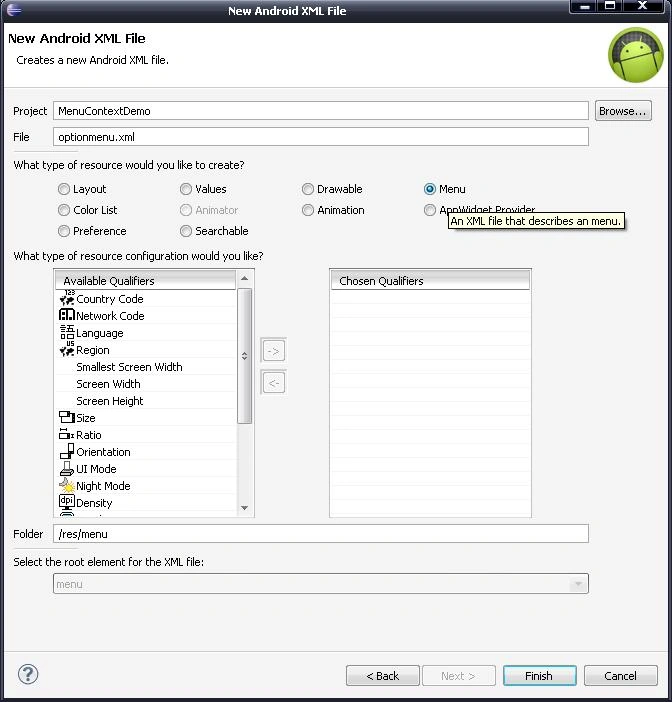
Step 1: Add "optionmenu.xml"
Right Click on "project" -> New -> Andorid Xml File
 Step 2: Edit "optoinmenu.xml"
This file contains items to be displayed. It takes the "id" that uniquely identify
that item and the "title" that displays on screen.
Step 2: Edit "optoinmenu.xml"
This file contains items to be displayed. It takes the "id" that uniquely identify
that item and the "title" that displays on screen.
To edit that file
Your Project -> res -> menu -> optionmenu.xml
Step 3: Edit "MenuOptionDemoActivity.java"
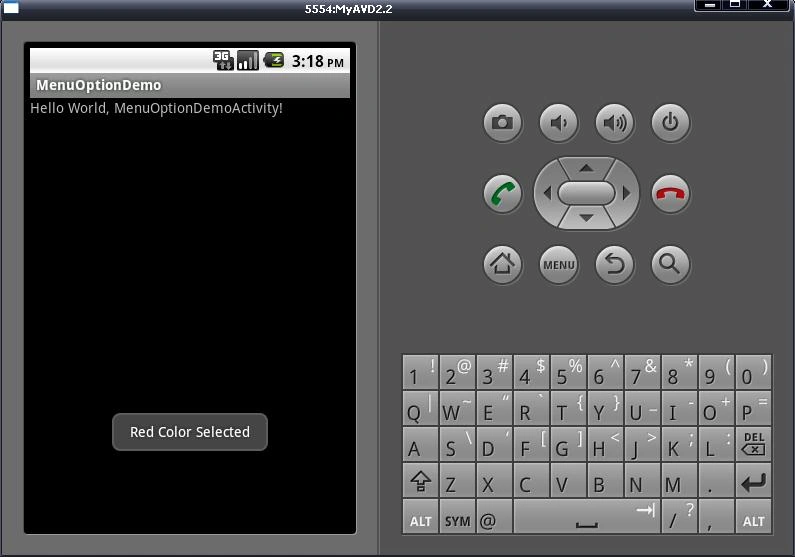
Step 4: Start Emulator

- <?xml version="1.0" encoding="utf-8"?>
- <menu
- xmlns:android="http://schemas.android.com/apk/res/android">
- <item android:id="@+id/Color" android:title="Color">
- <menu>
- <item android:id="@+id/RedColor" android:title="Red"/>
- <item android:id="@+id/GreenColor" android:title="Green"/>
- </menu>
- </item>
- </menu>
- package com.MenuOptionDemo;
- import android.app.Activity;
- import android.os.Bundle;
- import android.view.Menu;
- import android.view.MenuInflater;
- import android.view.MenuItem;
- import android.widget.Toast;
- public class MenuOptionDemoActivity extends Activity {
- /** Called when the activity is first created. */
- @Override
- public void onCreate(Bundle savedInstanceState) {
- super.onCreate(savedInstanceState);
- setContentView(R.layout.main);
- }
- @Override
- public boolean onCreateOptionsMenu(Menu menu) {
- // TODO Auto-generated method stub
- MenuInflater inflater=getMenuInflater();
- inflater.inflate(R.menu.optionmenu, menu);
- return super.onCreateOptionsMenu(menu);
- }
- @Override
- public boolean onOptionsItemSelected(MenuItem item) {
- // TODO Auto-generated method stub
- if(item.getItemId()==R.id.RedColor)
- {
- Toast.makeText(MenuOptionDemoActivity.this,"Red Color Selected" ,1000).show();
- }
- else if(item.getItemId()==R.id.GreenColor)
- {
- Toast.makeText(MenuOptionDemoActivity.this, "Green Color Selected", 1000).show();
- }
- return super.onOptionsItemSelected(item);
- }
- }
Summary
In this brief tutorial, we discussed how to create menus in an Android application.
Darwin ChaudharyPosted Dec 22, 2011, 12:50 AM
Thanks for your good work! Keep it up!
Akash AhlawatPosted Dec 21, 2011, 11:58 PM
Chintan you are great..really nice work
Alec StewartPosted Dec 21, 2011, 11:42 PM
Chintan your explanation is super, very easy to understand..please keep posting on android as I am also working on it...
Sonakshi SinghPosted Dec 21, 2011, 11:39 PM
Nice article
Jimmy UnderwoodPosted Dec 21, 2011, 11:34 PM
Very great work
Nitin SinghPosted Dec 21, 2011, 11:28 PM
thanks for sharing
Vineet Kumar SainiPosted Dec 21, 2011, 12:15 PM
Very Good article...
Vikas MishraPosted Dec 21, 2011, 11:59 AM
Hi Chintan You have done verry Excellent Work...........
Mike StewardPosted Dec 21, 2011, 11:56 AM
Nice way to Start
Chintan RathodPosted Dec 21, 2011, 10:49 AM
Thank You all of you for giving me such a response and inspiration ...
Manish TewatiaeditedPosted Dec 20, 2011, 11:45 PMEdited Dec 20, 2011, 11:45 PM
I am concentrating on making a good articles on android and now one more topic: Option Menu is clear to me........thankx
Deepak VermaPosted Dec 20, 2011, 11:36 PM
Good work.... :)
Arjun PanwarPosted Dec 20, 2011, 11:30 PM
Nice Explanation Mr. Chintan
Monika AroraPosted Dec 20, 2011, 11:30 PM
Nice article.
Akash AhlawatPosted Dec 20, 2011, 11:30 PM
Good work Chintan..Thanks for sharing this article
Dinesh BeniwalPosted Dec 20, 2011, 11:29 PM
Good start, Welcome to the Mindcracker Community.