

Introduction
Xamarin is a platform to develop cross-platform and multi-platform apps (like Windows phone, Android, iOS). In Xamarin, the code sharing concept is used. In Xamarin Studio, Visual Studio is also available.
Xamarin is a platform to develop cross-platform and multi-platform apps (like Windows phone, Android, iOS). In Xamarin, the code sharing concept is used. In Xamarin Studio, Visual Studio is also available.
Step 1
Create a new blank Android app, using Visual Studio.
Create a new blank Android app, using Visual Studio.
Step 2
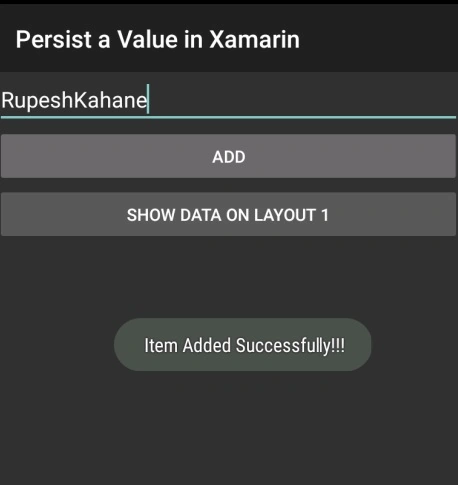
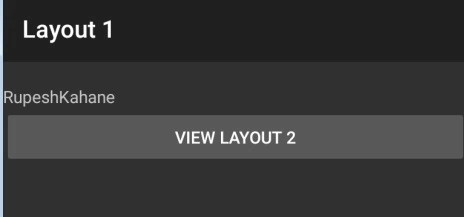
In your project solution, there is a Main.axml file. Now, open this file in designer view. Drag and drop one EditText, and two Buttons from toolbox. First button is used to write the user entered data into settings while the second button is used to show the data on layout 1 from Settings.
In your project solution, there is a Main.axml file. Now, open this file in designer view. Drag and drop one EditText, and two Buttons from toolbox. First button is used to write the user entered data into settings while the second button is used to show the data on layout 1 from Settings.
Write the code, mentioned below, into Main.axml.
- <?xml version="1.0" encoding="utf-8"?>
- <LinearLayout xmlns:android="http://schemas.android.com/apk/res/android"
- android:orientation="vertical"
- android:layout_width="match_parent"
- android:layout_height="match_parent">
- <EditText
- android:layout_width="match_parent"
- android:layout_height="wrap_content"
- android:id="@+id/editText1" />
- <Button
- android:text="Add"
- android:layout_width="match_parent"
- android:layout_height="wrap_content"
- android:id="@+id/btnAdd" />
- <Button
- android:text="Show Data on Layout 1"
- android:layout_width="match_parent"
- android:layout_height="wrap_content"
- android:id="@+id/btnShowData" />
- </LinearLayout>
Write the code, mentioned below, into MainActivity.cs.
- namespace MyApp
- {
- [Activity(Label = "Persist a Value in Xamarin", MainLauncher = true, Icon = "@drawable/icon")]
- public class MainActivity : Activity
- {
- public static ISharedPreferences sharedPrefernce;
- Button mButton;
- EditText nameBox;
- protected override void OnCreate(Bundle bundle)
- {
- base.OnCreate(bundle);
- SetContentView(Resource.Layout.Main);
- Button button = FindViewById<Button>(Resource.Id.btnAdd);
- button.Click += delegate
- {
- nameBox = FindViewById<EditText>(Resource.Id.editText1);
- string name = nameBox.Text.ToString();
- Helper.UserSetting.Name = name;
- // show a message pop up after clicking on Add button
- Android.Widget.Toast.MakeText(this, "Item Added Successfully", ToastLength.Short).Show();
- };
- mButton = FindViewById<Button>(Resource.Id.btnShowData);
- mButton.Click += mButton_Click;
- void mButton_Click(object sender, EventArgs e)
- {
- Intent intent = new Intent(this, typeof(Layout1));
- this.StartActivity(intent);
- }
- }
- }
Step 3
Now, install the below NuGet package from NuGet Console Manager.
Install-Package Xam.Plugins.Settings -Version 2.5.1
Now, install the below NuGet package from NuGet Console Manager.
Install-Package Xam.Plugins.Settings -Version 2.5.1
Create one "Helper" folder in your project and add a new class i.e UserSetting.cs.
- Create a new static class
To create a new static class, call "Settings" in your shared code project or PCL that will house all of your settings. - Gain Access to ISettings
When you want to read/write settings, you need to gain access via the ISettings API. This has a singleton setup. - Create Getters and Setters for your Setting
We can access it from any project, whether it is a PCL, Shared Code, or a platform specific project. We do this by using these two methods in the ISettings API i.e GetValueOrDefault and AddOrUpdateValue.
Write the code, mentioned below, into UserSetting.cs.
Join the conversation! Your thoughts help the community grow.