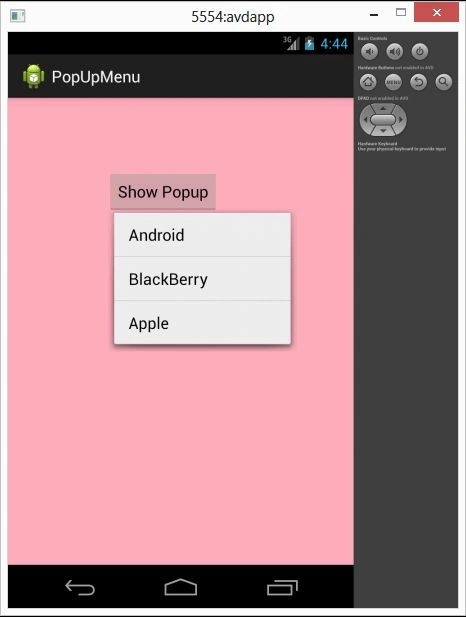
Introduction
This article explains PopUp menus in Android. Android Studio is used to create the sample.
A PopUp menu is a type of menu that contains a menu and displays that menu below the anchor text if space is available. If the space is not available then it displays it above the Anchor text. It appears untill when you do not click on the pop-up menu text.
For this you need to create an XML file inside "res/menu/popup" like this:
- <menu xmlns:android="http://schemas.android.com/apk/res/android" >
- <item
- android:id="@+id/one"
- android:title="Android"/>
- <item
- android:id="@+id/two"
- android:title="BlackBerry"/>
- <item
- android:id="@+id/three"
- android:title="Apple"/>
- </menu>
Step 1
Create a project like this:
Step 2
Create an XML file with this:

- <RelativeLayout xmlns:android="http://schemas.android.com/apk/res/android"
- xmlns:tools="http://schemas.android.com/tools"
- android:layout_width="match_parent"
- android:layout_height="match_parent"
- tools:context=".MainActivity"
- android:background="#fdacbd">
- <Button
- android:id="@+id/button"
- android:layout_width="wrap_content"
- android:layout_height="wrap_content"
- android:layout_alignParentLeft="true"
- android:layout_alignParentTop="true"
- android:layout_marginLeft="110dp"
- android:layout_marginTop="80dp"
- android:text="Show Popup" />
- </RelativeLayout>
Step 3
Create another XML file with this:
- <menu xmlns:android="http://schemas.android.com/apk/res/android" >
- <item
- android:id="@+id/one"
- android:title="Android"/>
- <item
- android:id="@+id/two"
- android:title="BlackBerry"/>
- <item
- android:id="@+id/three"
- android:title="Apple"/>
- </menu>
Step 4
Create a Java class file and with the following.
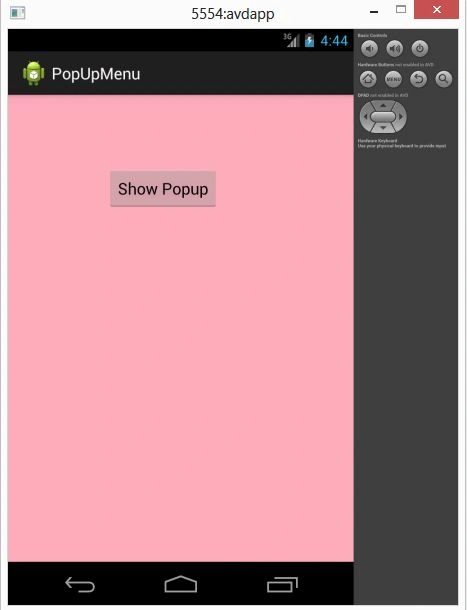
In this, you create the id of the button on which you pop up the menu. Now you will crate the instance of the PopUp menu, then you will populate.
- package com.popupmenu;
- import android.os.Bundle;
- import android.app.Activity;
- import android.view.Menu;
- import android.view.MenuItem;
- import android.view.View;
- import android.view.View.OnClickListener;
- import android.widget.Button;
- import android.widget.PopupMenu;
- import android.widget.Toast;
- public class MainActivity extends Activity {
- Button button;
- @Override
- protected void onCreate(Bundle savedInstanceState) {
- super.onCreate(savedInstanceState);
- setContentView(R.layout.activity_main);
- button = (Button) findViewById(R.id.button);
- button.setOnClickListener(new OnClickListener() {
- @Override
- public void onClick(View v) {
- //Creating the instance of PopupMenu
- PopupMenu popupMenu = new PopupMenu(MainActivity.this, button);
- //Inflating the Popup using xml file
- popupMenu.getMenuInflater().inflate(R.menu.popup, popupMenu.getMenu());
- //registering popup with OnMenuItemClickListener
- popupMenu.setOnMenuItemClickListener(new PopupMenu.OnMenuItemClickListener() {
- public boolean onMenuItemClick(MenuItem item) {
- Toast.makeText(MainActivity.this,"Button Clicked : " + item.getTitle(),Toast.LENGTH_SHORT).show();
- return true;
- }
- });
- popupMenu.show();//showing popup menu
- }
- });//closing the setOnClickListener method
- }
- }
Step 5
Android Manifest.xml file
- <?xml version="1.0" encoding="utf-8"?>
- <manifest xmlns:android="http://schemas.android.com/apk/res/android"
- package="com.popupmenu"
- android:versionCode="1"
- android:versionName="1.0" >
- <uses-sdk
- android:minSdkVersion="7"
- android:targetSdkVersion="16" />
- <application
- android:allowBackup="true"
- android:icon="@drawable/ic_launcher"
- android:label="@string/app_name"
- android:theme="@style/AppTheme" >
- <activity
- android:name="com.popupmenu.MainActivity"
- android:label="@string/app_name" >
- <intent-filter>
- <action android:name="android.intent.action.MAIN" />
- <category android:name="android.intent.category.LAUNCHER" />
- </intent-filter>
- </activity>
- </application>
- </manifest>
Step 6
Popup menu


Ramya PPosted Mar 21, 2014, 3:55 AM
can you tell me how to add sub items item, i.e, how can i add submenu to popupmenu item, if you know pls tell me