

Here we will see how to use the Property Changed Event by developing a LightSwitch Application (Visual C#) in Visual Studio 2012.
The following is the procedure for using the Property Changed Event in LightSwitch 2012.
Step 1
Open the Solution Explorer.
Step 2
In the Solution Explorer, right-click on the Server and choose "Add Table".
Step 3
The table appears.
Step 4
In the table select the "WayOfEntry" field.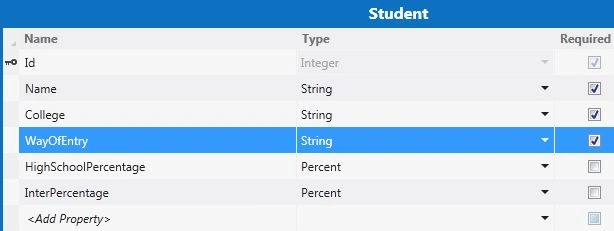
Now go to the property window and select "Choice List".
Define the following choices for the property and click the "OK" button.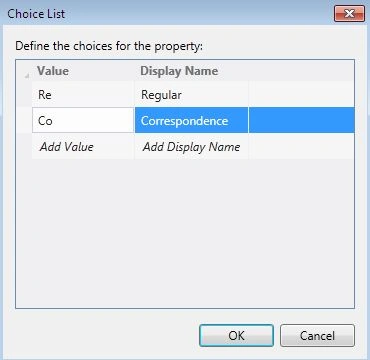
Step 5
In the Solution Explorer, right-click on the Screens and choose "Add Screen".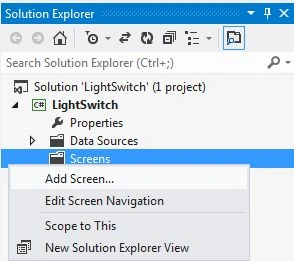
Step 6
The Add New Screen dialog box appears. Select "New Data Screen" from the Screen Templates, under screen information, choose "Student" under screen data and provide a name for the screen and click the "OK" button.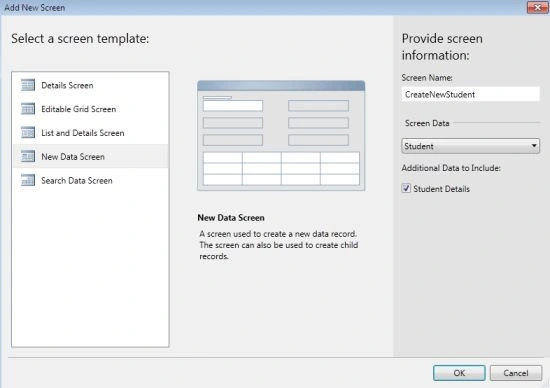
Step 7
The Screen Designer appears for the New Data Screen.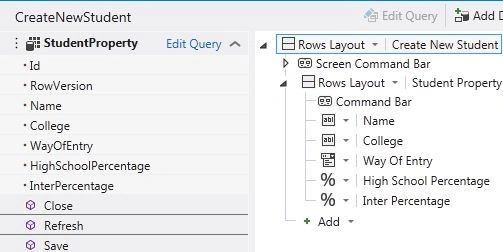
From the screen designer select "HighSchoolPercentage" and then go to the property window and uncheck the "Is Visible" checkbox.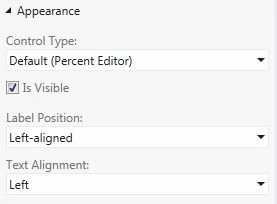
Step 8
Now we are going to create a new group for these two fields.
Add the following fields to this group:
Step 9
In the menu bar, select on Write Code a drop down list will appear and from that list select the _created() method and provide the following code: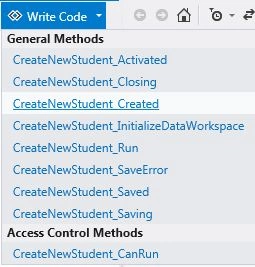
using System;
using System.Linq;
using System.IO;
using System.IO.IsolatedStorage;
using System.Collections.Generic;
using Microsoft.LightSwitch;
using Microsoft.LightSwitch.Framework.Client;
using Microsoft.LightSwitch.Presentation;
using Microsoft.LightSwitch.Presentation.Extensions;
using System.ComponentModel;
namespace LightSwitchApplication
{
public partial class CreateNewStudent
{
partial void CreateNewStudent_InitializeDataWorkspace(global::System.Collections.Generic.List<global::Microsoft.LightSwitch.IDataService> saveChangesTo)
{
// Write your code here.
this.StudentProperty = new Student();
}


Join the conversation! Your thoughts help the community grow.