

Introduction
GitHub Pages provides a fantastic platform for hosting your Blazor web applications or any web-based project without any cost. In this comprehensive article, I'll walk you through the process of publishing a personal website, like the one I have as 'rikampalkar.github.io'. Throughout this journey, we'll cover everything from creating repositories, publishing applications locally, and pushing changes to the repository to configuring essential settings in GitHub Pages.
We will explore six essential steps to bring your personal website to life on the internet.
- Creating a New Repository: Set up a GitHub repository following the 'username.github.io' naming convention.
- Create/Existing Blazor WebAssembly App: Prepare your Blazor app for deployment.
- Deploying App Locally to Get Published Files: Deploy your Blazor app locally for testing.
- Test app locally (optional step): Test your app on IIS (Windows) or Apache (Linux, macOS, Windows).
- Publishing your files on Github-Pages: Clone your 'username.github.io' repository, add essential files, and push changes.
- Configure GitHub Pages: Enable GitHub Pages for your repository and make your website accessible on the internet.
Publish Your Personal Website
1. Creating a New Repository
- Sign In to GitHub: If you don't have a GitHub account, sign up for one at GitHub.
- Access Your Dashboard: Once logged in, click the '+' symbol in the top right corner of your dashboard, then select "New repository".
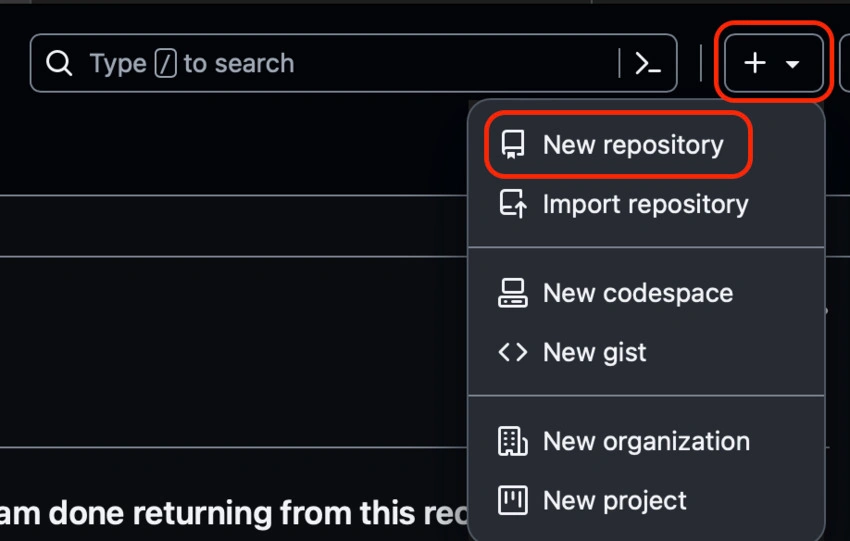
Image 1. Creating a New Repository
- Set Repository Name
- Repository name: username.github.io
- Why use the username.github.io Naming Convention?
- Automatic Recognition: GitHub automatically recognizes repositories with the username.github.io naming pattern as dedicated GitHub-Pages repositories. This means that when you create such a repository, GitHub knows it's meant for hosting your personal website. Your website will be accessible at https://username.github.io, where the username is your GitHub username. This makes it easy for you and others to access your site.
- No Configuration Required: GitHub-Pages automatically configures the repository to serve the website content. You don't need to set up a custom configuration or specify a source branch. It just works out of the box.
- In the following screenshot, you can see "RikamPalkar" is my username. and my website goes by rikampalkar.github.io, following the above naming conventions.

Image 2. Repository name
- Why use the username.github.io Naming Convention?
- Visibility: Public (for a public personal website).
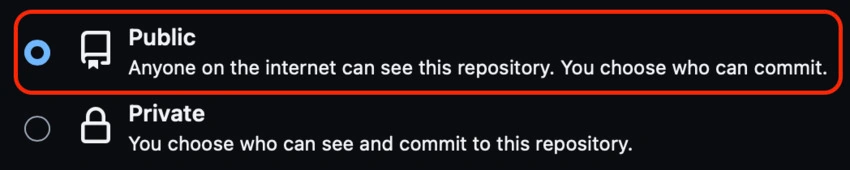
Image 3. Mark repository public
- Additional optional details
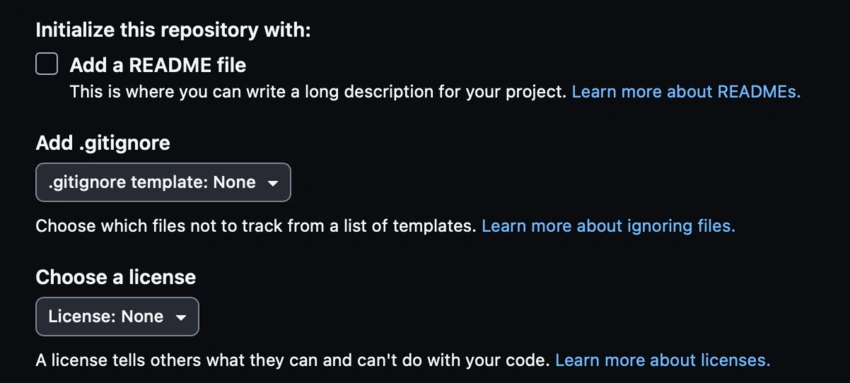
Image 4. Additional details
- Create Repository: Double-check your settings and click "Create repository".

Image 5. Creating a repository
2. Create/ExistingBlazor WebAssembly App
To get started with creating a Blazor WebAssembly app, you have two options: you can create a new app or use an existing one. If you want to learn how to create a new Blazor app, you can follow a detailed tutorial like the one provided in this article: Step-by-Step Guide to Develop Tic-Tac-Toe AI with Blazor.
Since this article focuses on publishing your Blazor app, we will assume that you already have a Blazor app ready for deployment. If you need guidance on creating a new Blazor app, please refer to the linked tutorial for comprehensive instructions.
3. DeployingApp Locally to get Published Files
In order to publish your app from Visual Studio, first right-click on your Blazor WebAssembly project (the one you want to publish) to open the context menu, then select the "Publish" buttons as shown in the below image.
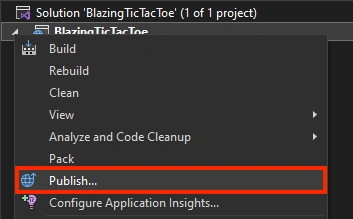
Image 6. Publishing a web app through Visual Studio
Next, in the wizard, you'll come across multiple target options to publish your files in; for now, select "Folder" as we are testing this app locally.
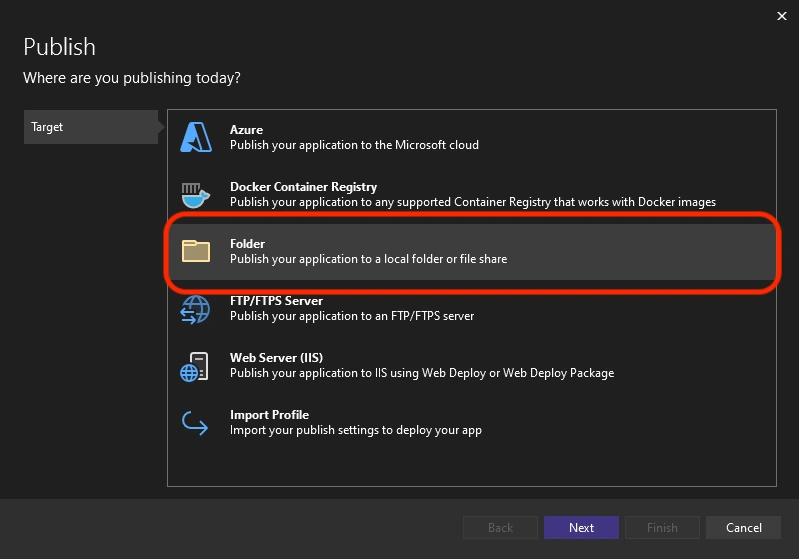
Image 7. Selecting a 'Folder' option to publish a web app
At the end, simply browse to the folder where you want published files to be located.
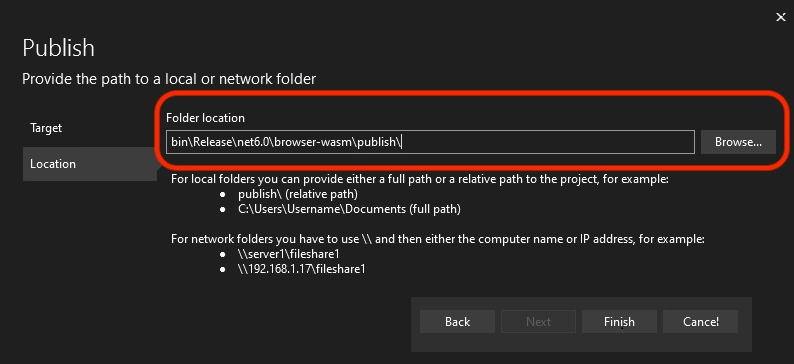
Image 8. Browsing and selecting a folder for web app to be published
Once you are satisfied with your settings, proceed by clicking the "Publish" button. Visual Studio will build your Blazor WebAssembly app and publish it to the specified location.
In my situation, the folder is named "Published code", and Visual Studio has organized two files (wwwroot folder and web. config file) as illustrated below.
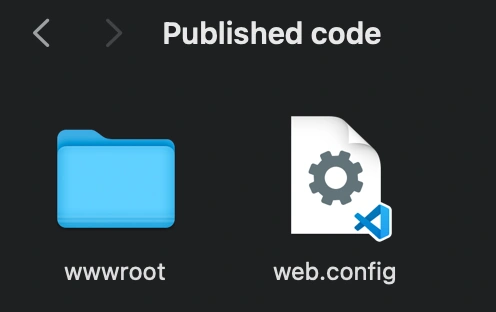
Image 9. Published files
If you open the "wwwroot" folder, you'll discover the heart of the app. These are the compiled files that should be uploaded to the GitHub repository (username.github.io) we've created in Step 1.
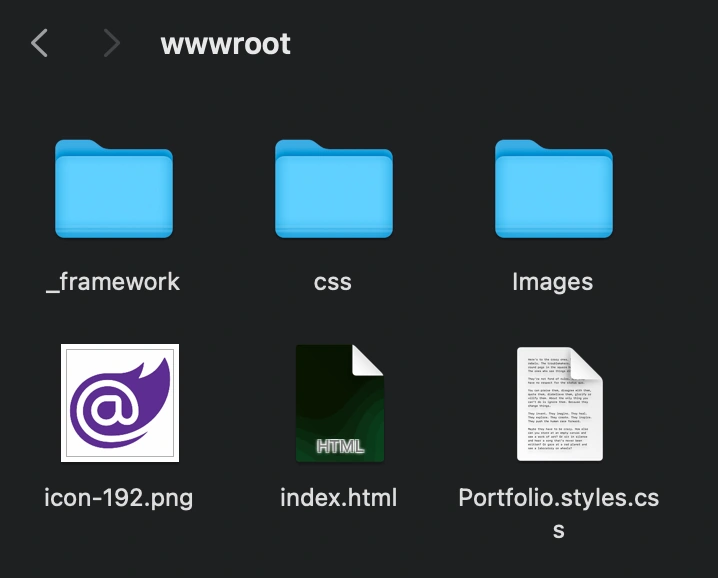
Image 10. wwwroot folder
4. Test app locally (optional step)
Testing on Local Servers: IIS and Apache, choose your own battle; for Windows, follow step 1; for Mac and Linux, follow step 2.
1. Testing on IIS (Windows)
- Install IIS: If you're on a Windows machine, you can install IIS by going to "Control Panel" > "Programs" > "Turn Windows features on or off", and then select "Internet Information Services".
- Create an IIS Site
- Open IIS Manager.
- Right-click on "Sites" and select "Add Website"
- Set a unique site name.
- Set the physical path to the wwwroot directory of your published folder from Image 10. In my case, I'll select the folder (Published code > wwwroot).
- Set the host name (e.g., "testapp.local").
- Click "OK" to create the site.
- Edit Hosts File (Optional): To access your app using a custom domain (e.g., "test app. local"), edit your system's host file to map the domain to localhost.
- Access Your App: Open a web browser and navigate to your app using the custom domain or localhost.
2. Testing on Apache (Linux, macOS, Windows)
- Install Apache: Skip this step for Mac; Mac has Apache preinstalled.
- Install the Apache web server on your system. Instructions can vary depending on your operating system. On Ubuntu, you can use this command: bash.
-
sudo apt-get install apache2
- Copy Files to Apache's Document Root: Copy the contents of the wwwroot directory from your published folder (from image 10) to Apache's document root directory as follows.
- /var/www/html on Ubuntu
- /Library/WebServer/Documents on Mac
- Start Apache: Start or restart the Apache service.
- On Ubuntu, you can use this command: bash
sudo service apache2 restartOn Mac, use this command
-
sudo apachectl start
- On Ubuntu, you can use this command: bash
- Access Your App: Open a web browser and navigate to your app using localhost or your server's IP address.
You've now successfully created, tested, and hosted a Blazor WebAssembly app locally on both IIS and Apache servers. Now it's time to deploy your app on GitHubPages.
5. Publishing your files on Github-Pages
Clone repository in local machineIn this step, we begin by cloning the "username.github.io" repository (from step 1) to your local machine. I prefer using GitHub Desktop for this purpose, but you can also achieve this using the command line. To keep things straightforward, I'll demonstrate with GitHub Desktop. You can download this software from the official GitHub website.
In the app, click on the clone repository button, as shown below.
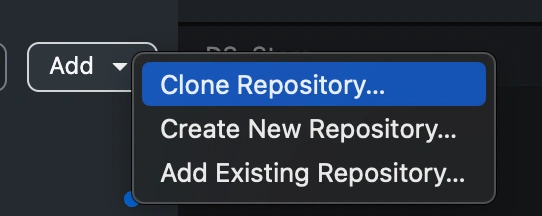
Image 11. Clone repository
This will bring up a wizard, where you need to select "username.github.io" and then select the folder in the local machine where github will clone the repo from the server to your local machine.
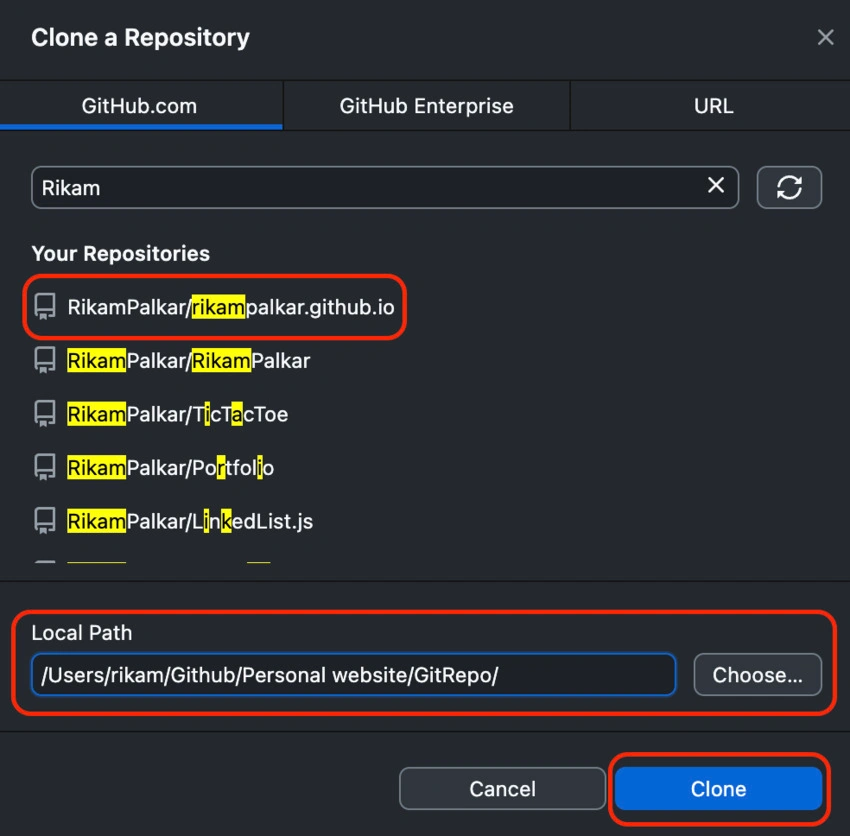
Image 12. Cloning git repo into the local machine
Now the final step, copy files from the "wwwroot" folder from step 2 - image 10 to the folder you just cloned in image 12, and then simply push the changes into the repo.
If you've followed as mentioned, then your repository will look like this.

Image 13. "username.github.io" after hosted files
Now we just need to make a couple of changes, and you're good to go.
- First, add an empty file and give an extension of ".nojekyll":The .nojekyll file is a special file used in GitHub repositories, and its significance lies in its ability to control how GitHub Pages, the platform's static site hosting service, processes your repository's content. If you miss this file, you might get the error for loading BlazorWebAssebly.js.
- Update <base> Tag:In the index.html file of your Blazor app, you'll find a <base> tag that sets the base URL for your app. Update this tag to reflect the correct base URL for your GitHub Pages repository. In your case, for a repository named "username.github.io," the <base> tag should look like this.

Image 14. <Base> tag
6. Configure GitHub Pages
To enable GitHub Pages for your repository, follow these steps, also highlighted in red color in image 15.
- In your GitHub repository, go to the "Settings" tab.
- Scroll down to the "GitHub Pages" section.
- Under "Source," select "Deploy from a branch".
- And finally, select a branch (usually the main and the /root folder).
- Click the "Save" button.
GitHub will build your Blazor app and host it on GitHub Pages; this take around 2-5 mins. Then simply refresh your page, and you'll see a link highlighted in green to your published site.
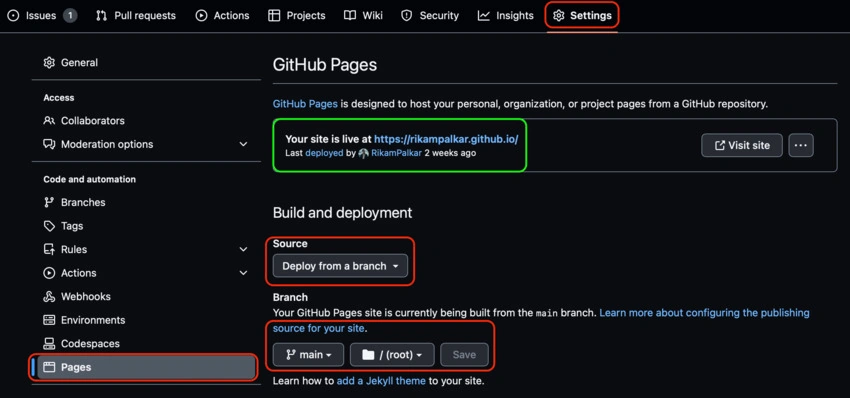
Image 15. GitHub pages settings
Now click on the link in blue color, and you'll be able to see the website hosted under url "username.github.io".
And there you have it, your very own piece of the web! To see my portfolio in action, visit my website at rikampalkar.github.io.

rikampalkar.github.io
Conclusion
In this article, we have explored the process of publishing your personal website using GitHub Pages, specifically focusing on hosting Blazor web applications. We began by creating a repository following the naming convention 'username.github.io', which allows GitHub to recognize it as a dedicated GitHub Pages repository. Then, we discussed how to deploy your Blazor app locally and test it using various web servers, including IIS and Apache.
Finally, we learned how to publish your website on GitHub Pages, ensuring that it is accessible to the world. By following these steps, you can easily share your work and projects with a global audience. So, what are you waiting for? Get started and showcase your creations to the world!
Join the conversation! Your thoughts help the community grow.