

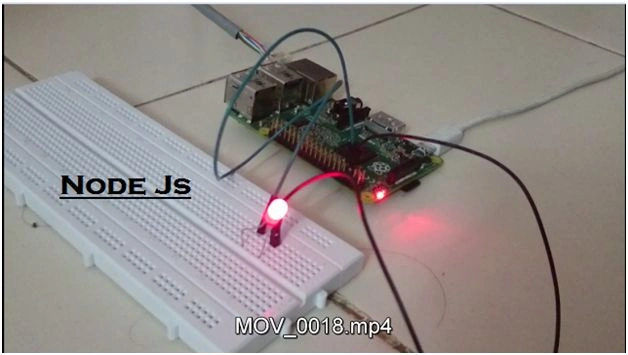
Figure 1: LED Blinking Program using NodeJs
- Raspberry Pi: 1 - Startup Raspberry pi with OS installation and configuration with a laptop
- Raspberry Pi: 2 - Simple LED Blinking program using Python
For Flashing/Blinking the LED on a breadboard using Node.js follow below steps
Required list of components:
- 1 - Raspberry Pi device with a 5 V power supply.
- 1 - Bread Board
- 1 - Male to Female jumper cable
- 1 - LED
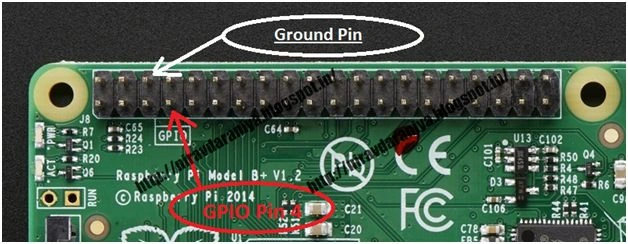
Step 1: Firstly, connect the GPIO pin to the bread board as shown in the figure.
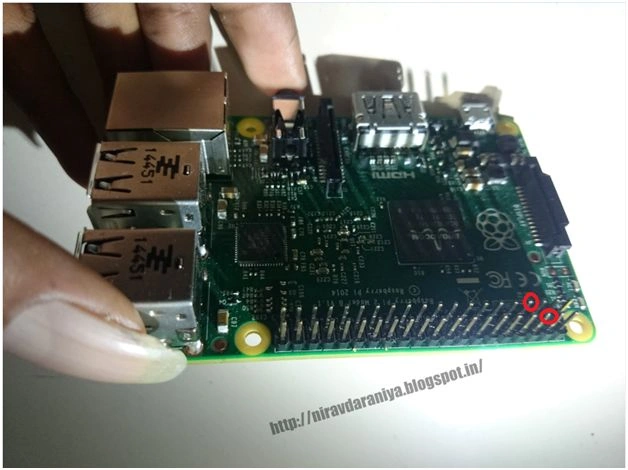
 Step 2: Here we use the PIN Number: “ 4 “ (As per number 4(pin rank 7), third from the top – left ). For getting the output from the raspberry pi connect eh jumper wire from Raspberry PI GPIO pin “4” to bread board as shown in image,
 Step 3: Now take LED and put it on the bread board as shown in the image.
Connect the Plus terminal of LED to the Jumper cable (green cable in image) coming from the GPIO Pin “4” as shown in image,
Step 3: Now take LED and put it on the bread board as shown in the image.
Connect the Plus terminal of LED to the Jumper cable (green cable in image) coming from the GPIO Pin “4” as shown in image,
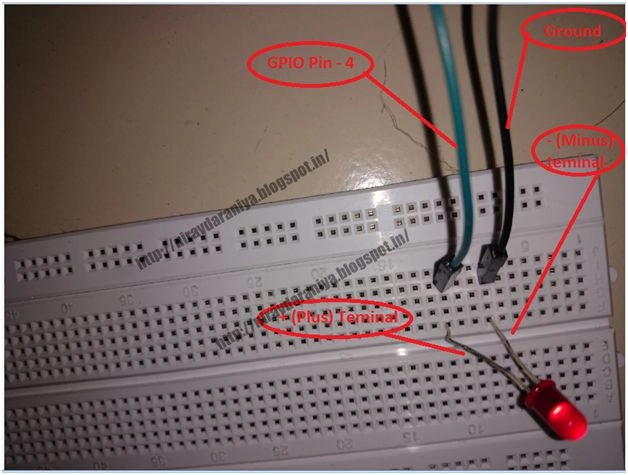 Step 4: Now take another jumper cable (black cable in image) connect it the GPIO pin “Ground” as per number 3(Pin rank 6), third from the top right. And add another terminal of this wire to the minus terminal of the LED as shown in the figure.
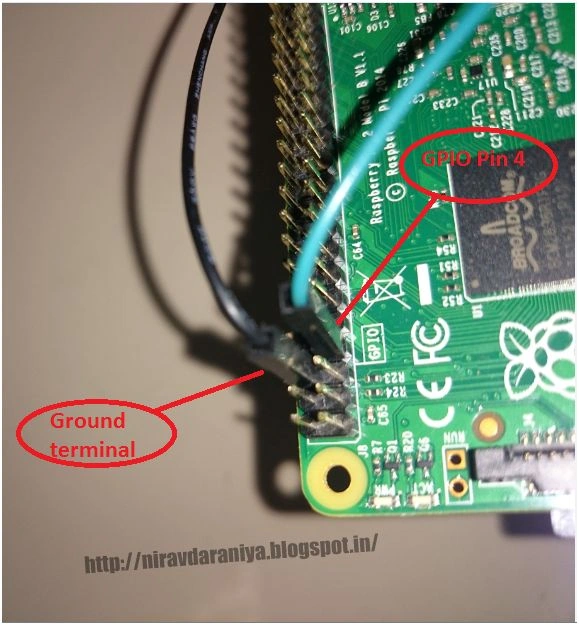 Step 5: Here for detecting the plus/minus terminal of LED, bigger (toll) terminal of LED is Plus and small (short) terminal of LED is minus. Or you can define it by cutting the side part of the LED that is Minus terminal.
 Step 6: Now write the Node.js program for blink LED every 1 second for 1 minute.
Here we use the “Onoff ” module for accessing the GPIO Pin of raspberry pi device.
Step 6: Now write the Node.js program for blink LED every 1 second for 1 minute.
Here we use the “Onoff ” module for accessing the GPIO Pin of raspberry pi device.
Figure 2: Connect the GPIO pin to the bread board
Figure 3: Connect eh jumper wire from Raspberry PI GPIO pin
Figure 4: Connect the Plus terminal of LED to the Jumper cable
Figure 5: Black cable in image
Figure 6: Detecting the plus-minus terminal of the LED
- -- -- -- -- -- -- -- -- --
- var Gpio = require('onoff').Gpio,
- led = new Gpio(4, 'out');
- var iv = setInterval(function ()
- {
- led.writeSync(led.readSync() === 0 ? 1 : 0)
- }, 1000);
- // Stop blinking the LED and turn it off after 5 seconds.
- setTimeout(function ()
- {
- clearInterval(iv); // Stop blinking
- led.writeSync(0); // Turn LED off.
- led.unexport(); // Unexport GPIO and free resources
- }, 60000);
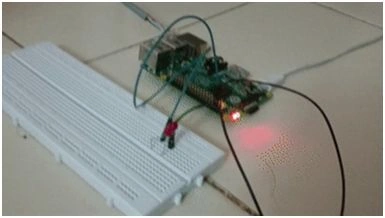
Figure 7: Program Show the Output
Shobana JPosted Jul 7, 2016, 7:40 AM
Nice explanation
Sr KarthigaPosted Feb 5, 2016, 10:07 AM
Nice one
Santhakumar MunuswamyPosted Jan 29, 2016, 2:06 AM
Thanks for nice article