

Introduction
Kendo multi select is one of the widgets from Kendo UI package. This article explains how to implement the Kendo multi select control in our HTML page using ASP.NET WEB API . To explain it, I have created a RESTful GET Service using ASP.NET WEB API, which is used to load the DataSource of Kendo panel bar.
Prerequisites
Basic knowledge of ASP.NET Web API, jQuery, and Kendo UI.
Content
- Creating an ASP.NET WEB API Application.
- Creating a Controller.
- Testing the REST API.
- Remote data binding in Kendo multi select control
Creating an ASP.NET Web API Application
Create a Web API Application, using an installed Web template in Visual Studio, as shown below. In my case, I named the Application “TechnologyList”.
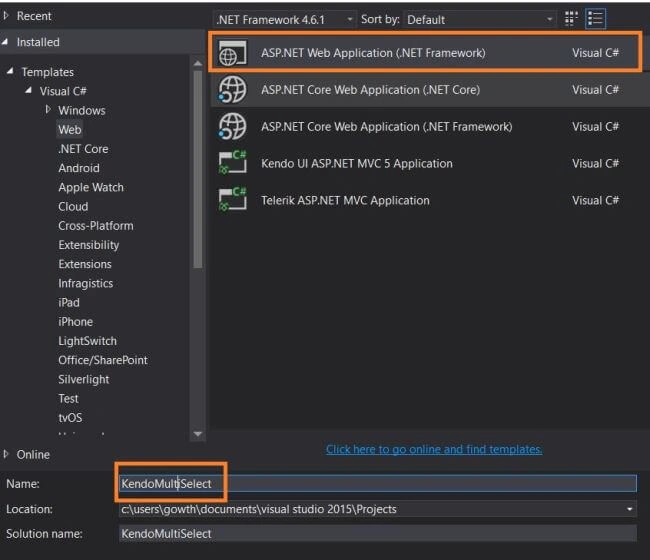
Figure 1
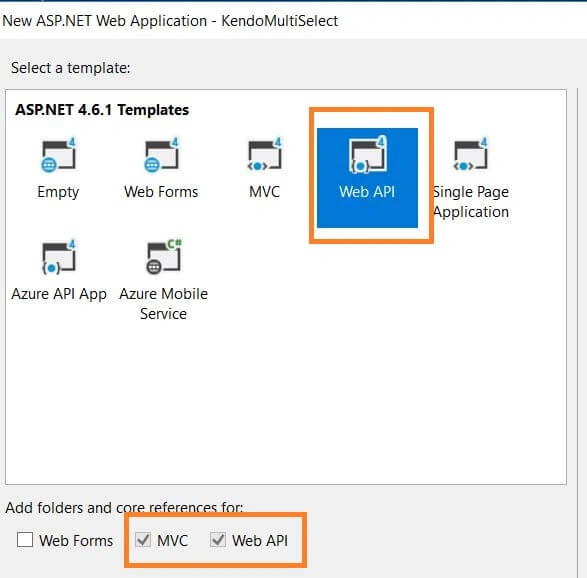
Figure 1
Figure 2
Creating a Model
In the Solution Explorer, right click the Models folder, select Add, followed by Class and name it as “TechnologyList.cs”.
Creating a Model
In the Solution Explorer, right click the Models folder, select Add, followed by Class and name it as “TechnologyList.cs”.
TechnologyList.cs
- public class TechnologyList
- {
- public TechnologyList(int Value,string Text)
- {
- this.Value = Value;
- this.Text = Text;
- }
- public int Value { get; set; }
- public string Text { get; set; }
- }
Creating a Controller
Right click on the Controller folder and add a new Web API 2- Empty controller, as shown in the figure 3. In my case, I named it as TechnologiesController.
Right click on the Controller folder and add a new Web API 2- Empty controller, as shown in the figure 3. In my case, I named it as TechnologiesController.
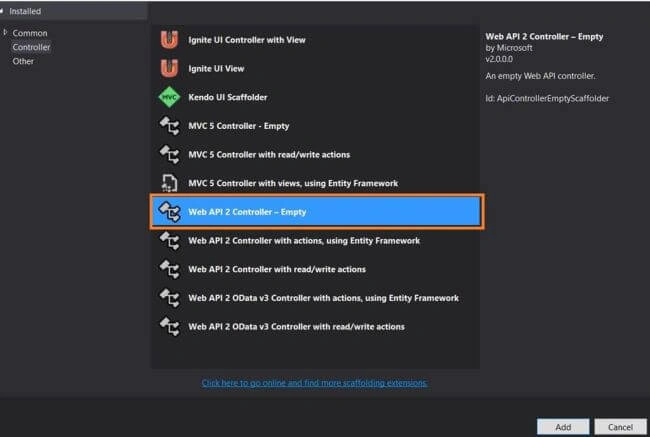
Figure 3
TechnologiesController.cs
- [RoutePrefix("api/Technology")]
- public class TechnologiesController : ApiController
- {
- [HttpGet]
- [AllowAnonymous]
- [Route("TechnologiesList")]
- public HttpResponseMessage GetTechnology()
- {
- try
- {
- List<TechnologyList> _TechList = new List<TechnologyList>();
- _TechList.Add( new TechnologyList( 1, "ASP.NET"));
- _TechList.Add(new TechnologyList(2, "ADO.NET"));
- _TechList.Add(new TechnologyList(3,"SilverLight"));
- _TechList.Add(new TechnologyList(4, "C#"));
- _TechList.Add(new TechnologyList(5, "SQL Server"));
- return Request.CreateResponse(HttpStatusCode.OK, _TechList, Configuration.Formatters.JsonFormatter);
- }
- catch(Exception ex)
- {
- return Request.CreateResponse(HttpStatusCode.OK, ex.Message, Configuration.Formatters.JsonFormatter);
- }
- }
- }
The Technologies Controller Action GetTechnolgy will return a list of technologies.
Testing the REST API
Test API, using the POSTMAN/Fiddler, as shown in figure 4.
- API End Point /api/Technology/TechnologiesList.
- Type GET.
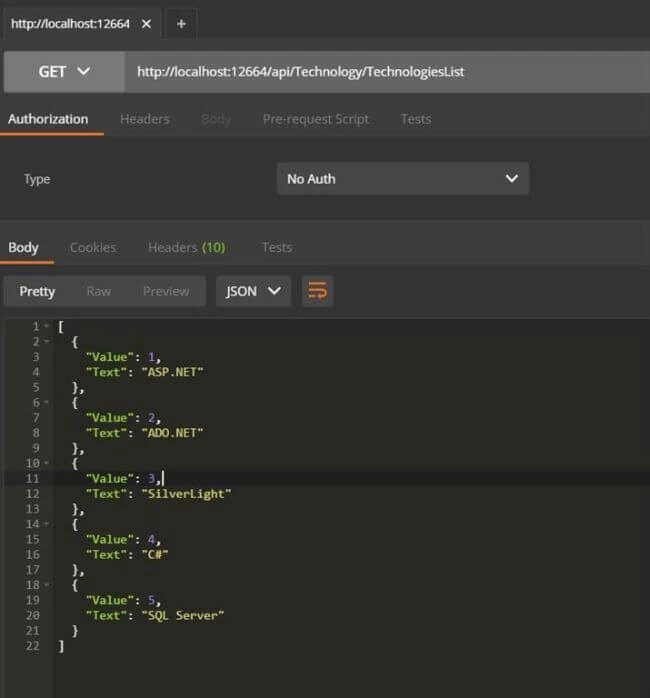
Figure 4
Remote Data Binding in Kendo multi select control
Create a new HTML page in our Application. In my case, I named it as kendoMultiSelect.html
kendoMultiSelect.html
- <!DOCTYPE html>
- <html>
- <head>
- <title>Kendo Multi Select</title>
- <meta charset="utf-8" />
- <link rel="stylesheet" href="http://kendo.cdn.telerik.com/2017.1.118/styles/kendo.common.min.css">
- <link rel="stylesheet" href="http://kendo.cdn.telerik.com/2017.1.118/styles/kendo.rtl.min.css">
- <link rel="stylesheet" href="http://kendo.cdn.telerik.com/2017.1.118/styles/kendo.default.min.css">
- <link rel="stylesheet" href="http://kendo.cdn.telerik.com/2017.1.118/styles/kendo.mobile.all.min.css">
- <script src="http://code.jquery.com/jquery-1.12.3.min.js"></script>
- <script src="http://kendo.cdn.telerik.com/2017.1.118/js/angular.min.js"></script>
- <script src="http://kendo.cdn.telerik.com/2017.1.118/js/jszip.min.js"></script>
- <script src="http://kendo.cdn.telerik.com/2017.1.118/js/kendo.all.min.js"></script>
- </head>
- <body>
- <h3> Kendo Multi Select</h3>
- <div class="demo-section k-content">
- <select id="technologies" data-placeholder="Select Technology..."></select>
- </div>
- <script>
- $(document).ready(function () {
- var dataSource = new kendo.data.DataSource({
- transport: {
- read: {
- url: "/api/Technology/TechnologiesList",
- dataType: "json"
- }
- },
- });
- $("#technologies").kendoMultiSelect({
- dataTextField: "Text",
- dataValueField: "Value",
- dataSource: dataSource
- });
- });
- </script>
- </body>
- </html>
Result in the Browser is given below.
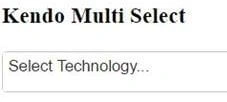
Figure 5
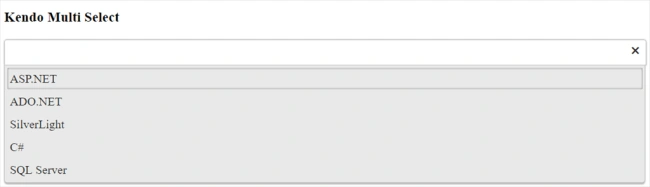
Figure 6
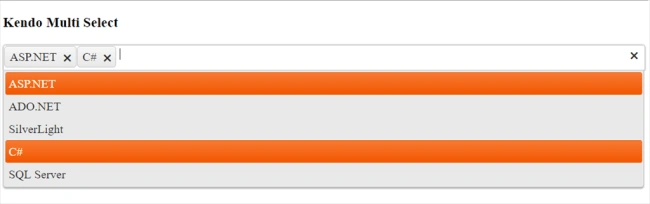
Figure 7
Reference
- http://docs.telerik.com/kendo-ui/api/javascript/ui/multiselect
I hope, you have enjoyed this article. Your valuable feedback, questions or comments about this article are always welcome.
Aman SoniPosted Oct 15, 2020, 6:18 AM
Nice Explanation!!