

Introduction
When Windows is installed, by default it asks for the computer name during the installation process. There may also be a situation when you might want to rename your computer for some other reason. For this,
you must be logged on as an administrator or a member of the
Administrators group in order to complete this procedure; once the computer is renamed it requires a restart as well. If you are a Windows 8
user and want to rename your computer then follow the steps as given
below.
Step 1
Logon to the Windows 8 computer with any account that has Administrative privileges.
Step 2
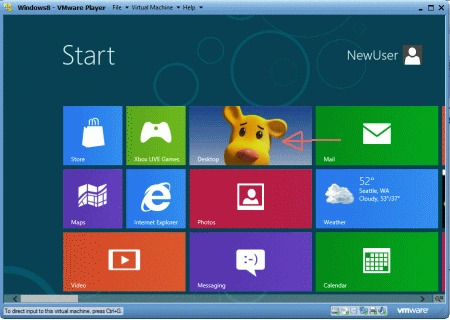
From the given option available on the applications Click on Desktop.
Step 3
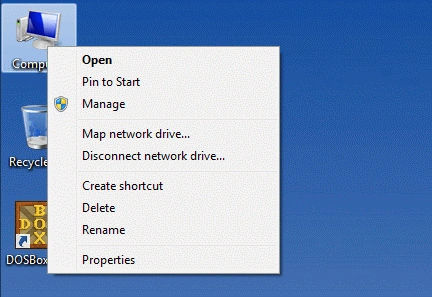
Right-click on the Computer icon and from the context menu that appears Click on Properties.
Step 4
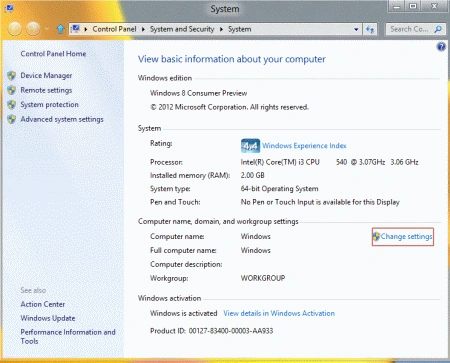
Now Click on Change settings under Computer name sections.
Step 5
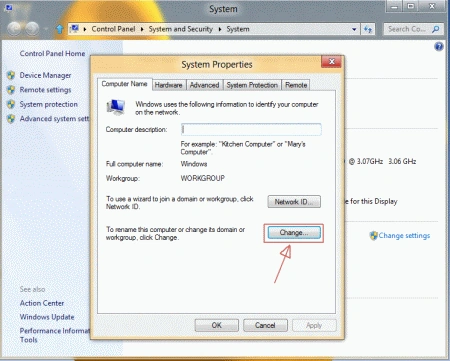
On the System Properties, click on the Computer Name tab and there click on Change buttons.
Step 6
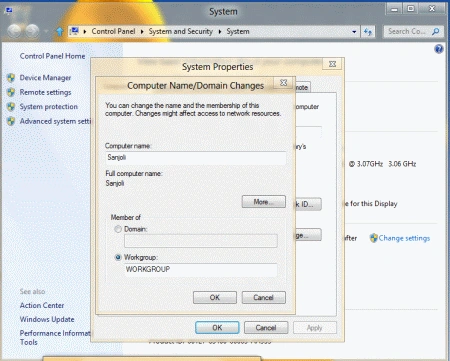
Type in the new name in the "Computer name" field and click on "Ok".
Step 7
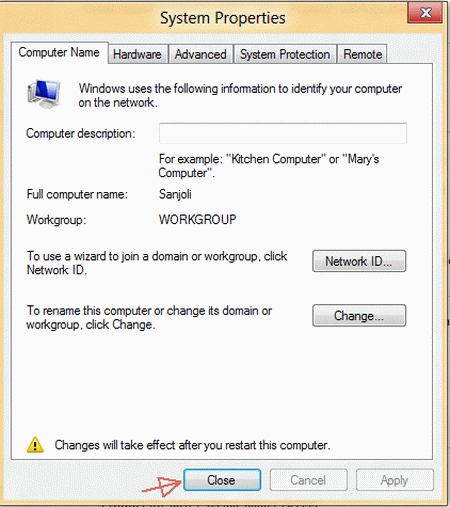
Click on the OK button in the information box and back in the System Properties box click on Close button.
Step 8
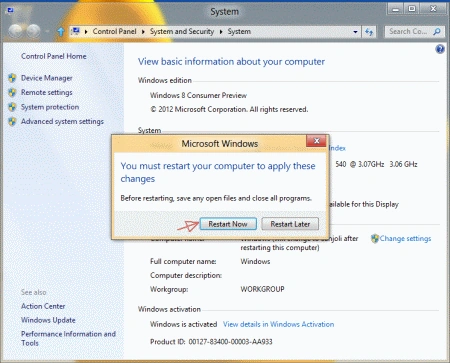
Now restart your computer for the changes to take place.
Resources:
Summary
In this article, we learned about Rename Your Computer in Windows 8.
Kathleen OConnellPosted Nov 6, 2012, 4:48 PM
For people who don't have a Computer icon on the Desktop by default: Right-click the empty space on the desktop and choose Personalize. On the left side of the Personalization window click "Change desktop icons." Check the box next to Computer and click OK to add it to your desktop.
Deepak DwijeditedPosted Apr 9, 2012, 7:08 PMEdited Apr 9, 2012, 7:09 PM
Appropriate way of representation. Keep posting more stuff Sanjoli !